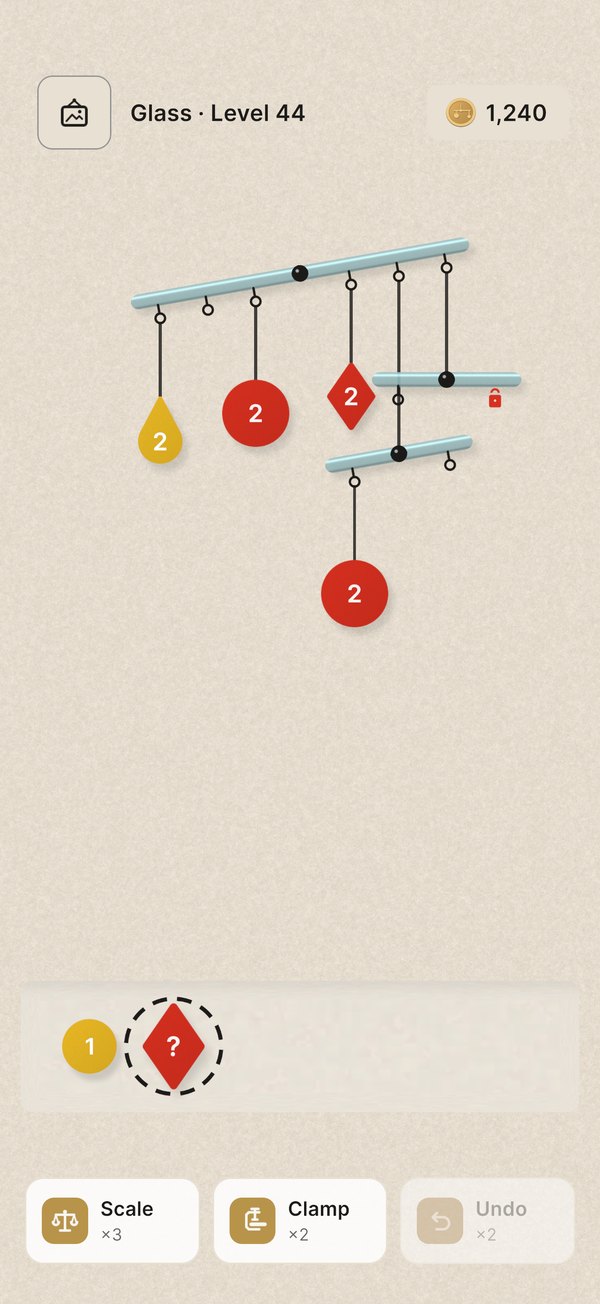
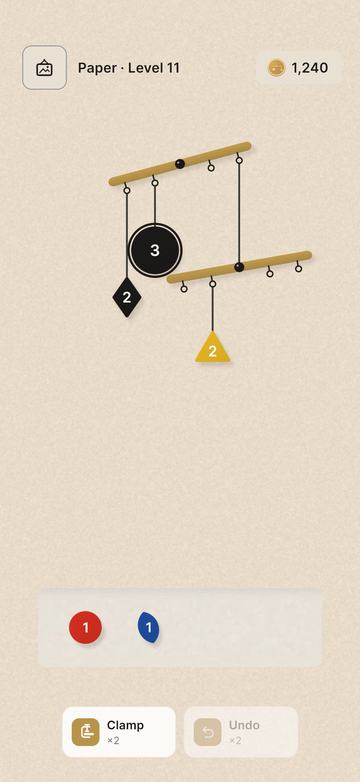
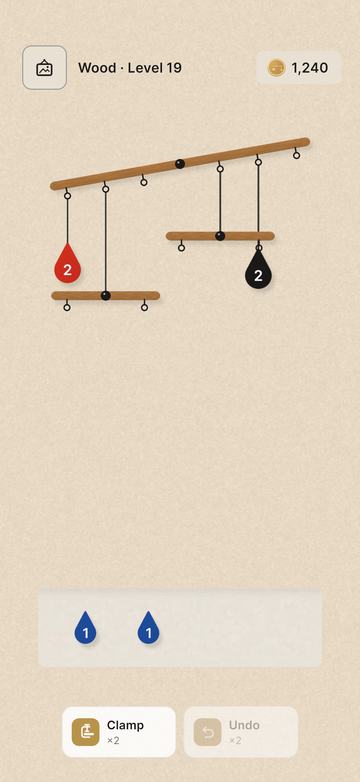
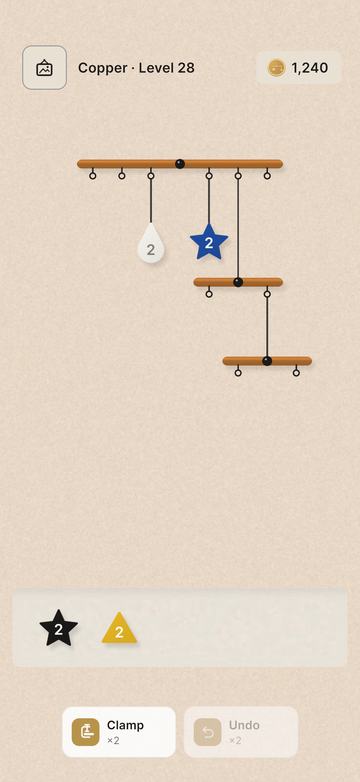
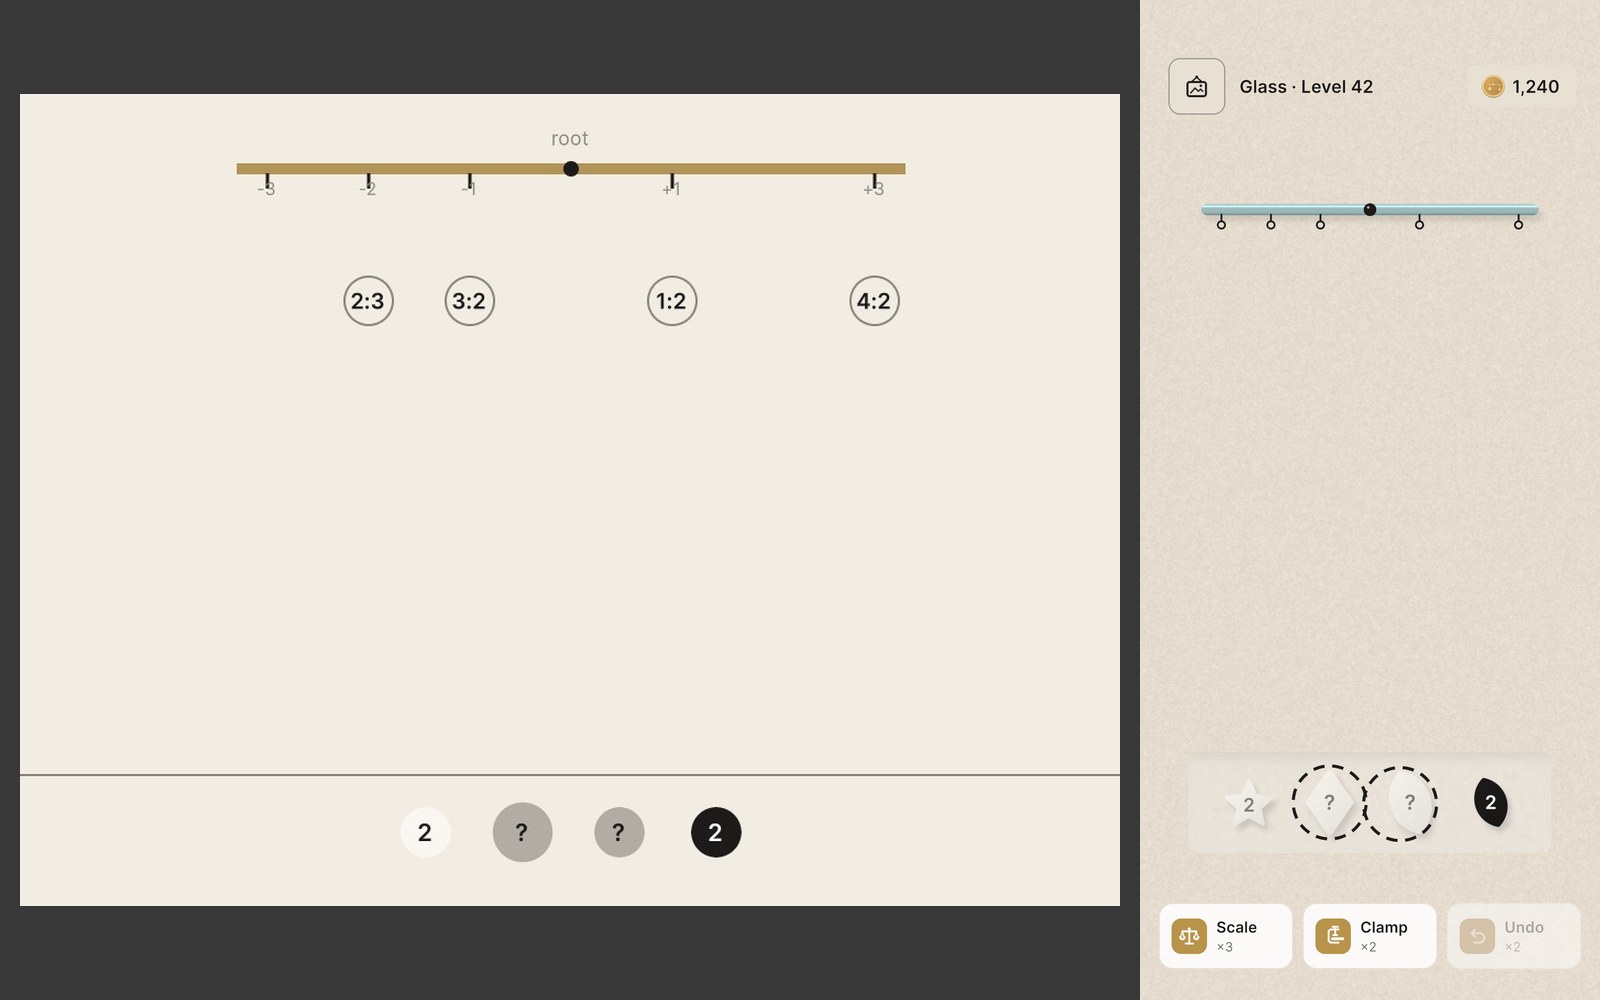
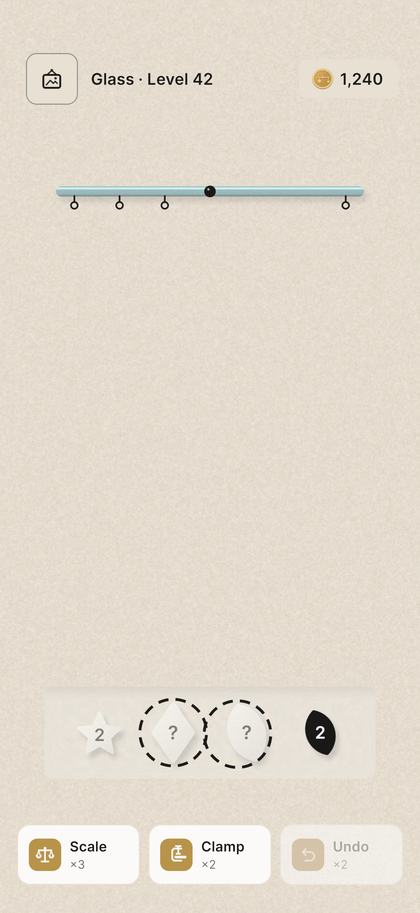
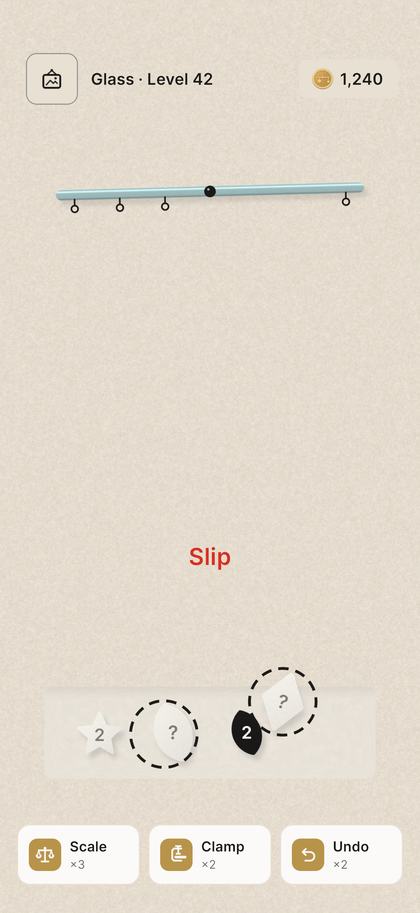
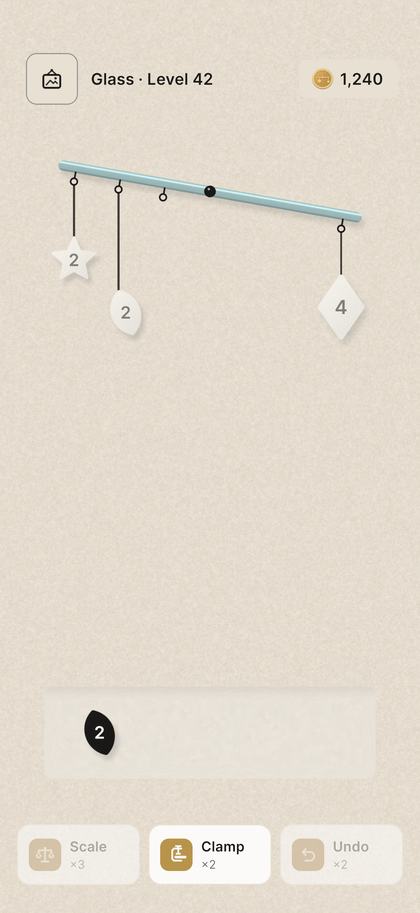
I graduated from Yıldız Technical University’s Communication Design program and have worked as a full stack web developer for five years. In mobile games, I design levels that teach mechanics clearly and balance the difficulty flow. I evaluate design decisions using player feedback, bot tests, A/B comparisons and product measurement plans. In Aplomb, Mozaik Blast and Crumble Crew, I develop both the design and product sides of the games, from level design to Unity editor tools.
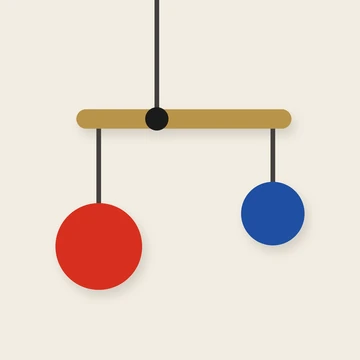
In Aplomb, you balance a structure hanging from the ceiling. Placing a piece means deciding both where it belongs and when to hang it. If an arm tilts too far, its pieces slip back into the tray and you can try another approach.
I wanted to make a calm puzzle you could learn through short attempts. After a mistake, you can keep playing and rebuild the balance. New rules appear as you progress, all built on the same relationship between weight and distance.
My work on the project
Level design: I designed the game’s 84 levels, defining their learning goals, mechanic progression and pacing.
Tests and improvements: I built a solver, a level editor and bot tests. I revised 15 levels based on the results, then checked both individual levels and progression through the game.
Product decisions: I designed the boosters, rewards and shop, and added analytics events. I planned a bot A/B comparison of the placement preview and analysed its data with SQL and Excel.
Implementation: I developed the game rules and tools in C# and Unity, and worked on the interface and visuals.
How I gathered the evidence
I could not access large-scale player testing, so I used bots with different playing behaviours. I report their assumptions alongside the results and compare design changes under the same conditions. These are bot results. I have not yet checked whether real players respond to the changes in the same way.
The French “à plomb” describes standing upright and balanced, like a plumb line. In English, aplomb means keeping your composure under pressure. I liked how it connects balance with taking a moment to think.
Gameplay
The basic rule is weight × distance from the centre. A weight of 3 placed two hooks away balances a weight of 2 placed three hooks away on the other side. Hovering a known-weight piece over a hook previews the tilt. Hidden “?” pieces have no preview.
Learning the order first
The video shows levels 6 and 11. On level 6, hanging the heavy piece at the far end causes a slip. Starting closer to the centre balances the same pieces safely. Level 11 introduces balancing a sub-arm before balancing the main arm.
Pieces can be moved between hooks or taken back into the tray.
The first five levels have no slips. Players explore weight and distance before placement order becomes a challenge on level 6.
A level ends when every arm is balanced and any rule cards are satisfied.
A guide to the game screen
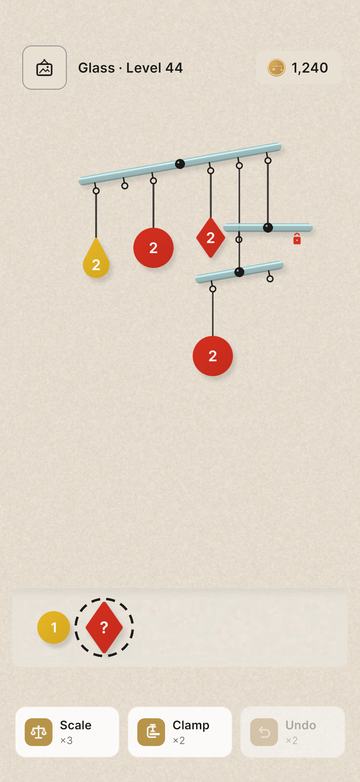
A screen from level 44. The numbers identify the pieces and boosters discussed on this page.
12345678910
1Hanging structure. The level itself: a structure of arms hanging from one another, suspended from the top. The level ends when every arm is level at the same time.
2Tray. The pieces waiting to be hung. The player drags a piece from the tray onto a hook. Pieces that slip come back here.
3Piece. The number on it is its weight. The farther from the pivot it hangs, the harder it pulls on the arm.
4Arm. A bar hanging from one point (the pivot). It stays level when both sides pull equally. From level 6 on, it slips if it tips too far.
5Hook. The rings that pieces and sub-arms hang from. Each hook is 1, 2 or 3 units from the pivot.
6Sub-arm. An arm that hangs from another arm. To the arm above, it acts like a single piece as heavy as everything on it. It has to balance on its own first.
7Hidden piece. Its weight is hidden behind a “?” until it is hung. Arrives with the Glass exhibition (level 37).
8Boosters. Scale weighs a hidden piece, Clamp holds an arm steady for 3 placements, Undo brings back the pieces that just slipped. Clamp and Undo unlock at level 8, Scale at level 37.
9Brass counter. The in-game currency, earned by clearing levels. Tapping the counter opens the Shop.
10Gallery button. Opens the exhibitions, their rooms, level select and Settings.
Game loop
LookWhich arm leans which way?
WeighHold the piece over a hook and watch the arm react.
HangLet go: the arm either gets closer to level or slips.
FixSlipped pieces return to the tray and the order is rebuilt.
When pieces slip, they return to the tray. That attempt can no longer earn a slip-free finish, but you can keep playing. I wanted a mistake to give you a reason to reconsider the order and try another way.
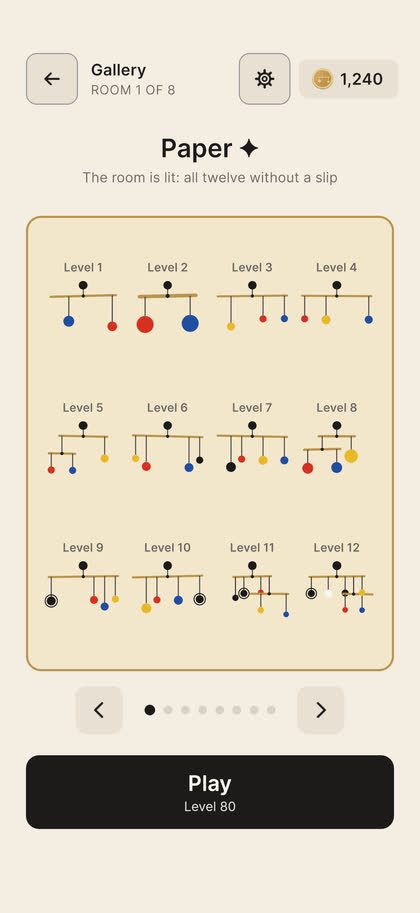
Completed levels stay in the gallery as small hanging structures. Finish an exhibition’s 12 levels to open the next room and earn 150 brass. Complete each level without a slip at least once and the room lights up. Using boosters does not prevent this.
Level design
I divided the 84 levels into seven exhibitions of 12. Each has its own material and design focus. Some introduce new mechanics. The last combines familiar mechanics with a tighter slip tolerance.
Weight × distance, sub-arms, slipping from level 6 on, pieces fixed to the arm
Where does this piece go, and in what order?
13–24
Wood
Locked hooks, arms with uneven sides (asymmetric), three-arm hanging structures
How does a hook I can’t use change my plan?
25–36
Copper
Free arms that the player hangs themselves. Decoys: not every piece in the tray is used
Which piece doesn’t belong on this structure?
37–48
Glass
Hidden weights: “?” pieces only show their weight once hung
Where can I safely weigh a weight I don’t know?
49–60
Felt
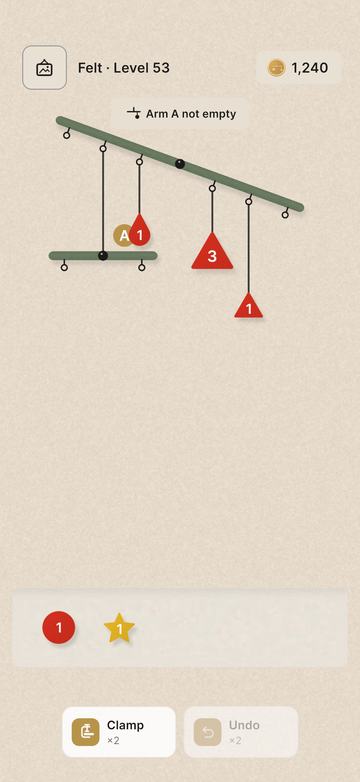
Rule cards: “Side by side”, “Red apart”, “Arm A left-heavy”, “Lowest”, “Arm A not empty”
It balances, but does it follow the rule?
61–72
Stone
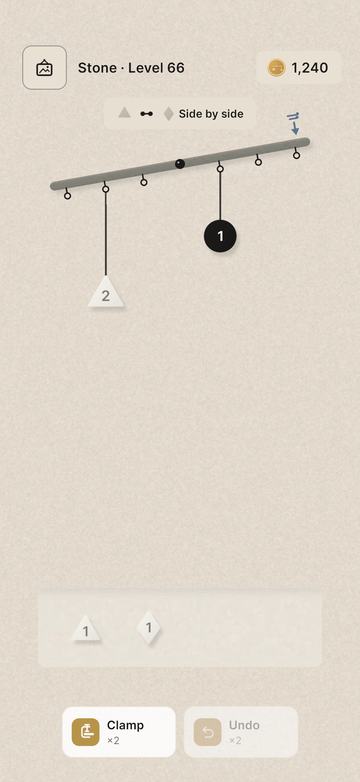
Wind: a load that pushes one end of an arm and can’t be moved. The slip threshold drops from 6 to 5
How do I balance a load I can’t lift?
73–84
Neon
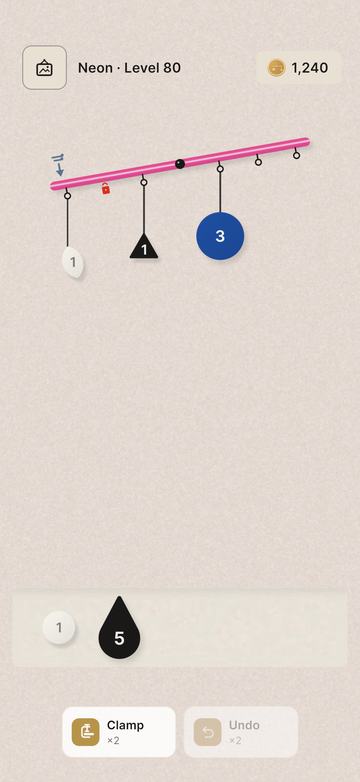
Slip threshold 4 (6 on the two walls): arms slip much sooner. Every earlier rule comes back
In what order can I hang this without a single slip?
Planning the rhythm before making levels
I start by deciding what the level should teach. I introduce the rule in a short level, then combine it with earlier ones. A harder checkpoint asks the player to use those lessons together. After that, I add a breather. Here are five examples from Glass.
Level
Purpose
The decision I want the player to make
37 · Introduction
Introduce one hidden weight
Hang a “?” piece to reveal its weight
38 · Easy
Practise weighing near the centre
Try an unknown piece on a safe hook before putting it at the far end
42 · Medium
Combine two hidden pieces with an asymmetric arm
Think about placement order while discovering weights
44 · Checkpoint
Combine hidden pieces, sub-arms, locked hooks and fixed weights
Plan the balance of multiple arms together
45 · Breather
Ease the pressure after the checkpoint. Identify a hidden decoy
Decide whether a revealed piece belongs on the structure
I set higher completion targets for introductions and lower ones for checkpoints. The rates and times below are design targets, not player measurements. I use them to plan the pressure across medium levels and breathers.
Band
Difficulty score
Target: players who clear it
Target: median time
Tutorial
below 3
95%
45 s
Easy
3–6
88%
60 s
Medium
6–9
80%
90 s
Wall
9–12
60%
150 s
Rejected
above 12
not shipped
–
In the first exhibition, the teaching purpose takes priority over the score. Level 6 scores 5.2, but I treat it as an introduction because it teaches slipping for the first time. I will revisit the time targets in player tests.
Designing and refining the levels
For each level, I chose a teaching goal, the mechanics to combine and its place in the exhibition. I checked the design with the solver and bots, then revised levels that missed their target or needed another look.
The editor lets me change hooks, weights, sub-arms and rule cards. I can then compare balanced placements and safe orders. I also open the level in the game to check that its lesson and layout still make sense.
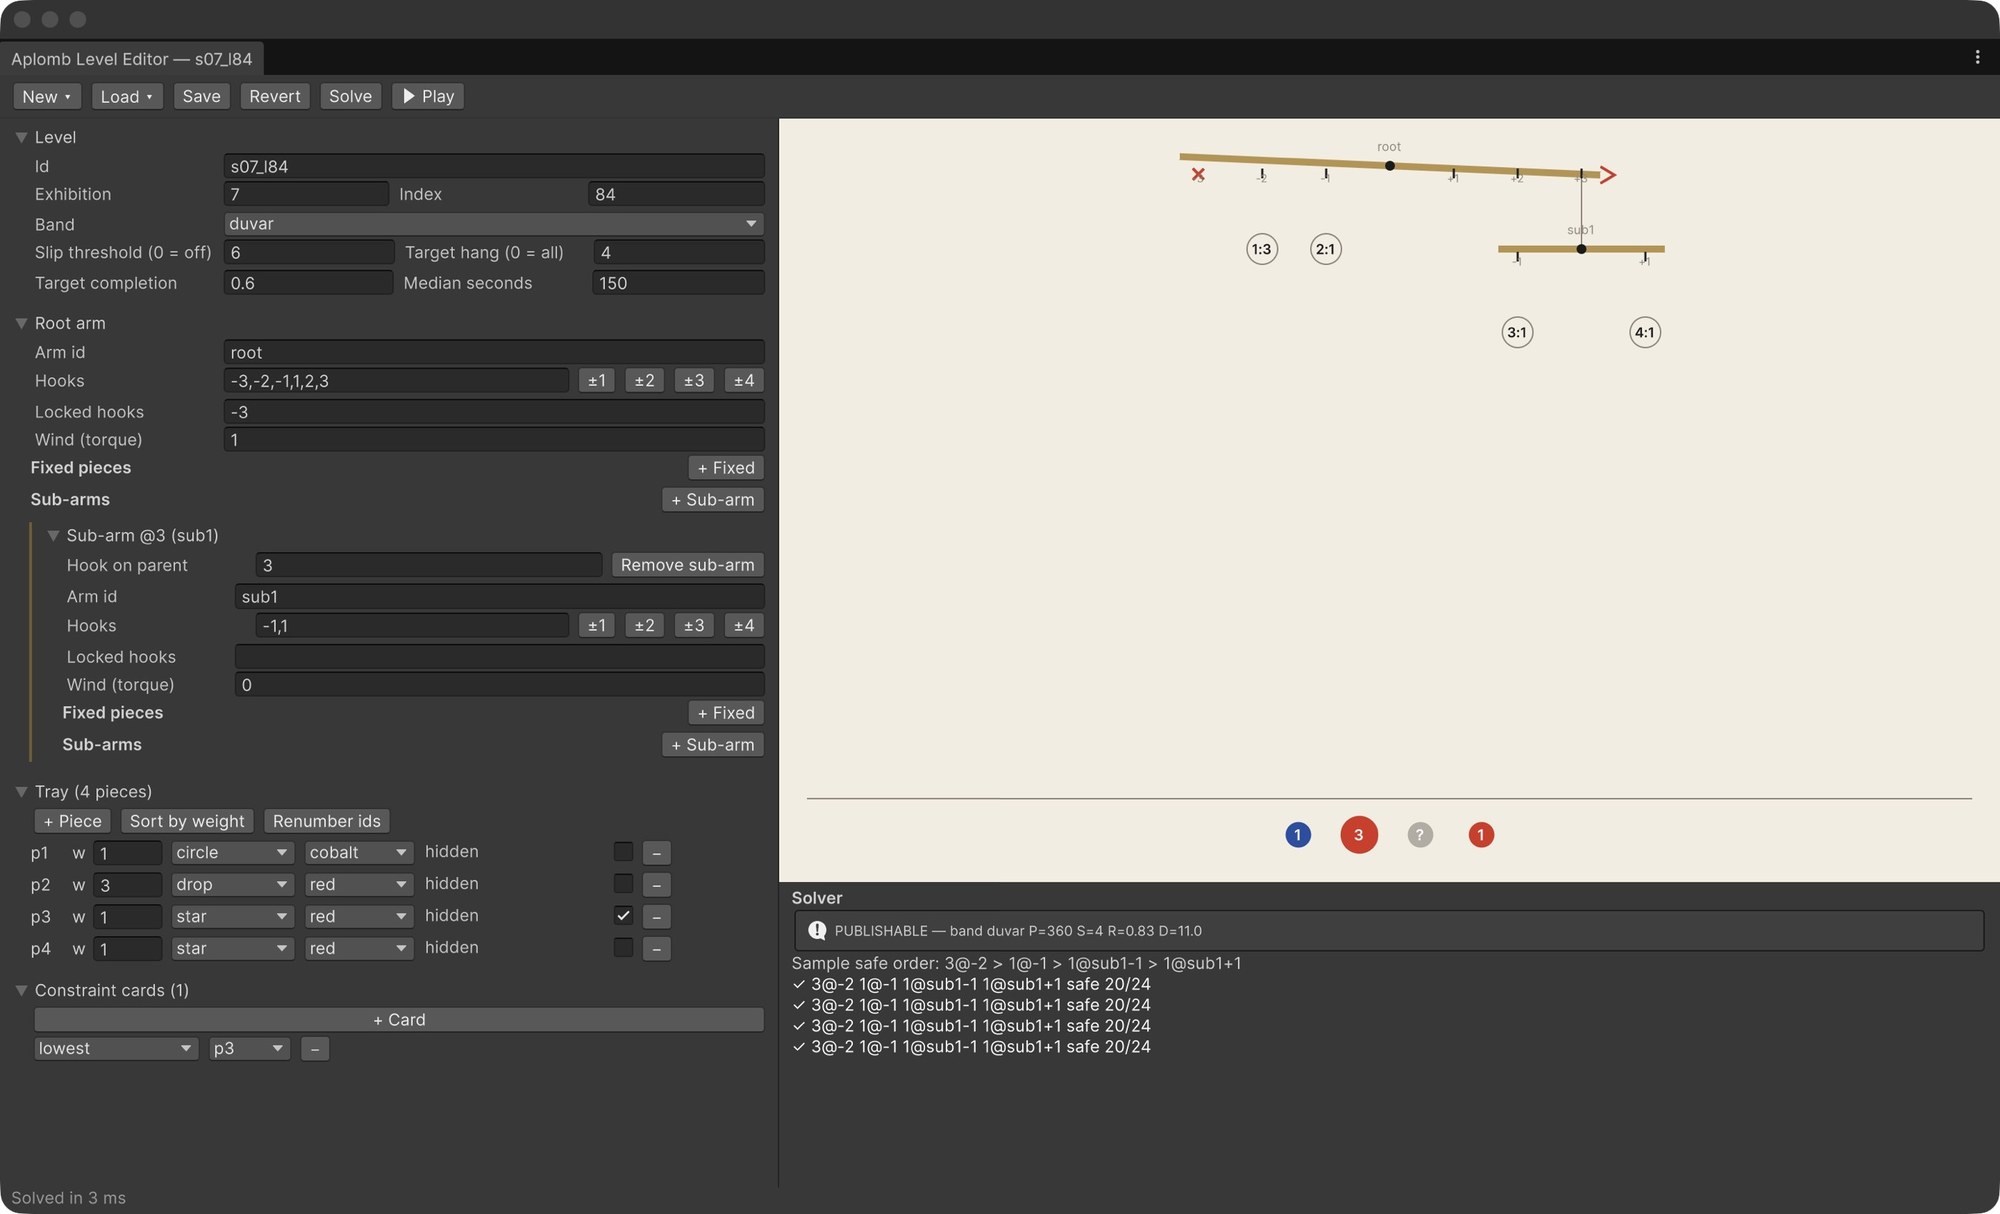
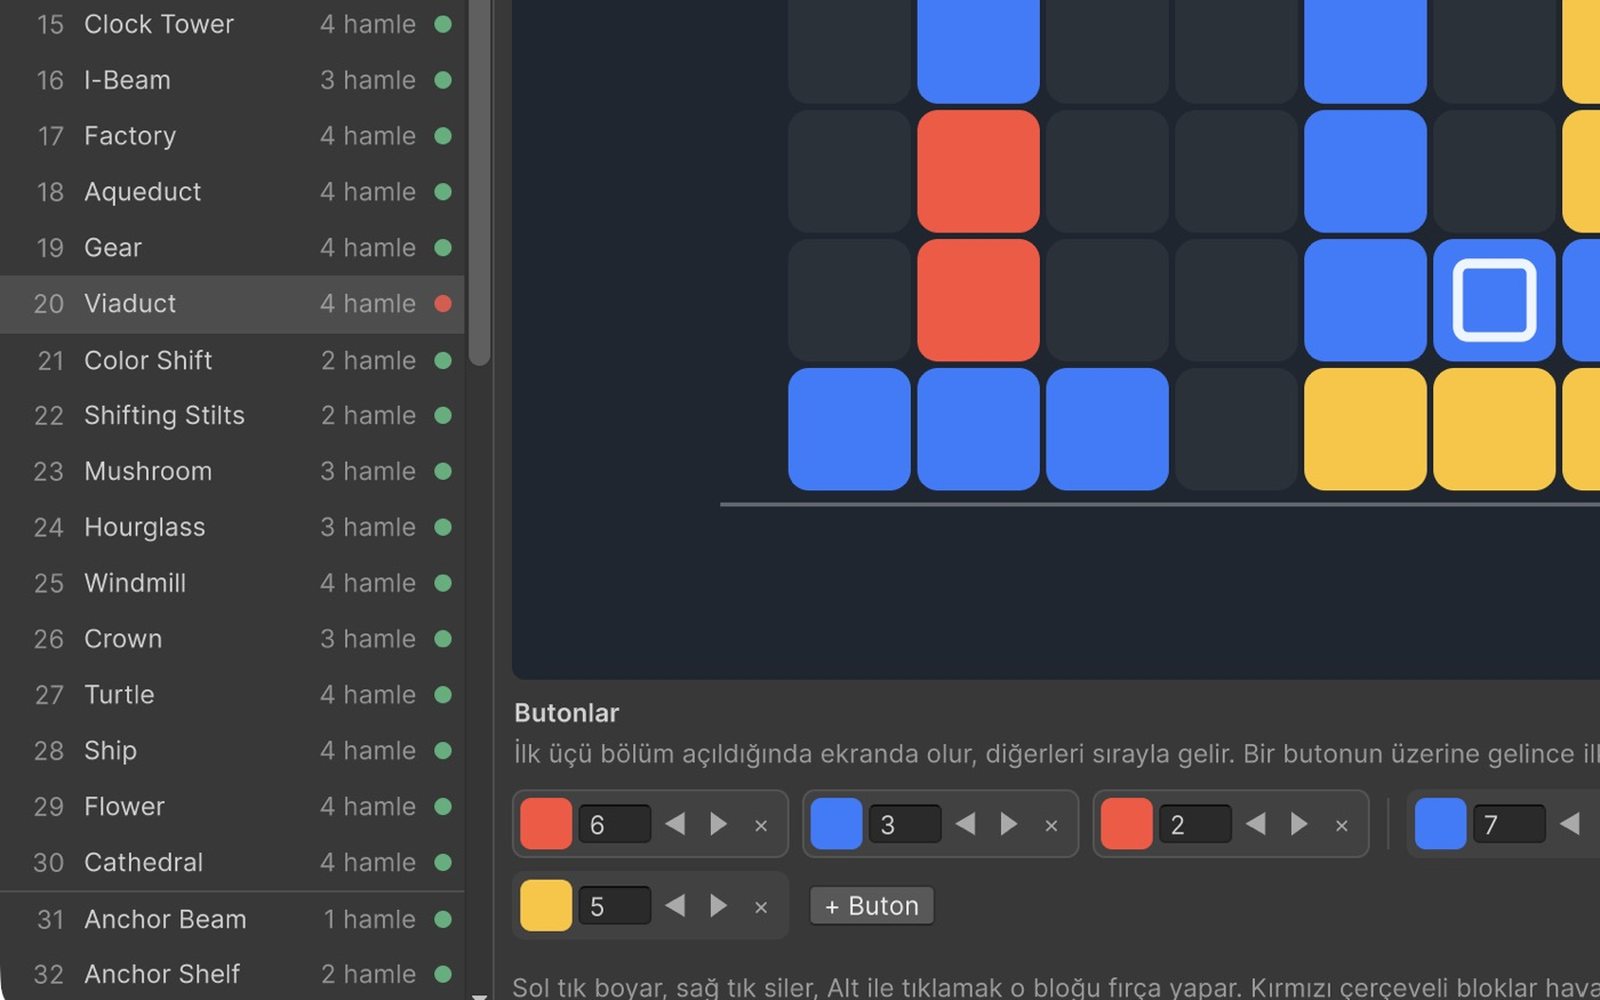
The level editor inside Unity, with the game’s last level open. On the left: a locked hook, wind, a sub-arm on the right, four pieces (one of them hidden) and a “Lowest” card. On the right, the preview and the solver: there are 4 balanced placements, and in each of them 20 of the 24 hanging orders finish without a slip.
Build: I arrange hooks, weights, sub-arms and mechanics around the learning goal.
Check: I inspect balanced placements and safe orders, then compare how an edit changes the problem.
Play and revise: I open the unsaved level in the game to check readability and feedback, then review the bot result against the target before saving.
The illustrated editor workflow
I start with the level’s purpose. I define the decision I want the player to make and which earlier lessons it should use. For a new mechanic, I choose a clear introduction. For a checkpoint, I choose the rules to test together.
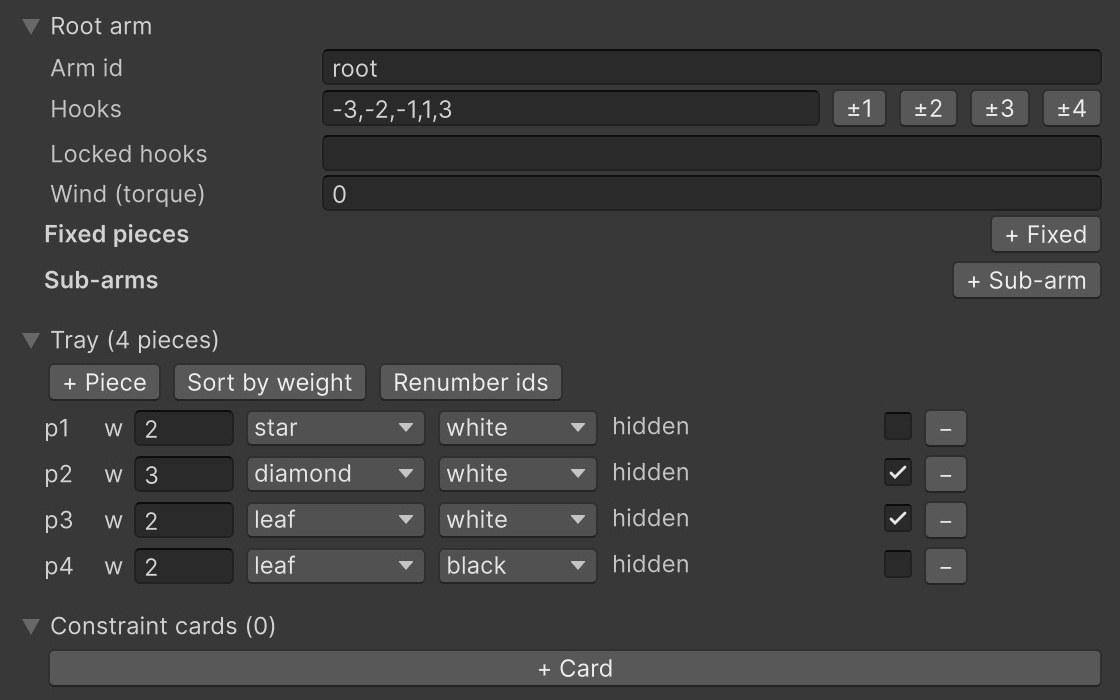
I set up the hanging structure and the tray. I type the hooks separated by commas, or use the ±1…±4 buttons for an arm with equal sides. Deleting a hook makes the arm asymmetric. Locked hooks, wind that pushes the arm one way, pieces fixed to the arm and sub-arms are set here too. In the tray, every piece has a weight, a shape, a colour and a hidden toggle. I also set how many pieces must be hung. If the tray holds more, the extras are decoys. Rule cards come in five types: side by side, a colour apart, arm left-heavy, lowest, and arm not empty. If I build something invalid (locking a hook that doesn’t exist, or hanging a sub-arm on a hook that’s taken), an error appears under the preview.
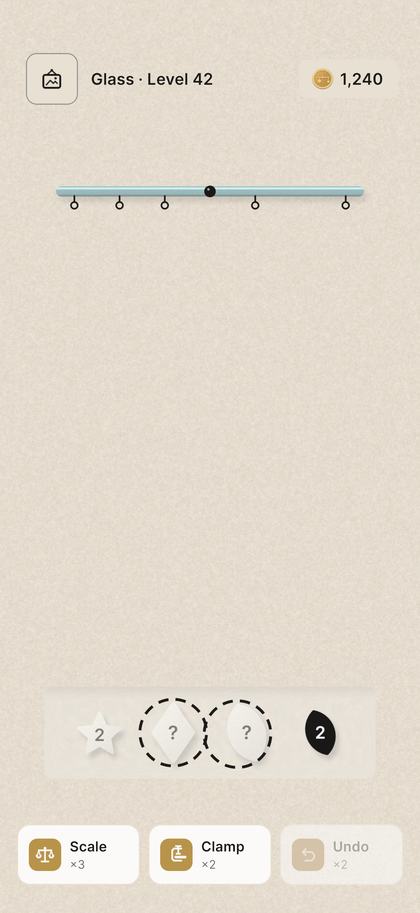
Level 42’s arm and tray. The arm has no +2 hook, which makes it asymmetric. Two of the four pieces in the tray are hidden.
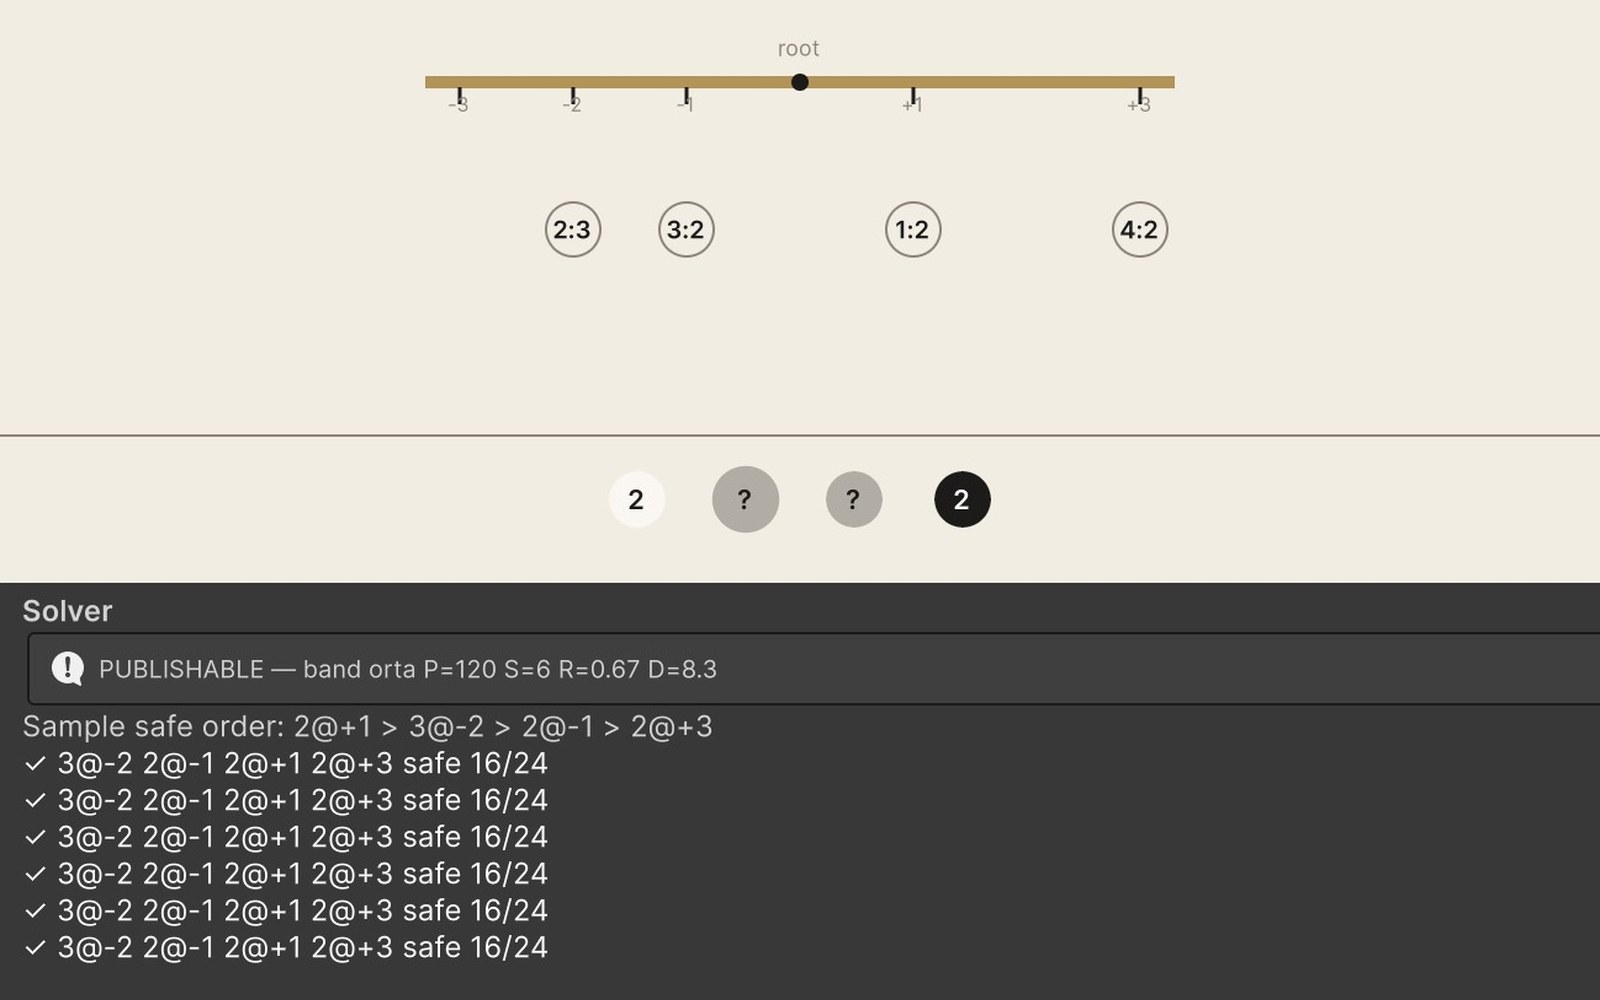
I run the solver. In this example, “Solve” takes 3 milliseconds. The verdict is at the top: can the level ship, which band is it in, P, S, R and the difficulty score (D). Below it are a sample slip-free order and every solution. Next to each solution is how many of all the possible hanging orders finish without a slip. The sample order is also drawn on the preview: “2:3” means the 3 goes on that hook in the second step.
Level 42 today: the medium band (“orta” in the editor), score 8.3. All six solutions are the same layout. Only the three 2s swap places. In each of them, 16 of the 24 orders finish without a slip.
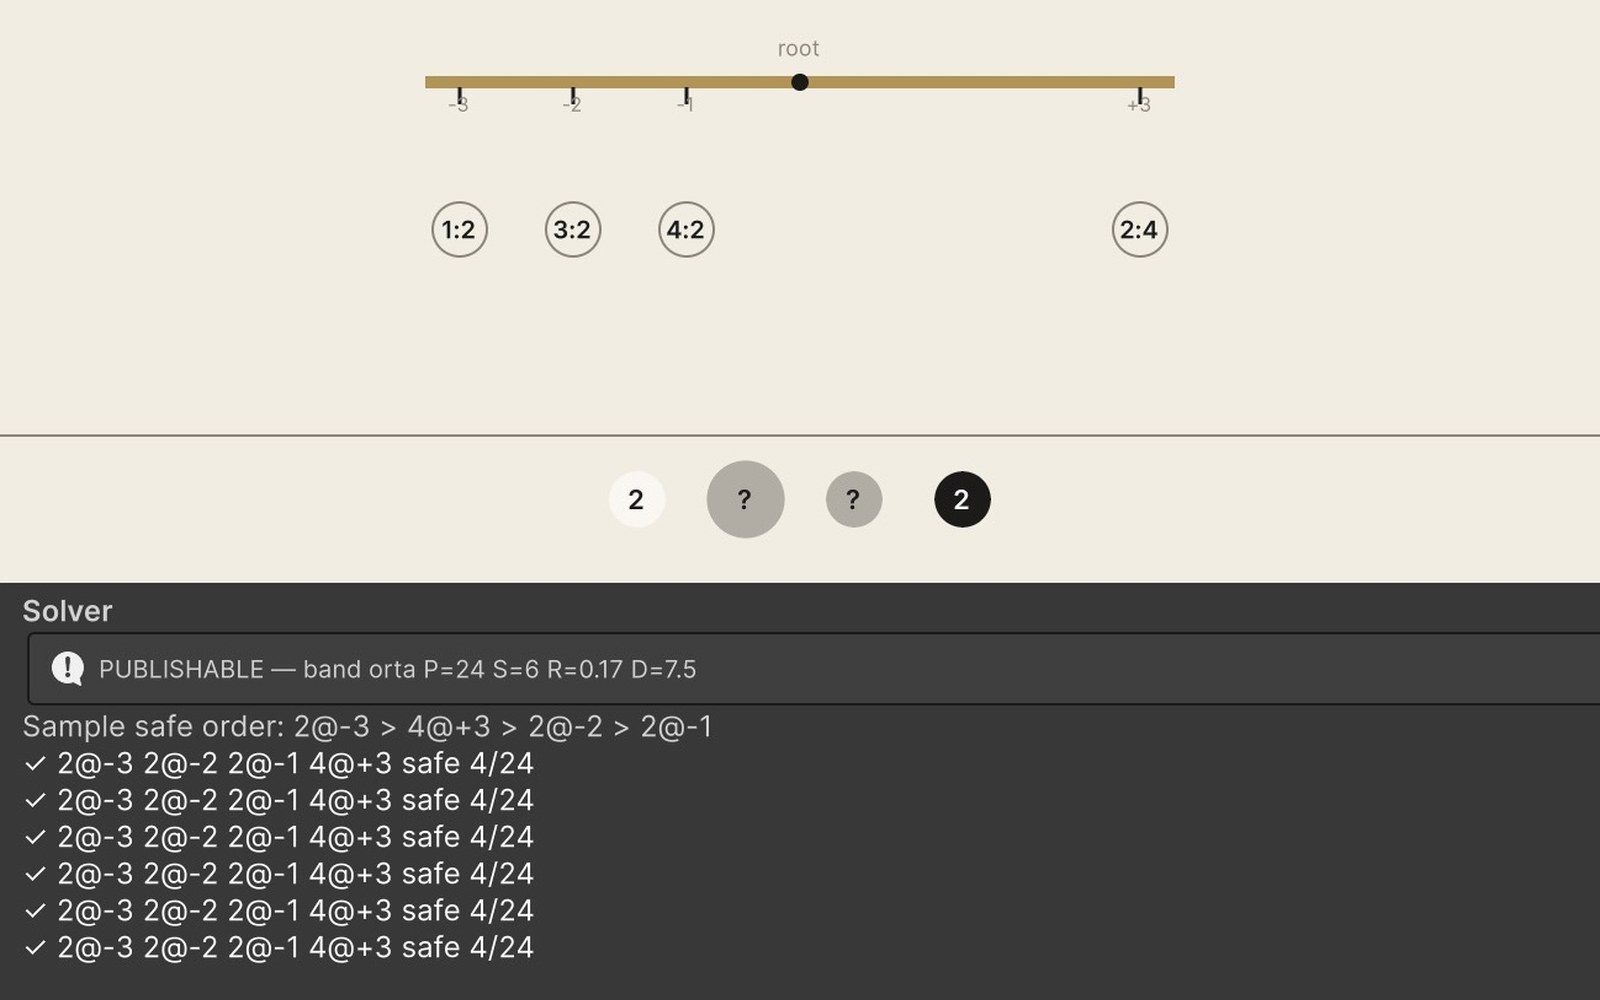
I check what a change does. Changing a setting clears the order from the preview, so I press “Solve” again and look at the new numbers. Below is the same level before the bot test. There are two differences: the arm has no +1 hook, and the hidden diamond weighs 4, not 3. In this version the only place for the 4 is the +3 hook, and in each solution only 4 of the 24 orders finish without a slip. The solver could see that most orders slip (R = 0.17), but not that revealing a hidden weight shapes the player’s decisions. With a score of 7.5, the level sat in the medium band. The bots showed how hard it really was (in the level 42 case study).
The same level before the bot test: P = 24, R = 0.17, score 7.5. In the sample order the 2 goes to −3 first, then the 4 to +3: without a load of 6 on the left, the 4 tips the arm.
I try it in the game. “▶ Play” opens the editor’s current version in the game scene, without saving. The solver says the level can be solved and how hard it is on paper, not how it looks on screen: whether the structure is easy to read, how far the arm tilts, whether the hidden pieces stand out at first glance. Those I check in the game.
Left, the preview in the editor. Right, the same level in the game.
I save the level with its report. Save checks the structure and runs the solver again. The level file stores its band, P, S, R and score. Revert restores the last saved version.
How I use the difficulty score
The solver counts balanced placements and checks which orders avoid slips. I use those results, along with hidden weights, decoys, cards and sub-arms, to calculate a difficulty score. The score helps me compare designs. It cannot tell me everything a player knows or might misunderstand.
I chose the formula’s coefficients myself. They have not been fitted to player data. I read the score alongside bot results and the level’s teaching goal. Level 42 is an example of those signals disagreeing.
P is possible placements, S balanced placements and R the share of safe orders. Distinct pieces with equal weights are counted separately, so S is not always the number of meaningfully different solutions.
I reject candidates with no solution, R = 0, a score above 12 or an exhausted search budget. Large order searches use sampling. The technical section explains the limits.
LevelChecks.cs · the “weigh near the centre” check
publicstaticbool TeachesWeighNearPivot(LevelDef def)
{
foreach (var hidden in def.Tray.Where(p => p.Hidden))
{
bool nearSafe = false, farSlips = false;
foreach (int hook in def.Root.Hooks)
{
var st = MobileState.FromDef(def);
st.Pieces[hidden.Id].Revealed = true;
var r = st.Preview(hidden.Id, st.Root.Id, hook);
if (!r.Available) continue;
if (Math.Abs(hook) == 1 && !r.WouldSlip) nearSafe = true;
if (Math.Abs(hook) >= 2 && r.WouldSlip) farSlips = true;
}
if (nearSafe && farSlips) returntrue;
}
returnfalse;
}
The near-centre check looks for a hidden piece that can be weighed safely on a nearby hook but slips on a distant one. That confirms the setup supports the lesson. I still need to observe players to see whether they discover it.
Protecting the intended lesson
The drag hint on the first level uses a safe move found by the solver. Short hints introduce slipping, hidden weights, cards and wind. If every piece is hung but the structure is still unbalanced, a reminder appears after 4.5 seconds explaining that hung pieces can be moved.
I turned Paper’s intended solution orders into automated checks. On level 6, putting the heavy piece at the far end must cause a slip. An edit that removes that teaching moment breaks the test. Copper’s introduction must require the loose arm. In Felt, removing the cards must increase the solution count. This checks their combined effect, rather than proving that every card matters individually.
Difficulty curve
The chart shows difficulty scores after the 15 level revisions. Colours mark the bands. Dots mark breathers immediately after checkpoints. I chose an uneven curve, easing the pressure when introducing a rule and when giving players room to practise after a hard level.
Tutorial
Easy
Medium
Wall
Breather level (right after a wall)
Difficulty score
03easy6medium9wall12limit
Paper1–12
Wood13–24
Copper25–36
Glass37–48
Felt49–60
Stone61–72
Neon73–84
Chart data
Level
Exhibition
Band
Score
1
Paper
tutorial
2.6
2
Paper
tutorial
0.0
3
Paper
easy
4.9
4
Paper
easy
5.9
5
Paper
tutorial
2.6
6
Paper
tutorial
5.2
7
Paper
medium
7.2
8
Paper
easy
2.6
9
Paper
easy
4.4
10
Paper
medium
6.4
11
Paper
medium
7.2
12
Paper
wall
10.8
13
Wood
tutorial
1.6
14
Wood
easy
5.3
15
Wood
easy
4.0
16
Wood
medium
7.0
17
Wood
easy
5.9
18
Wood
medium
7.5
19
Wood
medium
7.6
20
Wood
wall
10.6
21
Wood
easy · breather
4.4
22
Wood
medium
7.3
23
Wood
medium
7.5
24
Wood
wall
10.6
25
Copper
tutorial
1.0
26
Copper
easy
5.1
27
Copper
easy
5.0
28
Copper
medium
8.7
29
Copper
easy
4.5
30
Copper
medium
7.7
31
Copper
medium
7.4
32
Copper
wall
10.5
33
Copper
easy · breather
4.5
34
Copper
medium
7.6
35
Copper
medium
7.6
36
Copper
wall
10.6
37
Glass
tutorial
1.5
38
Glass
easy
5.4
39
Glass
medium
7.6
40
Glass
medium
7.6
41
Glass
easy
4.8
42
Glass
medium
8.3
43
Glass
medium
7.5
44
Glass
wall
10.5
45
Glass
easy · breather
5.3
46
Glass
medium
7.6
47
Glass
medium
7.9
48
Glass
medium
7.5
49
Felt
easy
6.0
50
Felt
medium
8.2
51
Felt
easy
5.8
52
Felt
medium
8.0
53
Felt
medium
8.5
54
Felt
wall
10.8
55
Felt
easy · breather
6.0
56
Felt
medium
8.9
57
Felt
medium
8.9
58
Felt
medium
7.9
59
Felt
medium
7.9
60
Felt
wall
10.5
61
Stone
easy
4.4
62
Stone
easy
4.6
63
Stone
medium
7.5
64
Stone
easy
4.9
65
Stone
medium
7.6
66
Stone
medium
7.4
67
Stone
medium
7.5
68
Stone
wall
9.3
69
Stone
easy · breather
4.7
70
Stone
medium
7.1
71
Stone
medium
8.4
72
Stone
medium
8.7
73
Neon
easy
4.6
74
Neon
medium
7.5
75
Neon
medium
7.5
76
Neon
medium
7.4
77
Neon
medium
8.0
78
Neon
wall
11.9
79
Neon
easy · breather
5.5
80
Neon
medium
7.4
81
Neon
medium
7.4
82
Neon
medium
8.4
83
Neon
medium
7.6
84
Neon
wall
11.0
Level 42: problem, decision, result
Level 42 combines two hidden pieces with an asymmetric arm. I placed it in the medium band, with an 80% completion target. Only 7% of bots finished it, and the experienced profile reached just 3%. I went back to the layout rather than trusting its score.
Old layout
One hook on the right (+3). Two pieces are hidden.Hung at +3, the “?” turns out to be a 4: 4 × 3 = 12, threshold 6. The arm slips.One of the safe orders: 2s on the left first, then the 4 at +3.
7% of bots cleared it
New layout (in the game)
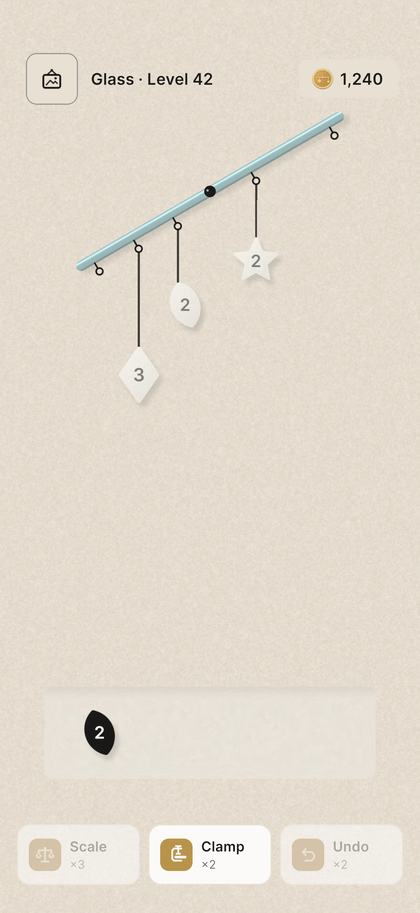
There’s a +1 hook on the right. The hidden 4 became a 3.Before the last piece: the left pulls 8, the right 2. The gap is 6 and the arm holds.
82% of bots clear it
Two versions of the same level. The screenshots are from the game itself. The old layout was opened from the backed-up level file.
The problem: unknown weights and a narrow order
The hidden 4 could only occupy +3 in the final arrangement. It pulls with 12 units of torque there, against a slip threshold of 6. Hanging it too early causes a slip, but its weight is unknown until it is hung. For each balanced placement, only 4 of the 24 orders were safe.
The old layout allowed a piece to be weighed near the centre, then moved or removed. The bots struggled to discover the weights while following a narrow safe order. I used that result to revisit the design. I have not measured whether people struggle at the same point.
The change: keep the idea, widen the safe options
I added a +1 hook and changed the hidden 4 to a 3. The two hidden pieces and asymmetric arm remained. My aim was to make it more suitable for its medium-band role without requiring Scale. Safe orders increased from 4/24 to 16/24.
Final arrangement: 3 → −2, 2 → −1, 2 → +1, 2 → +3. This is a placement map, not a move sequence. Once the weights are known, one safe order is:
Step
Move
Total arm torque
1
3 → −2
−6
2
2 → +1
−4
3
2 → −1
−6
4
2 → +3
0
No step exceeds an absolute torque of 6. This demonstrates a safe way to build the solved arrangement. It does not describe the process of discovering the hidden weights.
The result and what I learned
Old layout
New layout
Hooks
−3, −2, −1, +3
−3, −2, −1, +1, +3
Pieces
2, 2, hidden 2, hidden 4
2, 2, hidden 2, hidden 3
Possible placements / balanced
24 / 6
120 / 6
Orders that finish without a slip
4 of 24
16 of 24
Difficulty score
7.5
8.3
Mixed completion
7%
82%
Novice / casual / expert
10% / 6% / 3%
72% / 82% / 98%
The initial comparison used the same level test for both layouts: three bot profiles and three random seeds for each layout. Each profile ran 300 times per seed, giving 900 runs per profile and 2,700 per layout. The previous and revised layouts together account for 5,400 runs. The table shows rounded results from that first measurement. The solver’s six balanced placements come from exchanging three equal-weight pieces. They represent one arrangement of weights across hooks.
The score rose from 7.5 to 8.3, while bot completion rose from 7% to 82%. Adding a hook increased possible placements and raised the score. More safe orders made the level easier for the bots. This reminded me to look at when information becomes available, as well as how many options a level has.
In a separate check, I varied misdrop probability, patience and attention to the preview one at a time. Across seven settings, mixed completion ranged from 6.8–7.5% on the previous layout and 82.0–82.9% on the current one. Each of the three bot profiles improved. The change held up under the settings I tested. Its effect on real players remains unmeasured.
Tests and improvements
I tested levels individually, then ran all 84 in sequence. The first test helped me inspect each design. The second showed where bots stopped progressing. I compared revisions under the same conditions.
Bot profiles and test method
I use novice, casual and experienced profiles, weighted at 30%, 50% and 20% in the mixed result. I chose the mixture, error rates and patience limits. They did not come from player data. Novices check the preview less often. Experienced bots look two moves ahead.
The profiles share a decision model that scores moves by their contribution to balance. They do not know hidden weights until hanging them and use Undo, but not Clamp or Scale. They know how to move and remove pieces from the start, and the novice profile does not learn across levels. These results therefore do not assess tutorial comprehension, enjoyment or next-day return.
Novice (30%). Scattered choices, drops 8% of pieces on the wrong hook, looks at the preview about half the time, often forgets the cards, rarely thinks of weighing a hidden piece near the centre. Patience: 3 minutes.
Casual (50%). Drops 5% of pieces on the wrong hook, usually checks the preview, uses Undo after about half of its slips. Patience: 4 minutes.
Expert (20%). Thinks two moves ahead, almost always checks the preview, always follows the cards, usually weighs a hidden piece near the centre first. Patience: 6 minutes.
Tests and measures in this section
Level test
Each profile plays each level 300 times with each of three random seeds: 900 runs per profile and 2,700 for each layout of a level. This shows how hard a level is on its own. The charts and change table come from this test.
Mixed completion
The share of runs that clear the level, weighted novice 30%, casual 50%, expert 20%.
Off band
A level is off band if its mixed completion is more than 10 points away from its band’s target.
Play-through test
4,000 bots, in four groups of 1,000, start at the first level and play in order. A bot stops if it cannot clear a level in two sessions. I use this test to inspect progression and the brass economy.
Bot A/B test
10,000 bots are assigned to two groups using a value calculated from their IDs. Each group uses its own Remote Config settings and follows the sequential test’s rules.
Rank correlation
How closely the difficulty-score ranking matches the completion ranking (Spearman). −1 means completion always drops as the score rises.
What the first test revealed
In the initial layouts, 12 levels fell more than 10 percentage points below their completion target, while 46 exceeded it. Some intended easy and medium levels were harder for the bots than checkpoints.
42 and 70: Both were medium levels with an 80% target. Bot completion was 7% and 8%.
14, 15 and 17: Easy levels targeted 88%, but completion ranged from 36% to 45%.
12: The first exhibition’s finale. In sequential simulation, 51.7% of bots reaching it stopped there. 47.6% of the starting cohort reached level 13.
68, 78 and 84: Intended checkpoints were completing well above target.
Completion chart for all 84 initial layouts
More than 10 points below target
Close to target
More than 10 points above target
Breather level (right after a wall)
Mixed completion
0%25%50%75%100%
Paper1–12
Wood13–24
Copper25–36
Glass37–48
Felt49–60
Stone61–72
Neon73–84
Chart data
Level
Band
Completion
Target
1
tutorial
100%
95%
2
tutorial
100%
95%
3
easy
100%
90%
4
easy
96%
88%
5
tutorial
98%
95%
6
tutorial
100%
92%
7
medium
97%
80%
8
easy
99%
88%
9
easy
100%
88%
10
medium
97%
80%
11
medium
94%
80%
12
wall
28%
60%
13
tutorial
100%
95%
14
easy
43%
88%
15
easy
36%
88%
16
medium
77%
80%
17
easy
45%
88%
18
medium
54%
80%
19
medium
98%
80%
20
wall
36%
60%
21
easy · breather
100%
88%
22
medium
96%
80%
23
medium
100%
80%
24
wall
62%
60%
25
tutorial
98%
95%
26
easy
100%
88%
27
easy
99%
88%
28
medium
95%
80%
29
easy
100%
88%
30
medium
100%
80%
31
medium
87%
80%
32
wall
63%
60%
33
easy · breather
100%
88%
34
medium
100%
80%
35
medium
99%
80%
36
wall
32%
60%
37
tutorial
100%
95%
38
easy
100%
88%
39
medium
100%
80%
40
medium
100%
80%
41
easy
100%
88%
42
medium
7%
80%
43
medium
99%
80%
44
wall
74%
60%
45
easy · breather
100%
88%
46
medium
100%
80%
47
medium
44%
80%
48
medium
100%
80%
49
easy
97%
88%
50
medium
93%
80%
51
easy
93%
88%
52
medium
100%
80%
53
medium
89%
80%
54
wall
60%
60%
55
easy · breather
94%
88%
56
medium
84%
80%
57
medium
82%
80%
58
medium
65%
80%
59
medium
97%
80%
60
wall
69%
60%
61
easy
100%
88%
62
easy
100%
88%
63
medium
99%
80%
64
easy
95%
88%
65
medium
98%
80%
66
medium
89%
80%
67
medium
98%
80%
68
wall
92%
60%
69
easy · breather
100%
88%
70
medium
8%
80%
71
medium
92%
80%
72
medium
100%
80%
73
easy
100%
88%
74
medium
100%
80%
75
medium
98%
80%
76
medium
84%
80%
77
medium
60%
80%
78
wall
80%
60%
79
easy · breather
100%
88%
80
medium
97%
80%
81
medium
83%
80%
82
medium
98%
80%
83
medium
75%
80%
84
wall
85%
60%
Small, purposeful changes to 15 levels
My search tool tries single and paired edits to weights, hooks, sub-arms, fixed weights and wind. The solver rejects invalid designs, then bots test the rest. I chose changes that moved closer to the target while keeping the lesson. I made 12 levels easier and three overly easy checkpoints harder.
What changed in the 15 levels?
Level
Change
Band
Mixed completion
Target
12 · Paper
Added a +2 hook to the sub-arm.
wall
28% → 59%
60%
14 · Wood
Unlocked the +3 hook. The 4 became a 3.
easy
43% → 98%
88%
15 · Wood
Moved the sub-arm from −1 to +2.
easy
36% → 99%
88%
17 · Wood
Added a +3 hook to the arm.
easy
45% → 85%
88%
18 · Wood
Moved the sub-arm from +1 to −1.
medium
54% → 75%
80%
20 · Wood
Moved the left sub-arm from −2 to −1 and gave it a +2 hook.
wall
36% → 58%
60%
36 · Copper
Added a −3 hook to the arm and locked the free arm’s −1 hook.
wall
32% → 56%
60%
42 · Glass
Added a +1 hook. The hidden 4 became a 3.
medium
7% → 82%
80%
47 · Glass
Added a −2 hook. One of the two hidden pieces is now shown.
medium
44% → 68%
80%
58 · Felt
Moved the locked hook from +1 to +2.
medium
65% → 72%
80%
70 · Stone
The fixed piece at −1 went from 5 to 4.
medium
8% → 87%
80%
77 · Neon
One of the 1s became a 2.
medium
60% → 85%
80%
68 · Stone
Wind on the main arm went from 2 to 1. One of the 3s became a 2.
wall
92% → 56%
60%
78 · Neon
The 2 became a 3.
wall
80% → 63%
60%
84 · Neon
Moved the sub-arm from −1 to +3.
wall
85% → 64%
60%
Each row is a level I changed and shows how far it is from its own target. The middle line is the target. The green area is within 10 points of it. The arrow goes from the level before the change to the level today.
Percentages in the charts and tables are rounded. Level 14 is at the upper boundary. Level 15 is still too easy and level 47 too hard. Moving closer to a target does not by itself prove that a level works well for players.
After retesting
Levels far below target fell from 12 to 1. Level 47 remains below: 68% against an 80% target.
The rank correlation between difficulty score and bot completion strengthened from −0.50 to −0.65. That is a more consistent ranking in this model, awaiting validation with people.
In sequential simulation, reaching level 13 rose from 47.6% to 81.8%, and finishing the game rose from 0% to 14.2%.
The largest stopping points are now mostly intended checkpoints: 20, 36, 12, 68 and 24. In Glass, level 47 is still slightly harder than its checkpoint.
I applied the initial revisions to the game’s level files. The charts show that first iteration within the same bot model. I then checked selected levels separately with different behavioural settings and new random seeds. Those results appear below.
Do the results hold when behaviour settings change?
On 9 October 2026, I reran the existing three profiles. In addition to their baseline settings, I halved misdrop probability and increased it by 50%, set patience to 75% and 125%, and lowered preview attention by 20 percentage points or raised it by 15. I changed one setting at a time and kept attention within 0–100%.
I used seven scenarios, three new random seeds and 200 runs per profile for each seed: 600 runs per profile for each layout and scenario, and 63,000 level attempts overall. Profile settings, Undo stock and the starting seeds for each run were matched between the previous and current layouts.
Level
Previous layout
Current layout
Finding
42
6.8–7.5%
82.0–82.9%
Each profile improved under every tested setting.
70
7.4–7.9%
84.9–88.5%
Reducing the fixed weight helped under every tested setting.
47
Not compared
64.7–66.4%
Below its 80% target under every tested setting.
These ranges are the lowest and highest completion rates across seven settings using the 30% novice / 50% casual / 20% experienced mixture. They are not confidence intervals or predictions for people. I also reweighted the results for novice-heavy (60%/30%/10%) and experienced-heavy (10%/40%/50%) mixtures. Levels 42 and 70 still improved. Level 47 remains a revision priority.
I reconstructed the previous layouts of 42 and 70 from the recorded change notes. The game’s current level files and bot code stayed unchanged. I did not reconstruct level 47 because the notes do not identify its second originally hidden piece. This checks consistency within the behaviour settings I tested. It does not validate human behaviour.
Profile results and repeat settings
For each of the seven settings, I combined three seeds: 202610091, 202610092 and 202610093. Each seed has 200 runs per profile, giving 600 per profile and setting. The ranges below are the lowest and highest completion rates across those seven settings after combining the seeds. They are not confidence intervals.
Level / version
Novice
Casual
Expert
42 · earlier
8.5%–10.0%
7.3%–8.8%
2.0%–2.7%
42 · current
70.3%–74.8%
81.0%–83.5%
99.3%–99.5%
70 · earlier
12.2%–13.3%
7.0%–7.7%
1.0%–1.3%
70 · current
69.0%–75.7%
89.3%–93.2%
97.2%–98.5%
47 · current
48.5%–52.3%
65.2%–68.0%
83.2%–84.2%
Preview stays on, the slip-threshold bonus is zero and the starting Undo stock is 3. Other profile settings remain fixed. Each run starts with seed + level × 10007 + profile_index × 1009 + trial × 17. Random sequences can diverge after different moves. Recorded seconds are modelled bot time, not measured player time. Changing one setting at a time does not cover all combinations or other decision models.
Preview: A/B test with bots
The placement preview shows how an arm will tilt before you release a piece. I compared preview on and off using the existing bots. I used the test to check group assignment, measurement and analysis as well as the design choice.
Hypothesis and experiment plan
My hypothesis was that removing the preview could increase slips and Undo demand, and reduce completion of the first exhibition. Reaching level 13 was the primary metric. Undos bought with brass were an economy guardrail.
Assignment: I assigned 10,000 bots using a stable hash of their IDs. The control had preview on, and the other group had it off.
Analysis: I wrote the plan before the experiment. I used two-sided tests at α = 0.05 and 95% intervals calculated at bot level. Completion proportions use a normal approximation, per-attempt ratios use 2,000 bot-level bootstrap repetitions, and means use Welch tests.
Data check: I first ran an A/A test with preview on in both groups. Small deviations from 50/50 are expected. An SRM chi-square result of p < 0.001 requires investigating assignment before using the outcome.
The A/A test assigned 5,021 and 4,979 bots, with no sample-ratio issue or significant metric differences. I found no clear problem in assignment or analysis in that run. This check does not tell me how closely the bots resemble people. The main test assigned 4,984 and 5,016 bots.
Metric
Preview on
Preview off
Difference (95% CI)
Bots reaching level 13 (primary)
82.6%
81.2%
−1.4 points (−2.9 to +0.1)
Levels cleared per bot
36.7
36.4
−0.3 (−1.3 to +0.7)
Slips per attempt
0.103
0.261
+0.159 (+0.154 to +0.164)
Levels cleared in the first session
92.34%
92.37%
+0.02 points (−0.16 to +0.20)
Bots finishing the game
13.8%
14.4%
+0.6 points (−0.8 to +1.9)
Undos bought with brass, per bot
0.30
2.44
+2.14 (+2.04 to +2.24)
Difference = preview off − on. Differences between proportions are percentage points. Displayed rates and means are rounded. Differences use unrounded values. All results are simulated.
How I read the result
With the preview off, slips per attempt rose roughly 2.5-fold and Undos bought with brass increased from 0.30 to 2.44 per bot. Reaching level 13 fell by 1.4 percentage points, with an interval from −2.9 to +0.1 and p = 0.07. This does not establish equivalence: both a small decline and a near-zero difference fit the result.
Turning the preview off makes the bot give slip risk less weight when choosing a move. It still calculates balance from the game code. This test measures that change in the bot’s decision model. It does not fully reproduce how a person reasons without a preview.
I kept the preview on by default. Turning it off increased slips and Undo demand, while the result for reaching level 13 was uncertain. More booster use alone was not a reason to choose it. Keeping the preview also supports the lesson I want to teach. I have not measured its effect on real players.
Additional checks, sample planning and implementation
In a paired check added after the plan, I ran the same 10,000 bot scenarios under both settings. The difference in reaching level 13 was −1.6 percentage points (95% interval: −2.7 to −0.6), suggesting a small effect within the model. Uncertainty in the main test and the limits of representing human behaviour remain.
I also rehearsed sample-size planning: using that effect, a baseline near 82%, a two-sided α = 0.05 test and 80% power gives roughly 8,800 players per group, or 34,600 if the effect halves. These are simulation-based scenarios. I cannot currently access that many players, so I am not planning a live experiment at this scale. If that becomes possible, the calculation would need real pilot data and a defined smallest worthwhile effect.
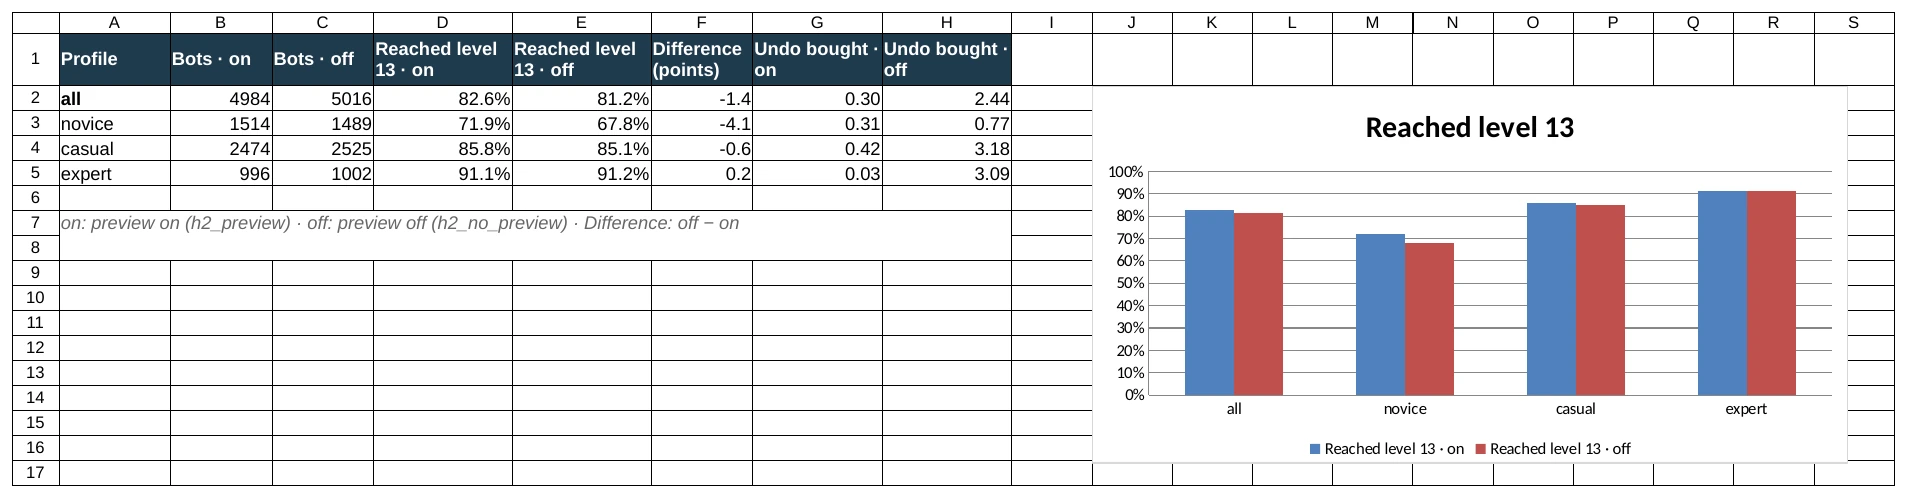
An exploratory novice breakdown fell from 71.9% to 67.8% reaching level 13 (p = 0.01). This comparison was not planned beforehand, so I treat it as exploratory. I will define profile breakdowns and comparisons before running a new experiment.
Bots read remote settings through the same Tuning code as the game. Disabling the preview changes the weight of slip risk in the move score. Balance calculations continue. During the study, I fixed a threshold-bonus bug that could enable slipping in the first five levels and added a regression check.
PlayerBot.cs and BotAbTest.cs · the preview setting and group assignment
// Remote Config can switch the preview off (preview_enabled); then the bot can't look at it either.bool watching = Tuning.PreviewEnabled && rng.NextDouble() < p.PreviewAttention;
// Firebase A/B Testing splits real players on its own servers. Bots get the same kind of split:// a bucket from a hash of the experiment name and the player id, so a player never changes group.publicstaticint Bucket(string experiment, int playerId)
{
uint h = 2166136261;
foreach (char c in experiment + ":" + playerId) { h ^= c; h *= 16777619; }
return (int)(h % 100);
}
Plan and the analysis I ran
I wrote the initial plan on 8 October, before the run. Assignment uses FNV-1a on h2:<bot ID>, modulo 100: values 0–49 go to preview on, 50–99 to preview off. The simulation uses seed 20261008, the current 84 levels, a 30% novice / 50% casual / 20% expert mix and at most two sessions per level. The original plan proposed bootstrap for means too. In the analysis I used Welch tests for means, while keeping the 2,000 bot-level bootstrap repetitions for per-attempt ratios. I report that change with the result.
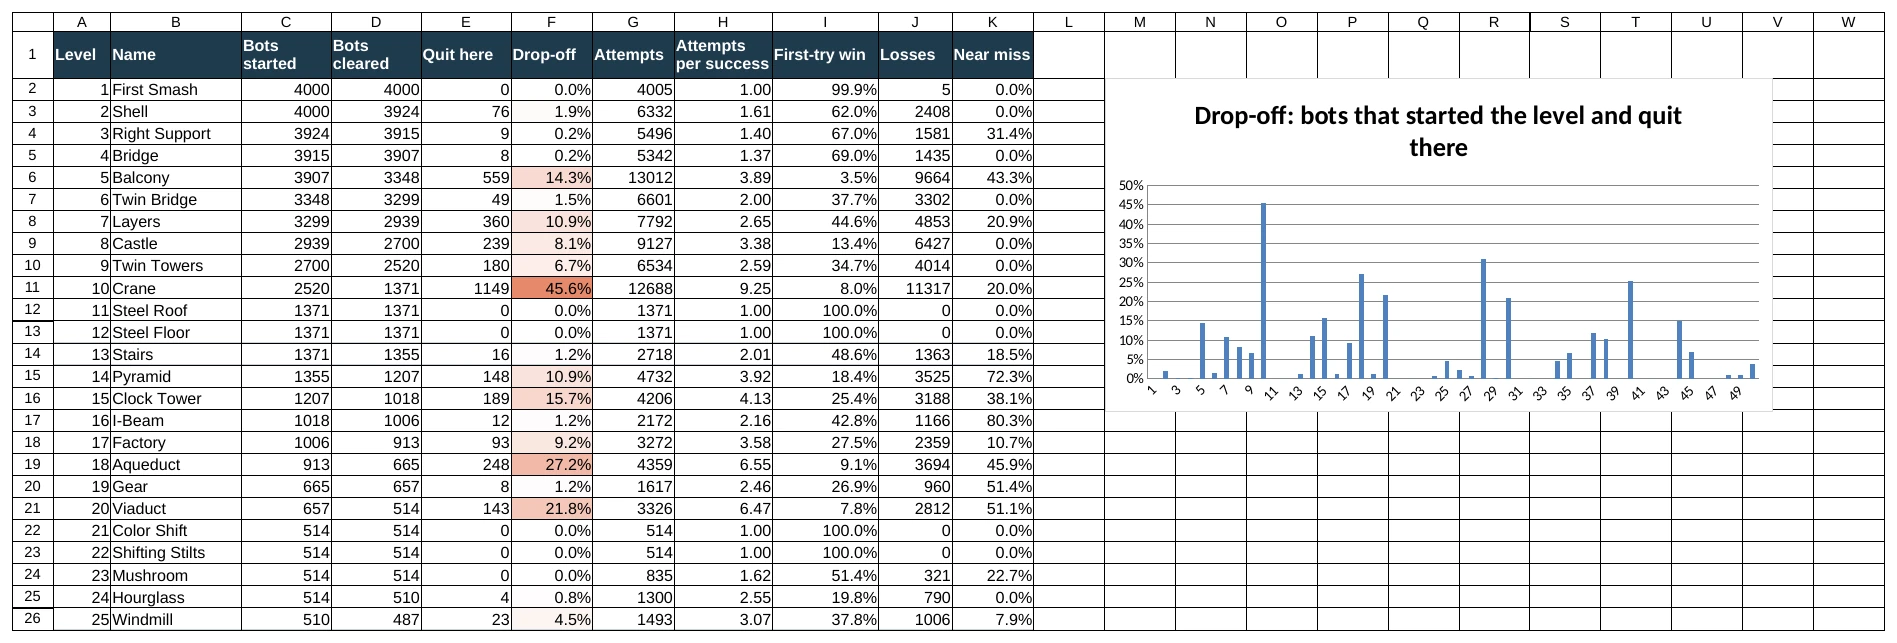
SQL and Excel
In the preview A/B test, 10,000 bots played 402,495 attempts. I put this data into three simple tables and asked questions with SQL. The queries run in SQLite.
players: one bot per row: its group, profile, how many levels it cleared, the level where it quit, slips, Undo bought with brass, and brass earned and spent.
attempts: one attempt per row: the level, the attempt number, whether it was won, slips and Undo uses.
levels: each level’s exhibition and band. Bands are stored as tutorial, easy, medium and wall.
1. What changes when the preview is turned off?
SQL · A/B test data
-- Önizleme açık ve kapalı gruplar nasıl karşılaştırılıyor?SELECT ab_group,
COUNT(*) AS bots,
ROUND(100.0 * SUM(CASEWHEN levels_cleared >= 12THEN1ELSE0END) / COUNT(*), 1) AS reached_13_pct,
ROUND(1.0 * SUM(slips) / SUM(attempts), 3) AS slips_per_attempt,
ROUND(AVG(undo_bought), 2) AS undo_bought_avg
FROM players
GROUPBY ab_group
ORDERBY ab_group DESC;
ab_group
bots
reached_13_pct
slips_per_attempt
undo_bought_avg
h2_preview
4984
82.6
0.103
0.3
h2_no_preview
5016
81.2
0.261
2.44
What the query does: It splits the players table into the two groups: preview on (h2_preview) and off (h2_no_preview). For each group it calculates the number of bots, the share that reached level 13, slips per attempt and the average Undo bought with brass. CASE WHEN counts a bot that cleared 12 or more levels as 1 and any other bot as 0.
What I found: With the preview off, slips rise about 2.5-fold and Undos bought with brass go from 0.30 to 2.44 per bot. Reaching level 13 falls from 82.6% to 81.2%, a 1.4-point difference. The statistical check in the A/B section leaves that difference uncertain.
2. On what kind of level do bots quit?
SQL · A/B test data
-- Botlar oyunu hangi tür level'da bırakıyor? (önizleme açık grup)SELECT l.band,
COUNT(*) AS bots_quit
FROM players p
JOIN levels l ON l.level = p.stopped_at_level
WHERE p.ab_group = 'h2_preview'AND p.finished = 0GROUPBY l.band
ORDERBY bots_quit DESC;
band
bots_quit
wall
3212
medium
963
easy
114
tutorial
5
What the query does: From the preview-on group, it takes the bots that did not finish. The JOIN finds the level where each bot quit in the levels table and brings its band. Then it counts the bots that quit in each band.
What I found: Of the 4,294 bots that stopped, 3,212 (75%) stopped at a wall. Only 11 of the 84 levels are walls. Very few stopped at easy levels. In this model, the bottlenecks fall mostly where I planned the harder checkpoints.
3. How much brass does a bot earn, and how much does it spend?
SQL · A/B test data
-- Bir bot ortalama ne kadar pirinç kazanıyor, ne kadar harcıyor? (önizleme açık grup)SELECT bot_profile,
COUNT(*) AS bots,
ROUND(AVG(brass_earned)) AS earned_avg,
ROUND(AVG(brass_spent)) AS spent_avg
FROM players
WHERE ab_group = 'h2_preview'GROUPBY bot_profile
ORDERBY earned_avg;
bot_profile
bots
earned_avg
spent_avg
novice
1514
964.0
12.0
casual
2474
1798.0
17.0
expert
996
2237.0
1.0
What the query does: It splits the preview-on bots by profile and averages the brass earned and spent.
What I found: Casual bots earn an average of 1,798 brass and spend 17. Experienced bots earn 2,237 and spend 1. Brass builds up faster than it is spent in this scenario. That gives me a reward and booster-use question to investigate. These bots buy Undo only and do not use Clamp or Scale.
Excel workbook
I also prepared the same data in Excel. Each row on the Players sheet is a bot, and the other sheets are calculated from it. COUNTIFS counts the rows that meet the conditions, and AVERAGEIFS averages them. The AB test sheet compares the two groups for all bots and for each profile: among novice bots, reaching level 13 falls from 71.9% to 67.8%. The Funnel sheet shows how many bots start each level, and the Economy sheet shows brass by exhibition.
Excel · two formulas
Funnel!D2 · bots starting a level = bots that cleared the level before it (preview on)
=COUNTIFS(Players!B:B, "h2_preview", Players!D:D, ">="&(A2-1))
AB test!G3 · average Undo bought with brass for the profile in A3 (preview on)
=AVERAGEIFS(Players!I:I, Players!B:B, "h2_preview", Players!C:C, A3)
The AB test sheet in Excel. The gap is largest among novice bots. Select the image to enlarge it.
All tables in this section come from bot data, not from real players.
Analytics and product decisions
I added Firebase Analytics, Crashlytics and Remote Config so I can investigate level and economy questions when player data becomes available. The results on this page come from local bot tests.
From data to a decision
Signal to investigate
Data to inspect
A possible response
Exits cluster after the first slip
arm_slip, level_quit, t_since_last_slip
Review slip feedback and the follow-up hint
Hidden pieces are repeatedly hung at the far end
piece_hang, arm_slip
Strengthen the near-centre weighing lesson in the layout
Booster demand spikes on one level
booster_use, level_complete
Review its band, information demands and safe orders
Shop opens do not lead to completed purchases
shop_open, iap_*
Separate offer timing and value from technical failures
Exits increase at low frame rates
Level events, FPS and Crashlytics
Compare device groups on the same level and investigate performance
The table connects the events I record to questions I want to investigate. Events appearing together do not prove that one caused the other. I would use observation and a suitable experiment to check the explanation.
Event list and measurement details
There are more than 30 events. They are also written locally, so I can inspect them in the editor and tests without Firebase. The main events for level design and economy are:
Event
When
Parameters
The question it answers
level_start
A level opens
level, attempt number, replay or not, band, brass
How far do players get?
piece_hang
A piece is hung
weight, hidden or not, hook, arm, torque after the move
Where do players hang pieces?
arm_slip
An arm slips
arm, torque at the slip, pieces dropped
Where and when do slips happen?
booster_use
A booster is used
type, slips so far, source
At what moment do players reach for help?
level_complete
A level is cleared
time, slips, boosters, hangs/removes/moves, brass earned, frame rate
How hard is a level and how long does it take?
level_quit
A level is abandoned
time, slips, remaining imbalance, time since the last slip, reason
Do players quit right after a slip?
shop_open iap_* ad_rewarded_*
Shop and ads
context, product, price, level
Where does the purchase and ad funnel break?
config_applied
Remote settings applied
experiment group, source of the settings
Which player played with which settings?
The custom level_quit event excludes exits without a move and backgrounding during ad or purchase flows. I will also inspect starts with no interaction, rather than building the new-player funnel from level_quit alone.
Time since the last slip and frame rate add context to exits. Performance data can reveal a possible issue, but does not explain the cause by itself.
AnalyticsService.cs · when a level is abandoned
privatevoid Quit(string reason)
{
var s = Session.State; var d = Session.Current;
if (s == null || d == null) return;
if (s.HangCommands == 0 && s.RemoveCommands == 0 && s.MoveCommands == 0) return;
Analytics.Track("level_quit",
("level_id", d.Id), ("duration", Round(Session.LevelSeconds)), ("slips", s.SlipCount),
("abs_tau_state", Math.Abs(s.Torque(s.Root))), ("hung", s.HungCount),
("t_since_last_slip", _lastSlipAt < 0 ? -1f : Round(Session.LevelSeconds - _lastSlipAt)), ("reason", reason), Fps(), SlowShare(), FpsTarget());
}
Managing experiment settings
Remote Config controls preview, reveal delay, slip-threshold bonus, review prompts, frame rate and experiment group. Prices and levels remain fixed. Values are clamped to safe ranges, and config_applied records which settings took effect.
Setting limits, consent and test devices
Setting
Range
preview_enabled
On / off
reveal_delay_s
0.2–1.2 seconds
slip_threshold_bonus
0–4
review_prompt_enabled
On / off
frame_rate_mode
Auto / 60 / 30
ab_group
Experiment group label
Tuning.cs · the limits of each setting, shortened
publicstaticbool PreviewEnabled => GetBool(KeyPreviewEnabled);
publicstaticfloat RevealDelaySeconds => Clamp(GetFloat(KeyRevealDelay), 0.2f, 1.2f);
publicstaticint SlipThresholdBonus => (int)Clamp(GetInt(KeySlipThresholdBonus), 0, 4);
publicstaticbool ReviewPromptEnabled => GetBool(KeyReviewPromptEnabled);
// The bonus only raises a threshold that is already on: a level without slipping stays without it.publicstaticint SlipThresholdFor(int levelThreshold) => levelThreshold > 0 ? levelThreshold + SlipThresholdBonus : 0;
Fetched settings are cached on the device. When a cache exists, new settings apply on the next launch, keeping rules stable within a session.
Data permissions start disabled. A consent form is used where required, and permissions are passed to Firebase and ad requests. iOS tracking permission is handled after the consent form and before loading ads.
Analytics is disabled on Test Lab devices. Crashlytics reports include a test-scenario label. Bots do not connect to Firebase. Their results stay in local files, separate from any future player records.
Economy and monetisation
Boosters affect difficulty without placing pieces on the correct hooks. Undo reduces the cost of a slip, Scale reveals a hidden weight and Clamp temporarily holds an arm steady. I consider these effects when designing both levels and the economy.
Earning and spending
Booster
What it does
Price
Unlocks at
Undo
Brings back the pieces that just slipped.
40 brass
Level 8
Clamp
Keeps one arm from slipping for 3 placements.
80 brass
Level 8
Scale
Shows the weight of a hidden piece.
60 brass
Level 37 (hidden pieces arrive with Glass)
The first completion awards 20 brass, plus 10 for a slip-free finish and 5 for using no boosters. Completing an exhibition for the first time adds 150. Replaying does not award these currency rewards again. New players start with 3 Undos, 3 Clamps and 2 Scales, available at their unlock levels.
Slip-free and booster-free are separate conditions. A player using Clamp without slipping can earn the extra 10, but not the extra 5. Using Undo after a slip earns neither. Gallery lights record a slip-free finish, rather than unassisted mastery.
Purchases and ads
Pack
Contents
Reference price
Brass per $1
Studio Starter
5 Clamps, 5 Undos, 3 Scales and 300 brass · one purchase
$2.99
—
Small brass pack
400
$1.99
≈ 201
Medium brass pack
1,100
$4.99
≈ 220
Large brass pack · best unit value
2,500
$9.99
≈ 250
These are reference prices in the project and have not been validated against payment behaviour. The starter pack appears from the first launch. Since Scale unlocks on level 37, I am reviewing the value of that part of the offer for a new player.
Rewarded ads: Players may choose to watch for one Scale, up to five times per day. There are no forced ads.
Review prompt: After completing an exhibition, at most three times and at least 30 days apart.
Purchase handling: Transaction IDs prevent duplicate grants, with a restoration flow in place.
The 4,000 sequential bots earn rewards and spend on Undo. They make no purchases and use neither Clamp nor Scale. This table describes that scenario. It is neither a lower bound on real spending nor a measure of human play time.
End of exhibition
Median brass
Median time
Level 12 · Paper
570
8 min
Level 24 · Wood
1,125
21 min
Level 36 · Copper
1,695
31 min
Level 48 · Glass
2,260
39 min
Level 60 · Felt
2,835
51 min
Level 72 · Stone
3,390
60 min
Level 84 · Neon
3,950
71 min
Medians are calculated among bots that finished the relevant exhibition, rather than the entire starting cohort. They used Undo 6,451 times, with 1,170 paid from brass. The median finishing wallet was 3,950, enough for about 98 Undos.
Brass accumulates quickly in this scenario. I want to check whether rewards are too generous for the modelled Undo demand, then vary booster use and starting stock. The bots make no real-money purchases, so this does not estimate pack demand or revenue.
Technical details
The game, editor, solver and bots share the same rule code. A balance calculation therefore gives the same result in each. I set up the code this way to make changes easier to check.
Balance rules and solver limits
Instead of a physics engine, I use integer torque. A sub-arm contributes its total weight to the parent. Wind adds fixed torque. A slip requires exceeding the threshold and making the previous state worse, so helpful moves on initially tilted levels remain safe.
TorqueEngine.cs · torque and slipping
publicstaticint Torque(Arm arm)
{
int t = arm.Wind;
foreach (var kv in arm.Slots)
{
var s = kv.Value;
int w = s.IsPiece ? s.Piece.Weight : TotalWeight(s.Arm);
t += w * kv.Key;
}
return t;
}
publicstaticbool WouldSlip(int threshold, int torqueBefore, int torqueAfter)
{
if (threshold <= 0) returnfalse;
int before = System.Math.Abs(torqueBefore);
int after = System.Math.Abs(torqueAfter);
return after > threshold && after > before;
}
The solver places heavier pieces first and prunes branches that remaining weights cannot balance. Above 5,040 orders per solution or 400,000 overall, it samples 200 orders per solution. Above 200 solutions, it selects 200 for estimating R. Sampling is reported. An exhausted placement search rejects the candidate.
Solver.cs · cutting hopeless branches early
void PieceDfs(List<Arm> arms, Dictionary<Arm, int> lever, int i, int placed)
{
    if (result.Solutions.Count >= maxSolutions || ++nodes > DfsNodeBudget) { truncated = true; return; }
    if (placed + (n - i) < target) return;
    foreach (var a in arms)
    {
        int t = Math.Abs(TorqueEngine.Torque(a));
        if (t > suffixWeight[i] * lever[a]) return;
    }
Automated checks and frame rate
The Unity-independent rule library has 139 automated tests covering rules, solver, level files, economy, shop, remote settings and translations. Bot tests can run without opening Unity.
After 1.5 seconds without activity, the game runs at 30 updates per second and renders every third update, about 10 renders per second. Touch restores full speed. Low memory or two consecutive slow performance windows can select 30 fps mode. The aim is to reduce unnecessary work. I have not measured a battery-life improvement.
FramePacing.cs · the starting frame rate and the slowness check
I kept weight and distance visible in the interface. Weights are printed on pieces. Hidden pieces have a “?” and dashed outline, while locked hooks have a lock symbol. A red arm and a brief visual response show slip risk. I still want to check how clearly players read these cues.
I modelled the brass coin in Blender and designed the interface and icons in Figma.
Paper, ink and five colours
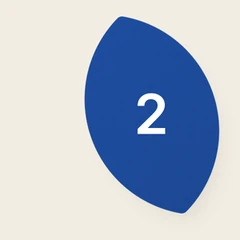
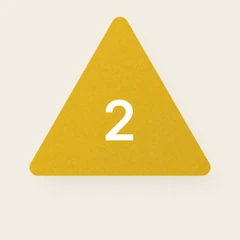
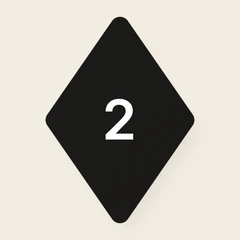
I used flat colours, no outlines, a light paper grain and soft shadows from the top left. Strings, text and hooks are ink black on cream paper. Pieces come in red, cobalt, yellow, black and white. I drew the shape images in white and let the game colour them. One image set can then cover six shapes in five colours.
Circle
Leaf
Triangle
Diamond
Drop
Star
The six shapes in the game’s colours. The piece and shadow images are the game’s files. I added the numbers with the game’s placement and colour rules.
Paper #F3EDE2 Background
Ink #1C1B1A String, text, black piece
Brass #B8944A Arm, coin
Red #D7301F Piece, slip warning
Cobalt #1F4FA3 Piece
Yellow #E9B824 Piece
White #FAF7F0 Piece
Where does the weight number go?
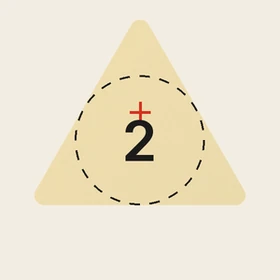
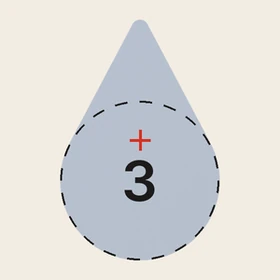
Players read the weight on every move, but the image centre does not suit every shape. The triangle is widest at the bottom, and the drop’s body sits low. I calculated the largest circle inside each shape and placed the number at its centre. The number grows with weight but stays inside that circle. It is white on coloured pieces and ink on white ones. Yellow uses full white, where the contrast is lowest.
The dashed circle is the largest circle that fits inside the shape. The number goes at its centre. The red cross is the centre of the shape’s bounding box.
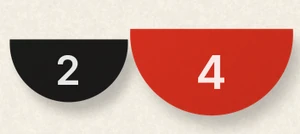
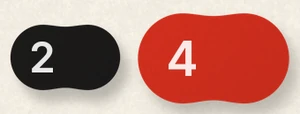
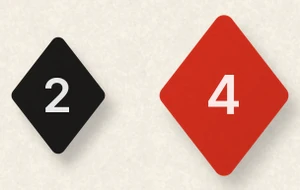
The first set also had a crescent. Its thin body couldn’t hold the number, which spilled over the edge. I tried a half circle, a bean, a diamond and a hexagon side by side and chose the diamond: it hangs from its top corner and the number sits right in its middle.
CrescentThe number doesn’t fit
Half circle
Bean
DiamondChosen
Hexagon
The crescent and the four shapes I tried in its place.
Seven rooms, seven materials
The arm material changes with each exhibition: brass, wood, copper, glass, felt, stone and neon. Wood has wavy grain, stone has speckles, glass has a bright line across the top and neon has a white core. I used 9-slice sprites so only the middle stretches. The rounded ends keep their shape. Each room’s paper background also takes a slight tint from its material.
Paper
Wood
Copper
Glass
Felt
Stone
Neon
Icons, the brass coin and the app icon
I designed the icons in Figma on a 24-unit grid with 2-unit strokes. The same icon can be white on a dark button or ink on a light background. I modelled the brass coin in Blender. For the app icon, I used a brass arm with a red and a blue piece.
Scale
Clamp
Undo
Gallery
Shop
Settings
Locked
Ad
Lowest
Side by side
Apart
Arm
The first three are the boosters’ icons. The last four belong to rule cards.
Brass coinBlender
App icon
Gallery and catalogue
The hanging structure stays in the gallery after completion. Slip-free finishes contribute to lighting the room. Brass can be spent, but the structure remains. I wanted the gallery to leave a visible reason to replay a level.
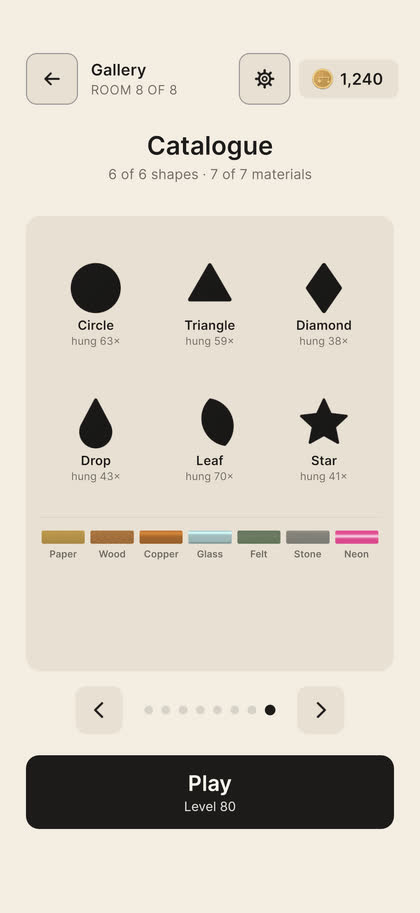
The catalogue shows shapes hung and materials unlocked. I added events for gallery time and rooms visited. When player data becomes available, I can use these to examine interest in the gallery. Whether it brings players back needs a separate hypothesis and test.
Menus, hints and cards support 10 languages. Numbers and puzzle relationships stay the same. My checks also include long translations on small screens and whether players notice cues beyond colour.
Next steps
I need to recruit real players for playtests to observe how they learn the relationship between weight and distance, discover moving and removing pieces, and react to the first slip.
In Mozaik Blast, you clear groups of matching tiles to complete a ceramic pattern. Clearing the board is not the goal: a target cell is painted when the colour you clear matches its required colour. Finding the largest group is only part of the decision. Its position and the board it leaves behind matter too.
I took inspiration from İznik ceramics. I wanted each level to reveal a motif as you clear groups. The pattern gives you a visible way to follow your progress.
My work on the project
Level design: I designed all 100 levels across four chapters using the level editor I built in Unity, working on patterns, colour pools, obstacles and move budgets together. I planned introductions to new rules and easier levels after difficult ones.
Product design: I developed the tutorial flow, lives and gold-leaf economy, continue offers and analytics events. I defined limits for remote settings and when updates take effect.
Implementation and visual design: I implemented the rules in Unity using C#, and made tile models in Blender. Each colour also has a distinct flower symbol to help distinguish tiles.
How I build a level
I start with the decision I want the player to make and where the level belongs in the chapter. Then I set its pattern, obstacles, colours and move budget in my editor. I play the draft, test it with bots and make changes. Before saving, I check the lesson and the neighbouring levels. Completion rate is one part of that decision.
Where the results come from
I could not access large-scale player testing, so I used bots with different ways of choosing moves. I report their assumptions with the results and compare designs under the same conditions. These are bot measurements. I have not yet checked their findings with real players.
Scope
Tools
100 levels · 4 chapters · Android and iOS
Unity 6 · C# · Figma · Blender
Level editor, bot simulation and CSV reports
Separate Unity editor · reproducible tests
Analytics, remote settings, ads and purchase systems
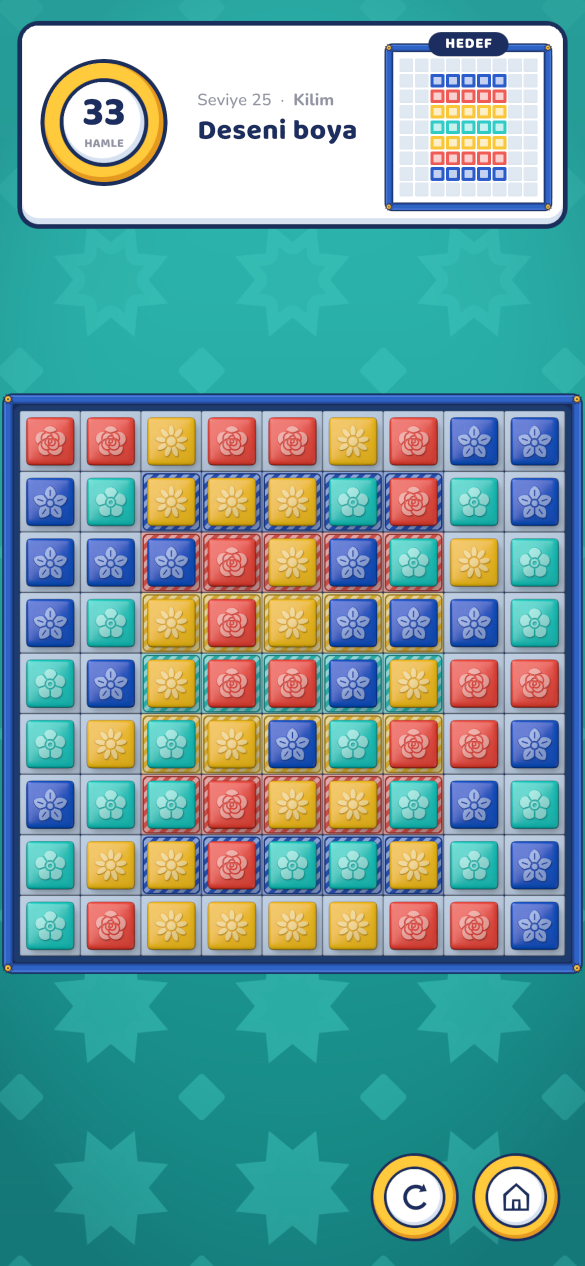
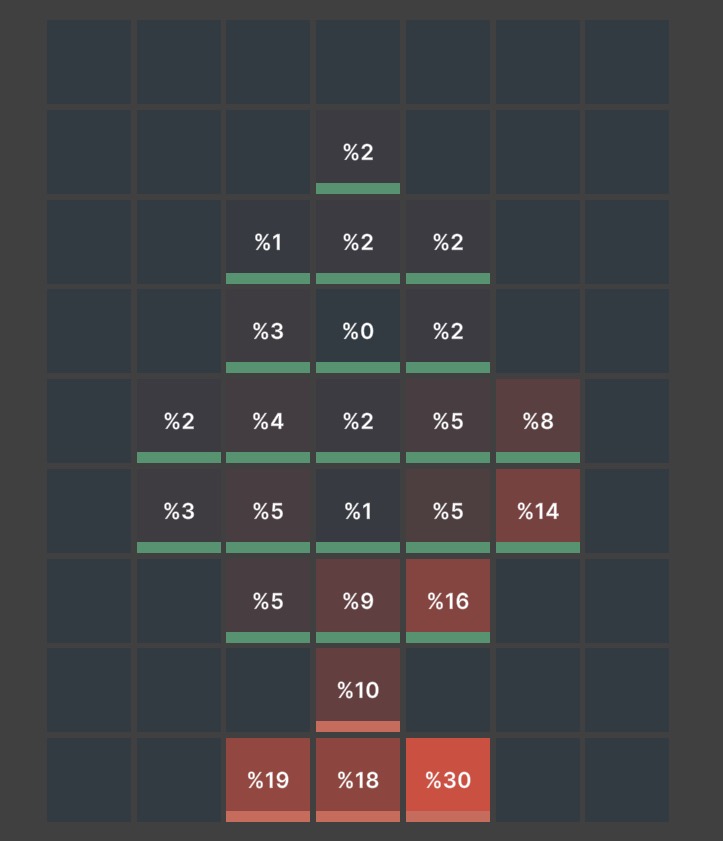
Level 25 · Kilim. The target pattern, move budget and board are visible together.
What happens in one move?
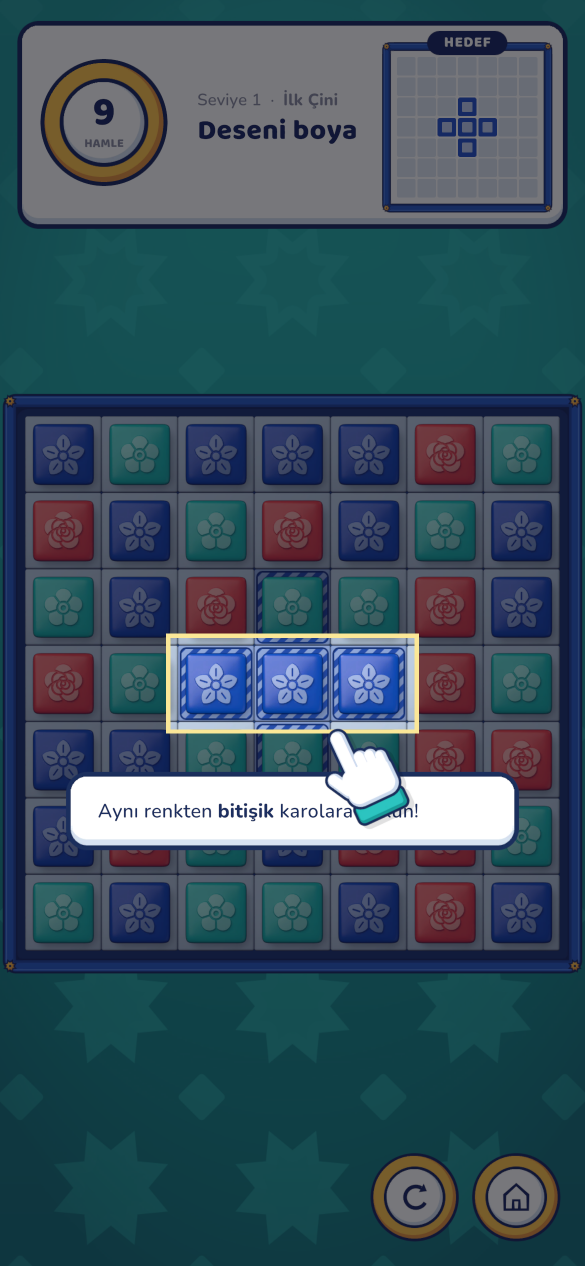
Choose a group: Tap at least two matching tiles connected horizontally or vertically. Diagonal neighbours do not count, and invalid taps do not spend a move.
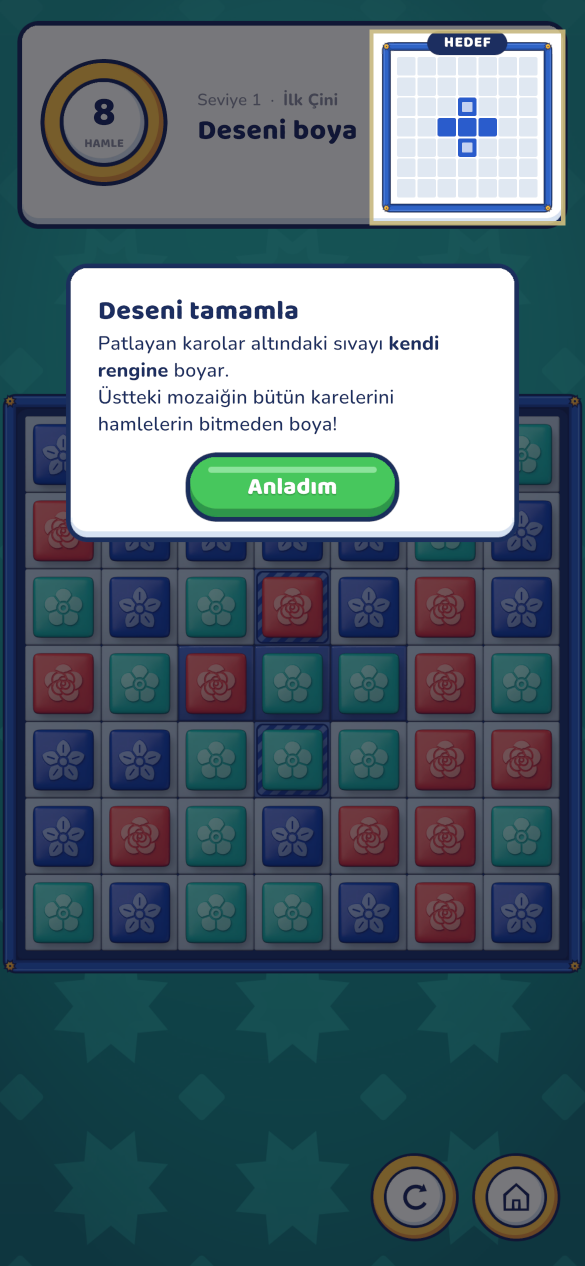
Paint the pattern: A cleared tile paints its cell if its colour matches the target there. Targets have borders and hatching on the board, as well as a small pattern preview above it.
Read the new board: Tiles fall and new ones fill the gaps. Large groups can leave a special tool at the tapped position.
Finish the pattern: Paint every target cell to complete the level. Running out of moves opens the choice to continue or end the attempt.
Completed target cells are protected in all 100 current levels. Later blasts of the wrong colour do not erase that progress, so the player can focus on the remaining targets and preparing tools.
What large groups create
Group
Tool
The decision it creates
7–9
Brush: Recolours ordinary tiles in a row or column to its own colour. The group’s shape determines the direction.
Paint a small target now, or change a line to prepare a larger group?
10–12
Bucket: Paints up to 8 unpainted target cells correctly, prioritising its own colour and nearby targets.
Save a tool for targets that are difficult to finish individually.
13+
Seal: Paints targets correctly within a diamond extending two grid steps from its centre.
Where should I tap the group to place the tool near more targets?
Adjacent tools can combine: two Brushes change both a row and a column, two Buckets increase capacity to 24 cells, and two Seals extend the radius to four grid steps. Bringing tools together adds another planning option alongside building large groups.
Game loop and onboarding
On the map, you choose the next pattern, see its preview and move budget, then play the board. A win completes the motif, awards gold leaf and unlocks the next level. The map brings completed mosaics and chapter progress together.
Within each attempt, the loop is read the remaining targets → choose between painting now and preparing a tool → clear a group → check the new layout. New tiles change the problem on each attempt. I keep early levels simple, then add obstacles and tighter budgets that require planning several moves ahead.
The first experience
I highlight the first map node and limit the first tap to a group that paints a target. The goal card follows that move. Tool tips appear when you first create each tool. Obstacle tips appear in their first level. I spread the explanations across the game instead of putting every rule on the opening screen.
The flow exists in the game. Bot completion does not establish that players understand it. Bots bypass the tutorial and already know the rules.
First move: a group that paints a target is highlighted.Next step: the pattern to complete is explained.
Level design
I give each level a purpose: teach a rule, combine earlier ones, encourage tool planning or offer a breather. I then arrange the targets and settings around it. Nearby targets, extra colours, tool reach, obstacles and moves all affect the choices. Scattered targets can make a Bucket valuable. A dense centre gives the Seal more to reach.
The 100 levels are divided into four chapters. Each opens by introducing a new situation with more room to learn. Later levels combine that rule with other demands.
Chapter
Levels
Design focus
Tile Workshop
1–25
Reading patterns and preparing tools. Three colours for the first 8 levels, then four. Kilim closes the chapter by combining the core rules before obstacles arrive.
Excavation
26–50
Single- and double-layer clay. First open access, then paint the target underneath.
Palace
51–75
Cages block falling. Clearing a group also becomes a way to reopen flow. Later levels combine cages and clay.
Garden
76–100
Moss spreads when ignored. Prioritising between painting targets, opening space and stopping growth.
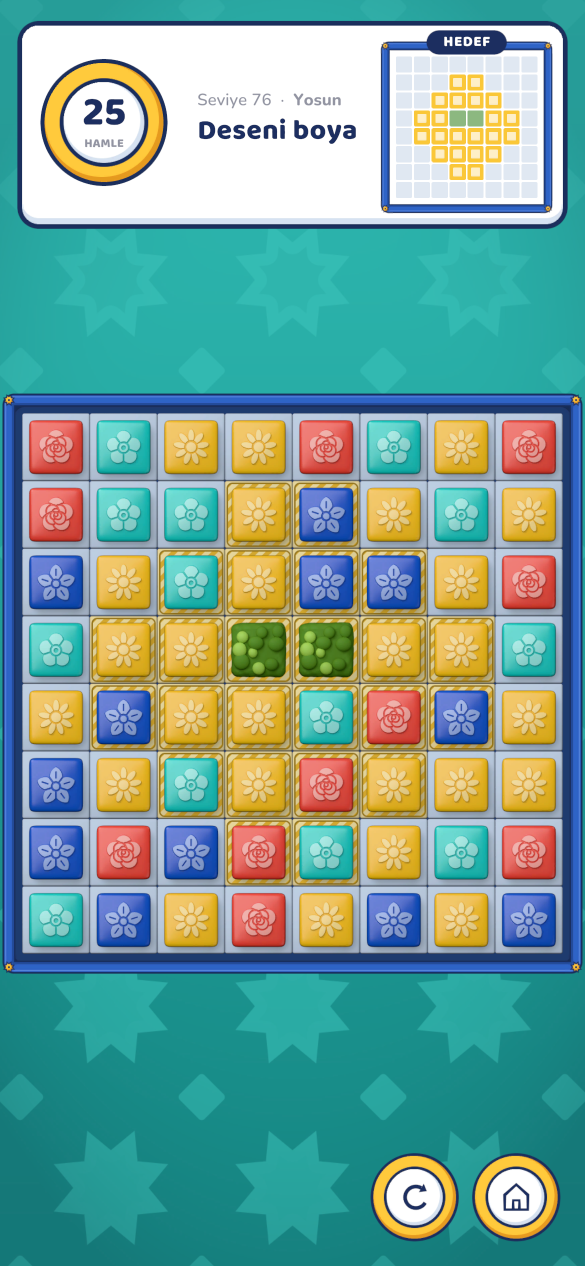
Whether the moss lesson survives the change, alongside the gap between bot profiles.
The target pattern and the playing tiles
The level file holds the target pattern, obstacles, colours and move budget. The game fills and replenishes ordinary tiles, so one designed level can produce many boards. I test it across repeated runs. Seeds help me repeat the measurement, with limits that I explain for each test.
How do obstacles change the decision?
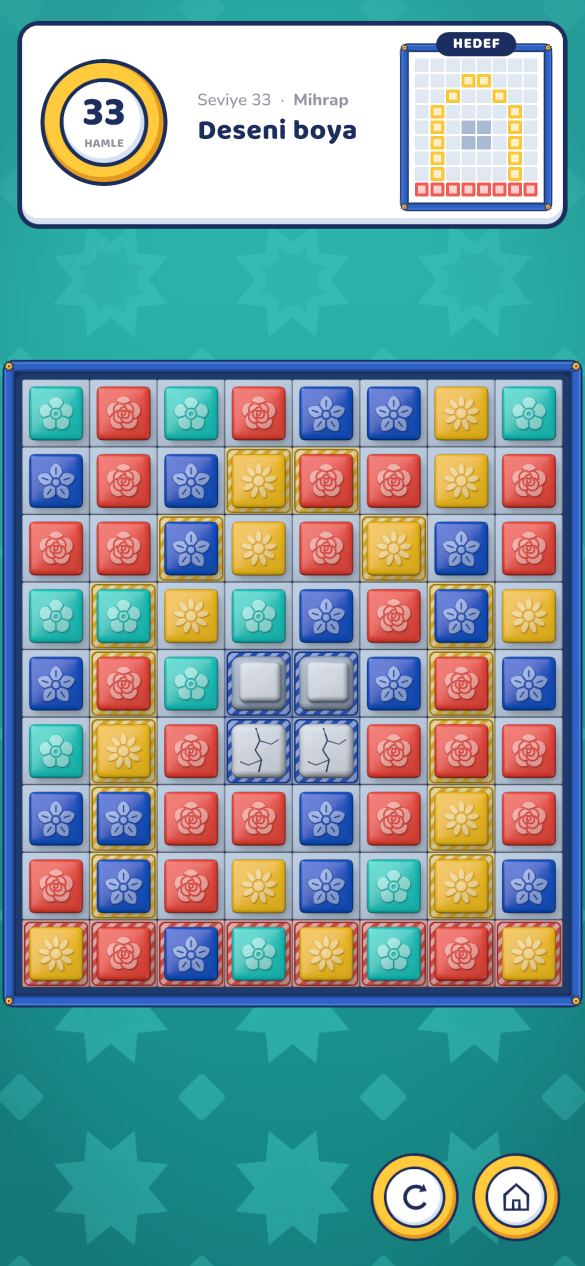
Clay: A covered cell cannot be painted. Clearing an adjacent group removes one layer. Double-layer clay needs two hits. Removing clay does not complete the target underneath: it still needs the correct colour.
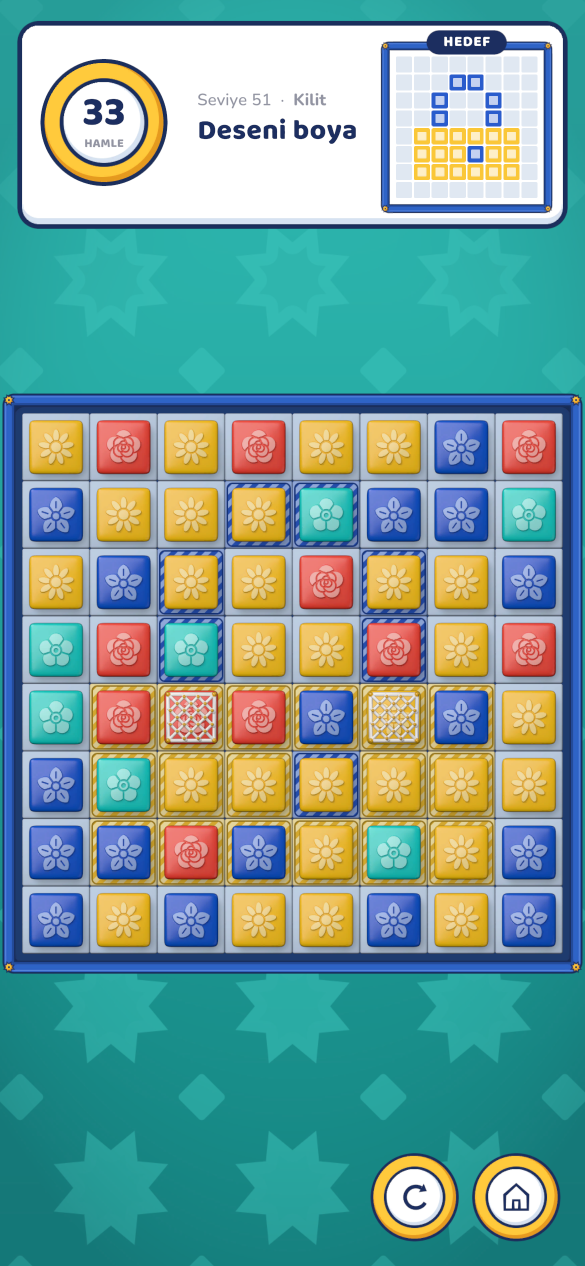
Cage: The tile inside joins matching groups, but the first blast breaks only the cage and leaves the tile in place. A cage also blocks falling until it breaks, so a move can open a route for the next move rather than paint a target immediately.
Moss: It covers cells. If no moss is removed during a continuing move, it spreads onto a neighbouring ordinary tile. Removing moss stops growth on that move. The player must prioritise between painting targets and controlling spread.
25 · Kilim Tools and pattern layout.33 · Mihrap Two clay layers in the centre.51 · Kilit Introducing cages.76 · Yosun Introducing a spreading obstacle.
Difficulty rhythm
I wanted changes in pressure rather than a continuous climb. The variable-choice bot completes Dalga (7) at 41.6%, followed by Güneş (8) at 84.2%. Mahzen (31, 43.1%) is followed by Fener (85.5%), and Kuru Havuz (81, 38.1%) by Lale Tarlası (85.6%). These easier levels provide a break after a demanding one.
The target below is the bot completion target stored in each level file. It is not a measured benchmark for players. A close match shows that the move budget meets the design target under this model.
Design target
Variable-choice bot
Completion rate · a higher value means an easier level
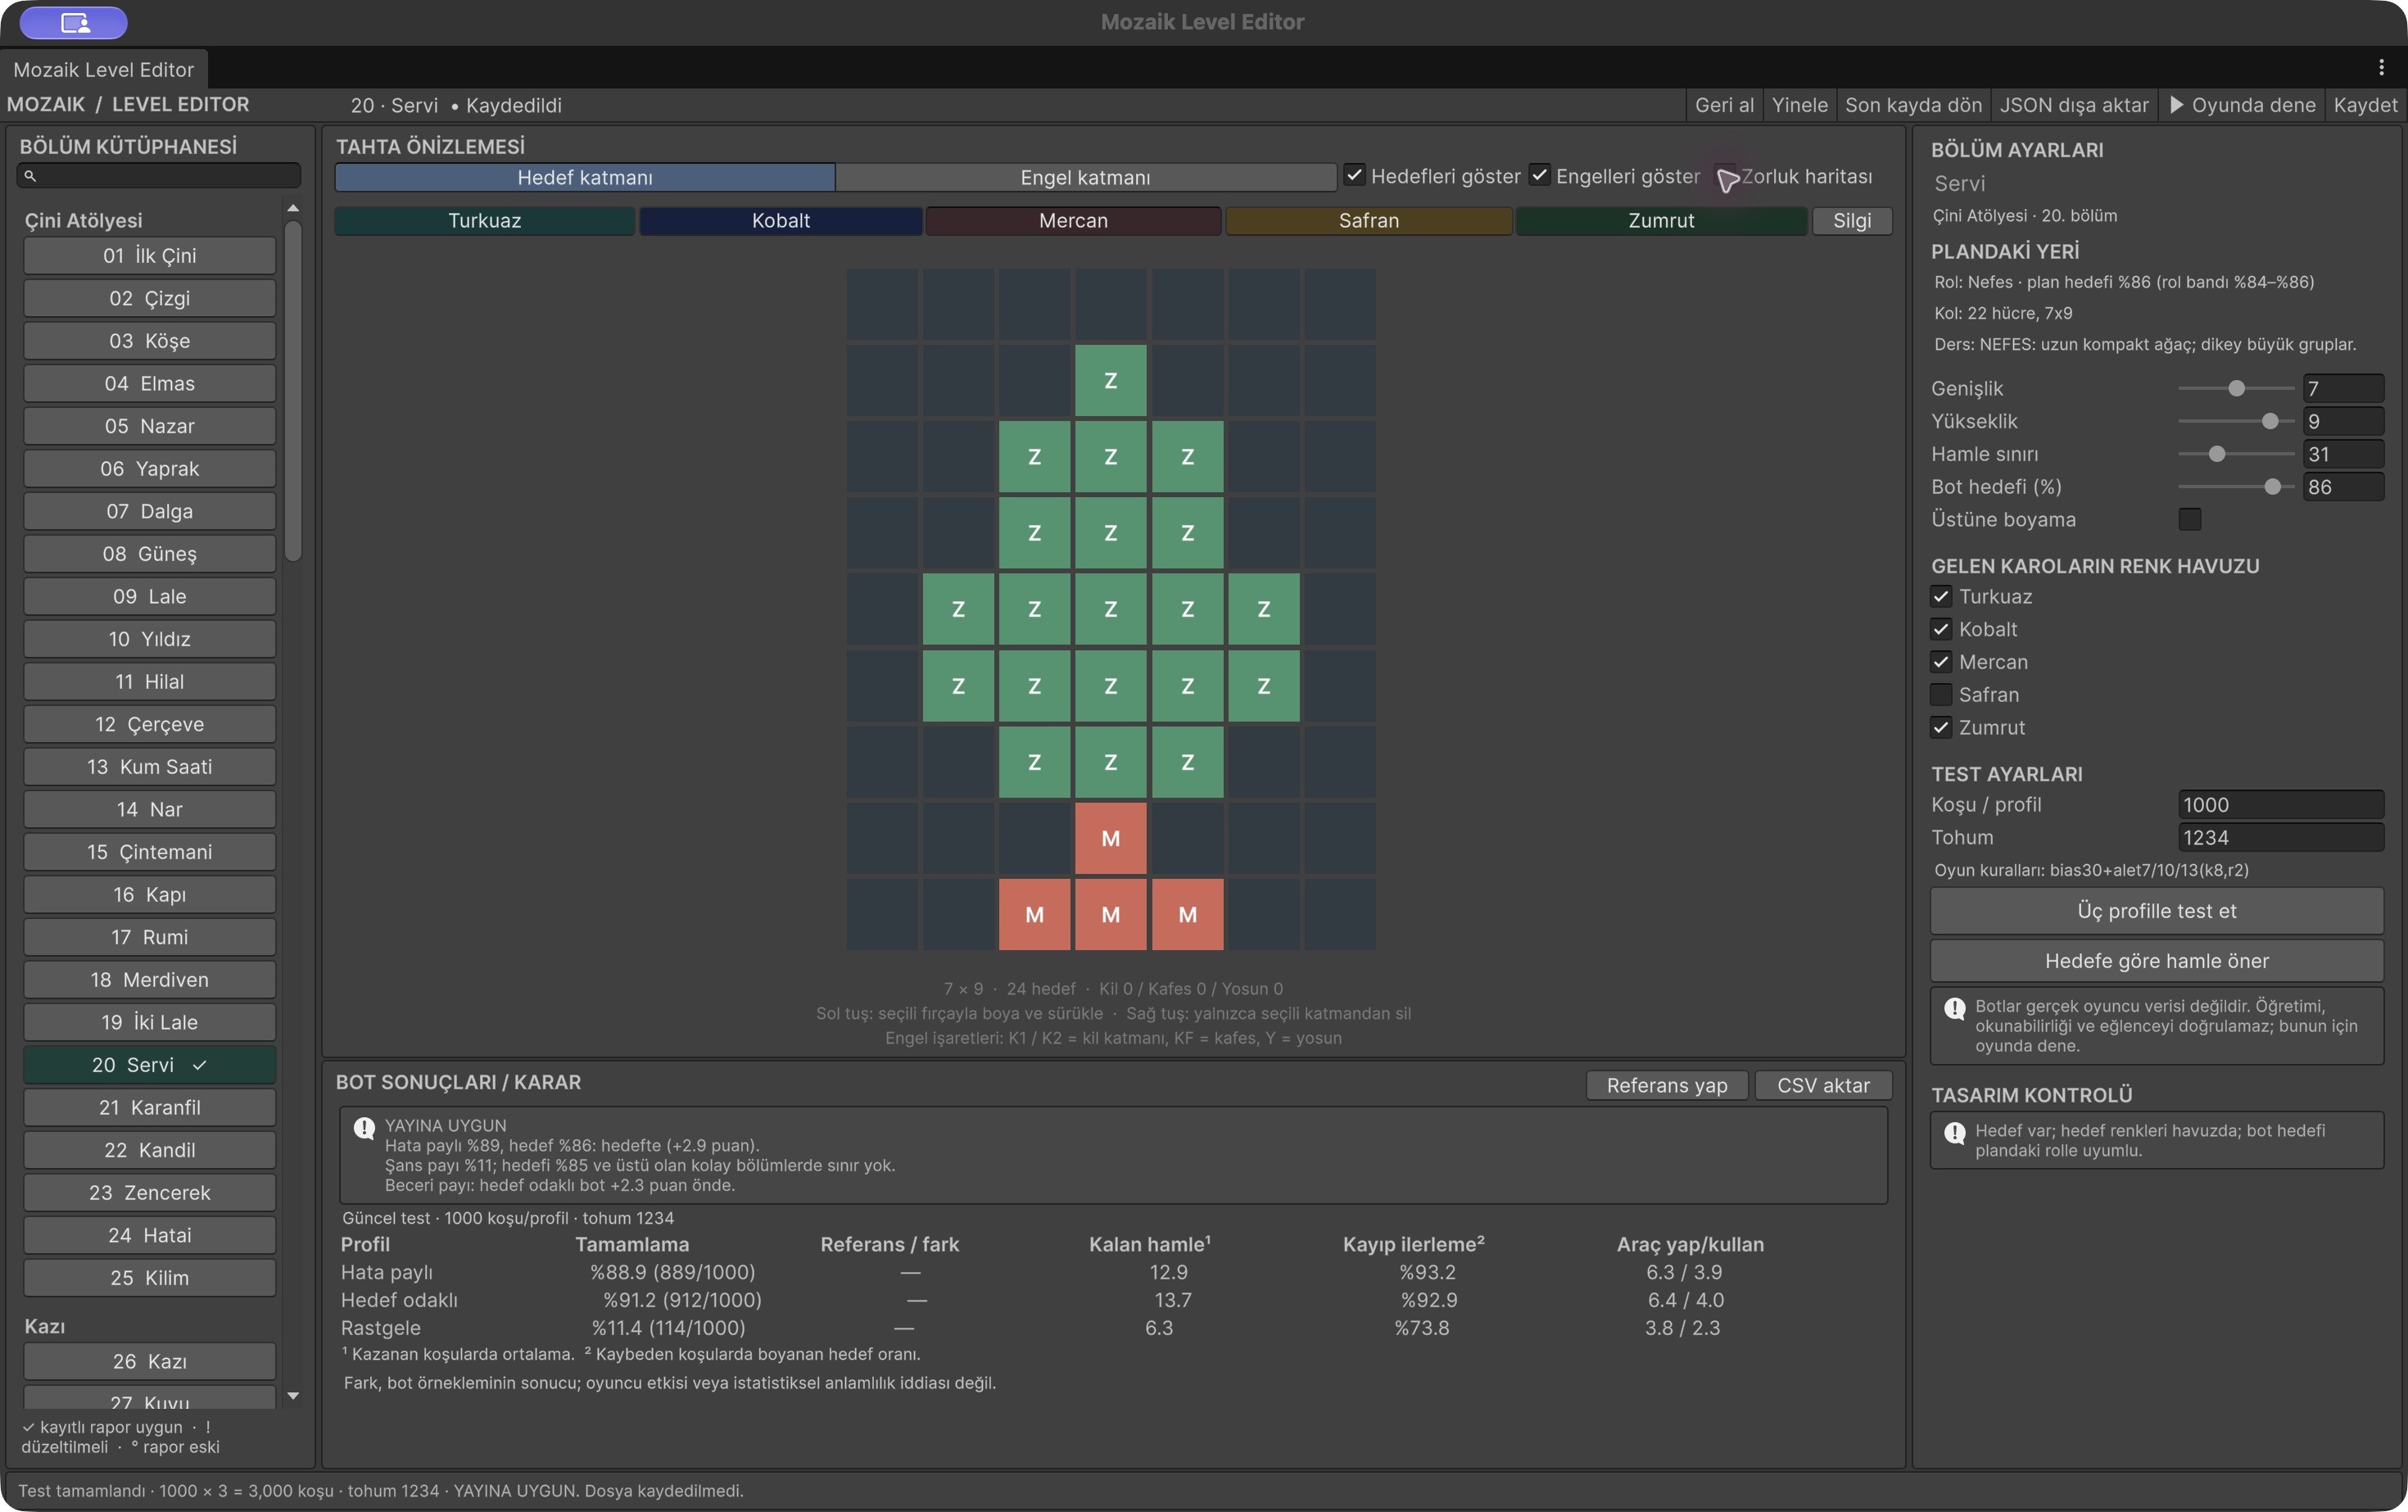
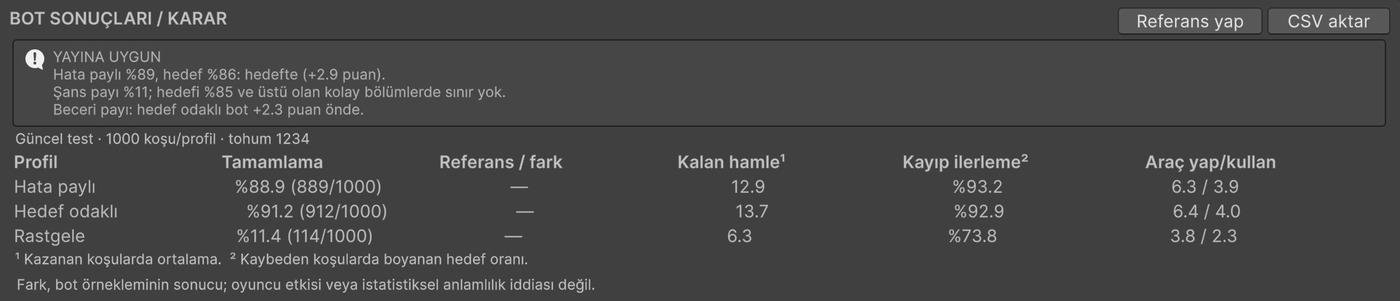
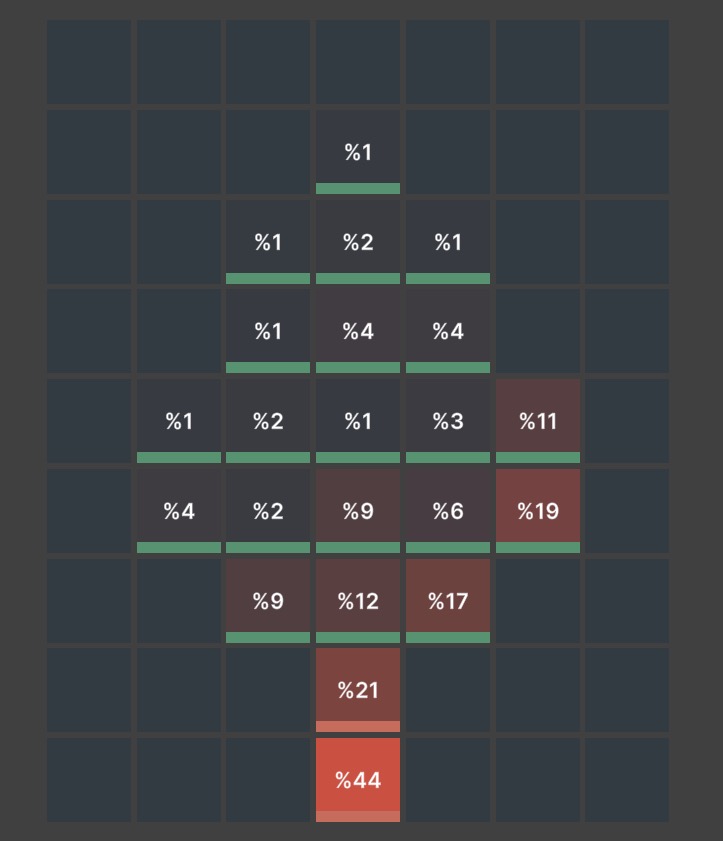
3 October 2026 verification · 1,000 runs per profile per level · 100 levels. The chart and value table show that version. Later Servi and Kelebek edits appear in Changes based on bot tests.Show the values for all 100 levels
Level
Moves
Target
Variable-choice
Goal-focused
Random
1 · İlk Çini
9
92%
94.5%
96.8%
21.5%
2 · Çizgi
9
92%
93.0%
94.9%
24.3%
3 · Köşe
10
90%
92.8%
94.3%
21.9%
4 · Elmas
10
90%
89.1%
93.3%
17.2%
5 · Nazar
15
86%
87.5%
91.4%
5.7%
6 · Yaprak
11
80%
77.4%
84.2%
2.8%
7 · Dalga
8
38%
41.6%
41.7%
1.7%
8 · Güneş
13
86%
84.2%
88.1%
5.7%
9 · Lale
21
78%
74.5%
83.4%
7.7%
10 · Yıldız
21
77%
76.1%
81.1%
2.8%
11 · Hilal
15
76%
74.5%
77.6%
11.2%
12 · Çerçeve
21
74%
77.9%
80.9%
9.6%
13 · Kum Saati
11
40%
40.6%
40.6%
1.0%
14 · Nar
27
86%
85.0%
88.8%
7.1%
15 · Çintemani
23
74%
73.5%
74.8%
5.6%
16 · Kapı
16
73%
75.0%
76.9%
7.5%
17 · Rumi
18
72%
73.1%
75.7%
6.5%
18 · Merdiven
17
72%
71.4%
73.0%
9.0%
19 · İki Lale
17
40%
43.7%
44.3%
0.6%
20 · Servi
27
86%
86.5%
89.1%
10.8%
21 · Karanfil
30
72%
74.0%
78.2%
2.0%
22 · Kandil
24
70%
71.2%
77.7%
1.4%
23 · Zencerek
30
70%
71.0%
74.7%
2.1%
24 · Hatai
28
68%
70.4%
75.1%
1.1%
25 · Kilim
33
60%
60.2%
66.8%
0.2%
26 · Kazı
24
88%
90.7%
92.7%
7.8%
27 · Kuyu
32
82%
80.1%
84.5%
5.5%
28 · Sandık
28
78%
80.5%
82.8%
4.4%
29 · Kale
33
76%
74.6%
81.0%
6.9%
30 · Çift Kat
29
76%
78.3%
82.9%
3.6%
31 · Mahzen
26
40%
43.1%
47.3%
0.5%
32 · Fener
29
86%
85.5%
88.0%
8.3%
33 · Mihrap
33
72%
69.7%
75.6%
2.3%
34 · Çeşme
30
72%
71.5%
78.3%
1.4%
35 · Hamam
35
70%
70.1%
77.4%
1.7%
36 · Köprü
28
70%
71.8%
74.6%
2.2%
37 · Labirent
23
40%
41.5%
44.4%
2.5%
38 · Gül Bahçesi
29
86%
85.0%
87.0%
9.0%
39 · Tavus
30
70%
71.9%
79.0%
1.3%
40 · Tespih
22
68%
69.0%
71.6%
2.4%
41 · Sebil
33
68%
66.7%
72.6%
1.5%
42 · Kervansaray
31
66%
63.6%
70.0%
1.2%
43 · Zindan
22
40%
44.4%
48.2%
0.2%
44 · Nilüfer
34
86%
85.7%
89.3%
10.1%
45 · Minare
35
66%
67.2%
73.0%
0.5%
46 · Kubbe
38
64%
64.9%
72.1%
0.2%
47 · Saray
35
62%
62.2%
67.8%
0.3%
48 · Pusula
27
62%
59.9%
69.3%
1.4%
49 · Hazine Odası
31
60%
61.0%
65.6%
0.4%
50 · Ayasofya
40
56%
55.2%
60.7%
0.4%
51 · Kilit
33
88%
89.7%
90.3%
9.9%
52 · Parmaklık
30
86%
86.6%
90.3%
22.9%
53 · Taş Kapı
24
74%
77.7%
82.4%
8.7%
54 · Taht
36
72%
75.3%
79.4%
2.8%
55 · Harem Penceresi
21
70%
69.4%
71.5%
3.8%
56 · Zincir
15
40%
42.0%
47.8%
0.9%
57 · Gül
29
84%
83.7%
86.3%
8.7%
58 · Topkapı Kapısı
33
70%
68.1%
73.9%
1.6%
59 · Sofa
24
68%
65.0%
71.1%
3.1%
60 · Kaftan
31
68%
69.3%
73.1%
1.3%
61 · Tuğra
21
66%
65.0%
69.3%
2.7%
62 · Hazine Dairesi
22
38%
41.6%
44.7%
0.2%
63 · Lale Bahçesi
33
84%
85.7%
87.8%
8.5%
64 · Çini Paneli
29
66%
65.4%
73.4%
3.1%
65 · Fıskiye
25
64%
61.5%
67.8%
1.3%
66 · Divan
34
62%
66.3%
70.7%
0.6%
67 · Kütüphane
29
62%
64.3%
66.1%
0.7%
68 · Zindan Kapısı
18
38%
40.2%
42.1%
0.6%
69 · Havuz
31
84%
83.8%
84.8%
7.1%
70 · Hünkâr Kasrı
37
60%
62.0%
67.9%
0.5%
71 · Kemer
25
58%
57.9%
62.8%
1.9%
72 · Nişan
33
58%
60.5%
64.9%
1.4%
73 · Mozaik Zemin
31
56%
59.9%
63.4%
1.9%
74 · Alem
20
56%
55.9%
61.9%
1.2%
75 · Topkapı Sarayı
40
52%
51.7%
56.2%
0.2%
76 · Yosun
25
88%
88.2%
90.0%
6.8%
77 · Sarmaşık
25
86%
86.8%
88.5%
15.3%
78 · Çiçek Tarhı
27
74%
75.6%
78.4%
2.0%
79 · Fıskiyeli Havuz
29
72%
72.4%
74.3%
1.2%
80 · Taş Yol
19
70%
68.0%
73.2%
2.5%
81 · Kuru Havuz
11
38%
38.1%
40.4%
1.9%
82 · Lale Tarlası
31
84%
85.6%
87.9%
4.2%
83 · Çardak
30
68%
67.6%
73.0%
1.3%
84 · Kameriye
25
66%
68.2%
71.7%
0.4%
85 · Sera
28
66%
66.0%
69.6%
0.9%
86 · Bostan
28
64%
65.8%
69.6%
0.4%
87 · Çit Labirenti
16
38%
41.0%
40.8%
0.3%
88 · Gülistan
26
84%
82.9%
86.2%
7.3%
89 · Çeşme Başı
23
62%
61.7%
67.9%
0.3%
90 · Kuş Evi
31
60%
60.8%
67.3%
0.0%
91 · Asma
28
60%
61.3%
67.7%
0.1%
92 · Nar Ağacı
31
58%
59.5%
66.4%
0.2%
93 · Harabe
15
38%
38.6%
45.8%
0.3%
94 · Çimen
26
84%
82.6%
87.6%
7.9%
95 · Kuyu Başı
24
56%
56.0%
62.4%
0.7%
96 · Ağaç Evi
35
56%
56.7%
63.4%
0.0%
97 · Kelebek
30
54%
50.0%
62.4%
0.1%
98 · Bahçıvan Kulübesi
35
54%
57.4%
61.2%
0.2%
99 · Gizli Bahçe
38
52%
52.6%
55.5%
0.5%
100 · Cennet Bahçesi
39
50%
50.3%
55.9%
0.0%
Level editor and workflow
I designed all 100 levels in the editor I built in Unity. I use each level’s role and lesson to decide what to change. The library sits on the left, the board in the middle, and the settings and plan on the right. I check a draft with bots, open it in the game without saving and save the chosen design with its report.
The plan is read from a separate design table and does not update automatically when I edit the board. Servi’s older plan note still describes 22 targets. The current board and saved design have 24. I use the current board counter and saved report when checking the final version.
Level 20, Servi’s current pattern. The library is on the left, target and obstacle layers in the middle, and the design plan and settings on the right, with bot results below. Click the image for a larger view.
How I edit a level
Start with the level’s purpose. I open Mozaik Blast → Level Editor in Unity and choose a level from the library. Its role, difficulty lever and intended lesson from the design table are visible alongside it. Before editing, I run the bots and keep the result with “Set reference”.
Edit the pattern and obstacles separately. I paint targets with colour brushes, and clay, double clay, cages and moss on the obstacle layer. Erasing one layer preserves the other. A drag can be undone in one step.
Adjust and measure again. Board size, colours, moves and painted-cell protection are in one panel. The default test runs 1,000 games per profile. If the reference has a different run count or seed, the editor hides the difference column. I also keep the game rules fixed. The move suggestion searches with 300-run tests, then runs the full test. I review the suggestion before choosing it.
Look at the cells behind the rate. The difficulty heatmap shows targets left unpainted in games lost by the variable-choice bot. Percentages use only lost games as their denominator. Colour intensity scales to the hottest value on that map, so I do not compare colour darkness directly across levels.
Try the draft in the game. “Playtest” opens the game scene without changing the level file. I check the goal preview, pattern readability and tool behaviour there. Leaving Play Mode restores the previous lives, gold and progress.
Save the design and report. Saving reruns the bots if the measurement is out of date. The file keeps the run count, seed, rules, date and three profile results. A design or rule change marks the report as stale. I can export levels as JSON and measurements as CSV. Library markers show which reports passed, need attention or are stale.
The simple checks behind my decisions
I read the bot results with five simple checks. The editor calculates all of them. The examples come from Servi’s and Kelebek’s real measurements.
Is it close to the target?
Variable-choice bot − target = within ±5 points
Kelebek’s target is 54%. After the edit, the variable-choice bot wins 56.5%: 2.5 points away.
Can luck beat it?
A bot tapping at random wins at most 15%
In Kelebek the random bot wins only 1 game in 1,000. I do not apply this limit to easy introductory levels with a target of 85% or more.
Kelebek was 62.4 − 50.0 = 12.4 points before, so mistakes were punished hard. Afterwards it was 63.0 − 56.5 = 6.5 points.
Where do players get stuck?
Lost games where the cell stayed empty ÷ all lost games
In Servi the bottom trunk cell stayed empty in 44 of every 100 losses. After I added the root, the hardest cell dropped to 30 in 100.
Which change worked?
Effect = new result − previous result, one change at a time
Moving Kelebek’s moss and adding a move improved the variable-choice bot by 6.4 points. Adding only the move improved it by 6.5. The extra move was enough in this measurement, so I kept the moss where it was.
How I read the bot results
Servi’s current measurement. Remaining moves average only wins. Loss progress averages only losses. Tool creation and use are reported separately too.
The editor’s “ready to ship” label means the level passed my bot checks. The variable-choice bot must be within 5 percentage points of its target. Below an 85% target, the random bot must not exceed 15%. The label does not confirm how difficult or enjoyable a level is for people.
I also watch the difference between the goal-focused and variable-choice profiles. “Skill gap” here means only the difference between those two bots’ completion rates. I use 3–8 points as a review range. Falling outside it does not block saving by itself. Easy levels with a target of at least 85% also receive no warning for a gap below 3 points.
I used this workflow to revise Servi’s target layout and Kelebek’s move budget. The problems, alternatives and before-and-after results appear in Changes based on bot tests.
A limit the editor showed me
I noticed that heatmaps of symmetric levels were consistently hotter on the right. In level 73, Mozaik Zemin, the caged bottom-left target stays empty in 16% of losses, compared with 50% on the right. Bots always tap the leftmost cell in a group, where the tool then appears. That behaviour may affect the difference. I do not treat the hotter side as proof of a layout problem. The editor shows this limitation below the map. I want to test different tap positions next.
Why change each setting?
Editor setting
Design question
Target layout
Can a tool reach several targets together, or must they be pursued separately? Do final targets sit in the centre or along the edges?
Obstacle type and layers
Does a move paint, open access or stop spreading? Am I introducing a rule alongside too many other demands?
Board dimensions and colour pool
How much space is available for groups and tools? Do extra pool colours add tiles outside the motif? A larger board is not automatically harder.
Move budget and bot target
Does the budget support the level’s place in the chapter? How do remaining moves and progress on losses change alongside completion?
Protecting painted cells
Does earned progress persist? Changing this rule affects decisions as well as difficulty. Kilim’s separate bot comparison appears below.
Looking across all levels
The balancing menu can check a chapter, selected levels or all 100. Budget search, fine-tuning and verification without changing moves are separate actions. The chart’s 3 October report uses verification and covers the levels as they were then. It excludes the later Servi and Kelebek edits. The CSV contains targets, old and new budgets, three completion rates, and the variable-choice bot’s remaining moves, loss progress, group sizes and tool use. I use it to check neighbouring levels together.
What I check before saving
Pattern and access: Do target colours and the colour pool agree? Did resizing remove a target or obstacle? Are covered targets and the preview readable?
Teaching and rhythm: Which decision does the level emphasise? Do obstacles, tool setup space and move budget support it? How does pressure change from the previous level to the next?
Fresh measurements: Did I rerun the bots after the last edit? Are run count, seed and rules suitable for the comparison? Am I reading win and loss averages separately?
The editor limits board size to 4–10 and moves to 1–99. It refuses target-free levels and will not overwrite a file changed elsewhere. It warns about missing target colours and targets outside the planned role’s range. I check the lesson and readability by playing the draft.
Level 25: Kilim
Kilim closes the first chapter: a 9×9 board, four colours, 35 target cells, 33 moves and no obstacles. Seven horizontal colour bands make the group’s location part of the decision after the tools have been introduced.
The same tool in a different position
A Seal does not paint the entire board. Its two-step diamond reaches 13 target cells at the centre of this pattern, versus 9 at the left edge. The diagram assumes all targets are still unpainted. Actual gains depend on the cells remaining at that point.
Centre: 13 target cellsEdge: 9 target cells
The tool appears at the cell tapped within the large group. “Find a group of 13” therefore becomes “where should I tap it?” Colour bands give the Brush a way to prepare large groups, while the dense centre makes Seal placement valuable.
I compared Kilim’s 33-move budget with 31 and 35 moves. The rates, test settings and decision to keep 33 moves appear in Bot A/B tests.
Tests and balancing
I use three bots that choose moves differently. They all use the game’s board model and rules, and I report them separately. This test does not play animations, tutorials or the economy flow.
Profile
Behavioural assumption
Limitation
Goal-focused
Previews the listed move candidates. Scores target gains, obstacle damage, tool creation and opportunities for the next group, then chooses the highest score.
Knows the rules and full board state. Neither an exhaustive solver nor a learning player.
Variable-choice
Uses the same scoring. On 25% of choices it selects randomly among the top three moves, including the best move.
This is not a human who makes mistakes 25% of the time. Its source name is Human. The human CSV column is bot data.
Random
Chooses uniformly among the listed legal move candidates.
Does not tap every screen cell at random. Not a validated model of an impatient or new player.
All three profiles represent an ordinary group with one tap position rather than comparing every possible tool placement within it. The 13-versus-9-cell example in Kilim was therefore examined geometrically. Bot results do not fully represent the skill of placing a tool.
Checking all 100 levels
The 3 October check ran 1,000 games per level and profile: 100 × 3 × 1,000 = 300,000 runs. Seed: 1234. Move budgets stayed unchanged during verification. I later changed Servi from 27 to 31 moves and 22 to 24 targets, and Kelebek from 30 to 31 moves. Those designs and measurements appear separately in Changes based on bot tests.
In that report, the variable-choice bot is within 4.4 percentage points of the target on every level. The intended rhythm is possible under this model. I have not measured players’ difficulty, enjoyment or return behaviour. The report’s processing time is also not player time.
Reproducibility and quality checks
The new Kilim measurement ran with unchanged copies of the game source. I first compared 150 runs per profile on levels 1, 7, 25, 26, 51, 76 and 100 with the existing Unity regression record. All 21 win-count comparisons matched. I then measured the alternatives.
The project also contains a QA record of 131 passing tests covering areas such as board rules, obstacles, tools, level loading and the economy. Technical checks and bot balancing serve different purposes: a rule working correctly does not show that a level feels good to play.
Win counts checked against Unity
At seed 777, each cell shows wins out of 150 runs. All 21 counts matched the Unity record. These 3,150 checks are separate from the 16,200 Kilim experiment runs.
Level
Variable-choice
Goal-focused
Random
1
144 / 150
143 / 150
34 / 150
7
62 / 150
55 / 150
1 / 150
25
91 / 150
97 / 150
0 / 150
26
134 / 150
140 / 150
15 / 150
51
136 / 150
130 / 150
10 / 150
76
125 / 150
128 / 150
12 / 150
100
67 / 150
83 / 150
0 / 150
Changes based on bot tests
In Servi, I found a target that often stayed empty in losses. In Kelebek, I found a wide gap between two bots. I tested changes to each while keeping the level’s purpose. I played the drafts and saved my chosen designs.
Level
Saved change
Variable-choice bot · before → after
Design decision
20 · Servi
Added two coral targets to the root. Raised the budget from 27 to 31 moves.
86.5% → 88.9%
Preserve the breather role. Revise the bottom target often left incomplete in losses.
97 · Kelebek
Kept the moss position. Raised the budget from 30 to 31 moves.
50.0% → 56.5%
Keep the moss lesson. Choose the budget that reduced the profile gap from 12.4 to 6.5 points.
These are design edits measured with bots. Their effects on real-player completion, enjoyment or return behaviour have not yet been established.
20 · Servi: a breather level’s final target
Problem
Servi follows a hard level and has an 86% bot target. Its result was close, but the heatmap drew my attention to the bottom of the trunk. That cell stayed empty in 44% of the variable-choice bot’s 135 losses. Losing bots had painted an average of 92% of the targets. Most of the pattern was complete, yet the same cell often remained. I revisited the layout because this was meant to be a breather.
Change
I added two coral cells under the trunk to make a three-cell root. The bottom target is no longer on its own. A side-by-side group can paint it. The move suggestion raised the budget from 27 to 31. I opened the draft in the game, checked that the root reads clearly in the goal preview, and saved it.
The variable-choice bot is now 2.9 points above target. I accepted that margin for a breather. I changed both the root and the move budget, so I cannot attribute the improvement to the root alone. The hotter right end may also reflect the bot’s tap position.
97 · Kelebek: keep the lesson, change the budget
Problem
Kelebek’s bot target is 54%. The variable-choice bot stopped at 50.0%, while the goal-focused bot reached 62.4%. The 12.4-point gap was outside my 3–8-point review range for these two bot profiles. It does not establish how players feel when they make a mistake.
Alternatives I tried
I first moved the moss from the middle of the body to the top, where it could no longer spread straight into both wings. The result looked better, but the move suggestion had also raised the budget from 30 to 31. I put the moss back and tested 31 moves alone.
Attempt
Variable-choice
Goal-focused
Skill gap
Earlier version · 30 moves
50.0%
62.4%
12.4 points
Moss at the top of the body · 31 moves
56.4%
61.1%
4.7 points
Only 31 moves · the version I saved
56.5%
63.0%
6.5 points
Result and decision
The two 31-move options gave very similar variable-choice results. Changing only the budget met the target and profile-gap range. Moss spreading from the body is part of the lesson I want to keep, so I left it there and saved 31 moves. The bot is 2.5 points above target, with a 6.5-point gap. This does not prove the moss position has no effect.
Both examples use 1,000 runs per profile and seed 1234 with the same rules. In this editor test, using the same seed does not pair every run with an identical starting board: move choices and game length can change the random sequence. The comparisons show results under these bot settings. They are not matched-start player A/B tests. Heatmap percentages use lost games only.
Settings in the saved reports
Both reports use 1,000 runs per profile and seed 1234. Tile guidance is 30%. Tool thresholds are 7, 10 and 13, Bucket capacity is 8, and Seal radius is 2. Remaining moves are averaged over wins, and target progress over losses, for the variable-choice profile. These saved reports describe the selected designs. They do not contain the raw runs for every earlier alternative.
Saved design · 9 October
Moves / targets
Moves left in wins
Progress in losses
20 · Servi · 22:56
31 / 24
12.87
93.2%
97 · Kelebek · 22:54
31 / 38
7.04
91.4%
Bot A/B tests
I tested three questions on Kilim: how many moves to allow, whether painted cells should stay complete, and how much new tiles should help with targets. I changed one setting per comparison and kept the other rules fixed. The same bot profiles played the alternatives. No real players were assigned to test groups.
Hypotheses and test plan
My main measure was closeness to Kilim’s 60% completion target for the variable-choice bot. I also watched the goal-focused and random bots. Each condition has 900 runs per profile. Pattern, colours and tool rules are fixed. Only the setting named in that experiment changes.
1. Move budget: 31, 33 or 35?
Idea tested: 33 moves leave enough space for a chapter finale that requires tool planning. Fewer moves may put completion below target, and more moves may take it above target.
I retested the current 33-move version against 31 and 35 moves using the same scenario seeds. The pattern, colour pool, tools and tile-arrival setting stayed fixed. Each option has 900 runs per profile, or 2,700 across all three profiles.
Moves
Variable-choice
Goal-focused
Random
31
54.6%
61.3%
0.1%
33
62.1%
70.1%
0.1%
35
71.3%
76.9%
0.4%
Decision: I kept 33 moves. The variable-choice bot completes 62.1%, close to the 60% target. It falls to 54.6% with 31 moves and rises to 71.3% with 35. I wanted the chapter finale to require tool planning, so I did not choose the highest completion rate.
At 33 moves, losing runs from this profile complete an average of 92.1% of the pattern. That flags the last few targets for closer inspection. It does not measure frustration or willingness to buy extra moves. Winning runs have an average of 7.38 moves left, a figure that applies only to wins.
This is a local comparison of alternatives. I do not present the existing report as a before-and-after improvement, and the game’s level file was not changed for the test.
2. Should completed cells stay protected?
Idea tested: Protecting correctly painted cells lets the bot focus on remaining targets and sustain progress. Removing protection may make completion harder with the same budget and move selection. I also measured target progress in lost games.
In the current version, a correctly painted cell stays complete. In the alternative, later blasts of the wrong colour can undo that progress. This adds a need to protect previous work alongside completing the remaining targets.
Painting rule
Winning runs
Completion
Target progress in losses
Protected cells · current
559 / 900
62.1%
92.1%
Wrong colours can undo progress
3 / 900
0.3%
63.0%
Decision: I kept painted cells protected. Without protection, variable-choice completion fell from 62.1% to 0.3%, and progress in losses from 92.1% to 63.0%. The alternative made Kilim much harder at this budget. I did not retune the bot or rebalance moves for it. This test does not establish that overwriting is a poor rule in every game.
3. How much should new tiles help with targets?
Idea tested: 30% guidance may keep completion close to the design target. Removing guidance or increasing it to 60% may change that balance. I examined random-profile completion alongside the variable-choice rate.
The current tile-arrival setting has 30% guidance: if a column has missing target colours, a new tile has a 30% chance of drawing from those colours. Otherwise it uses the ordinary colour pool. This is neither a 30% win boost nor a guarantee of a useful group.
Tile-arrival setting
Winning runs
Completion
Random profile
No guidance · 0%
460 / 900
51.1%
0.0%
Current · 30%
559 / 900
62.1%
0.1%
Stronger · 60%
660 / 900
73.3%
0.4%
Decision: I kept 30% guidance on Kilim. Without it, variable-choice completion is 51.1%. At 60% guidance it reaches 73.3%. The current setting is close to my 60% target, while the random bot completes 0.1%. These results help me choose a setting for this level. They do not measure a player’s sense of fairness or control.
Experiment scope
There are six conditions: 31, 33 and 35 moves. Overwriting at 33 moves, and 0% and 60% tile guidance at 33 moves. Each has 900 runs per profile, 2,700 in total, giving 16,200 unique runs. The current version is shared across comparisons and is not counted again.
I used three seed blocks of 300 runs. The move-budget and painting comparisons share starting scenarios. Changing tile arrival means the same seed does not guarantee the same board. These are bot A/B comparisons, not a live experiment splitting players into two groups. Settings and sampling uncertainty are shown below.
All three profiles across six conditions
Condition
Variable-choice
Goal-focused
Random
31 moves
491 / 900 · 54.6%
552 / 900 · 61.3%
1 / 900 · 0.1%
33 moves · current
559 / 900 · 62.1%
631 / 900 · 70.1%
1 / 900 · 0.1%
35 moves
642 / 900 · 71.3%
692 / 900 · 76.9%
4 / 900 · 0.4%
Overwriting · 33 moves
3 / 900 · 0.3%
4 / 900 · 0.4%
0 / 900 · 0.0%
0% guidance · 33 moves
460 / 900 · 51.1%
511 / 900 · 56.8%
0 / 900 · 0.0%
60% guidance · 33 moves
660 / 900 · 73.3%
721 / 900 · 80.1%
4 / 900 · 0.4%
Settings and uncertainty
The seed blocks are 1729, 8675309 and 20261009, with 300 runs in each. A run’s seed is block + trial × 104729, starting trial numbering at zero. Each game is a separate simulator call, so the previous game’s random-number use does not change the next starting scenario. Move and painting comparisons share starts. Tile-arrival changes and different profile choices can change the boards that follow.
All conditions use a 9×9 board, 35 targets and four colours. Tools are enabled, splash is disabled, thresholds are 7/10/13, Bucket capacity is 8 and Seal radius is 2. The current variable-choice result is 559/900 (62.1%), with a 95% Wilson interval of about 58.9–65.2%. This describes sampling uncertainty for the bot and scenarios, not uncertainty about real-player behaviour.
Remaining moves use wins only. Target progress uses losses only. Tool creation and use are averaged across all runs. The older 100-level report’s seconds measure computation time, not play time. Its Kilim rate of 60.2% and this experiment’s 62.1% use different seed methods, so their difference is not a design improvement.
SQL and Excel
To examine the gold-leaf economy and continue offers, I made a bot run that plays the levels in order from the start. It uses the game’s own board and bot code. On Servi it reproduced the editor’s saved result exactly.
4,000 bots: 70% variable-choice and 30% goal-focused. A bot that loses the same level 3–8 times in a row quits.
When moves run out, a bot takes one continue for 30 gold if at least 80% of the pattern is painted and it can afford it. This is my assumption. Ads, life timers and purchases are not modelled.
434,900 attempts were played in total. 2,910 of the 4,000 bots cleared level 100.
I put the data into three simple tables and asked questions with SQL. The queries run in SQLite.
players: one bot per row: its profile, how many levels it cleared, the level where it quit, and gold earned and spent.
attempts: one attempt per row: the level, whether it was won, whether a continue was taken, how much of the pattern was painted at the offer, and gold earned and spent.
levels: each level’s name, chapter and type.
1. Does a continue bought with gold save the attempt?
SQL · in-order play data
-- Altınla alınan continue attempt'i kurtarıyor mu?SELECTCASEWHEN offer_progress >= 90THEN'90-99%'ELSE'80-89%'ENDAS painted_at_offer,
COUNT(*) AS continues,
ROUND(100.0 * SUM(won) / COUNT(*), 1) AS won_pct
FROM attempts
WHERE continued = 1GROUPBY painted_at_offer;
painted_at_offer
continues
won_pct
80-89%
37918
32.5
90-99%
72540
54.8
What the query does: It selects attempts with a continue: continued = 1. CASE WHEN puts an attempt in the “90-99%” group if at least 90% of the pattern was painted at the offer, otherwise in the “80-89%” group. For each group it counts the continues and calculates the share of attempts that were won.
What I found: Continues taken at 90% or more painted progress win 54.8% of the time. At 80–89%, the rate is 32.5%. The outcome of spending the same 30 gold depends on what remains. The offer already shows painted progress. This result supports my reason for keeping that information visible.
2. On which levels are we losing the most bots?
SQL · in-order play data
-- Botları en çok hangi level'larda kaybediyoruz?SELECT l.level,
l.name,
l.tier,
COUNT(*) AS bots_quit
FROM players p
JOIN levels l ON l.level = p.stopped_at_level
WHERE p.finished = 0GROUPBY l.level, l.name, l.tier
ORDERBY bots_quit DESCLIMIT5;
level
name
tier
bots_quit
13
Kum Saati
hard
99
37
Labirent
hard
89
19
İki Lale
hard
83
56
Zincir
hard
81
81
Kuru Havuz
hard
75
What the query does: It groups the bots that did not finish by the level where they quit. The JOIN brings each level’s name and type from the levels table. The five levels that lost the most bots are listed.
What I found: All five are hard levels I planned: Kum Saati, Labirent, İki Lale, Zincir and Kuru Havuz. The numbers are small because in this model bots quit only after several losses in a row and can take continues. Real player loss has other causes too. Here the result shows that difficulty gathers where I planned it.
3. How much of the gold earned goes to continues?
SQL · in-order play data
-- Her temada kazanılan altının ne kadarı continue'a gidiyor?SELECT l.theme,
SUM(a.gold_earned) AS gold_earned,
SUM(a.gold_spent) AS gold_spent,
ROUND(100.0 * SUM(a.gold_spent) / SUM(a.gold_earned), 1) AS spent_pct
FROM attempts a
JOIN levels l ON l.level = a.level
GROUPBY l.theme_no, l.theme
ORDERBY l.theme_no;
theme
gold_earned
gold_spent
spent_pct
Tile Workshop
1094461
669390
61.2
Excavation
1132337
897780
79.3
Palace
1040035
883230
84.9
Garden
901869
863340
95.7
What the query does: It joins the attempts table to the levels table, adds up the gold earned and spent on continues in each chapter, and divides spent by earned to give a percentage.
What I found: Continues use 61% of gold earned in Tile Workshop and 96% in Garden. Little gold accumulates towards the end in this scenario. The bots always continue when the conditions allow it. The result depends on that choice and is not a purchase or revenue forecast.
Excel workbook
I also prepared the same run in Excel. Each bot is a row on the Players sheet, and each continue with its result is a row on the Continues sheet. The Continue sheet shows the result separately for variable-choice and goal-focused bots. The Levels sheet shows how many bots start and quit each level, and the Economy sheet shows gold by chapter. Everything is calculated with COUNTIFS and SUM.
Excel · two formulas
Continue!B2 · continues taken with 80–89% of the pattern painted
=COUNTIFS(Continues!E:E, ">=80", Continues!E:E, "<=89")
Levels!G2 · bots that quit the game on this level
=COUNTIFS(Players!E:E, A2)
The Continue sheet in Excel. Both profiles point the same way. Select the image to enlarge it.
All tables in this section come from bot data, not from real players. The run was made on 12 October 2026 with seed 20261012.
Analytics and product decisions
The bots let me compare board designs. Product decisions also need evidence about how players move through tutorials, levels and offers. I added events for those steps and for currency activity. The table is a measurement and decision plan. It contains no observed player results yet.
Question
Existing events and measurement
Decision to assess when data arrives
Is the rule understood initially?
tutorial_begin / step / complete · step drop-off and completion
Change text or highlighting if players struggle. Event order alone cannot explain why. Check with a small observational test.
Which level creates too much friction?
level_start / level_end · attempt count, win/fail/quit/restart, moves left and progress
Separate first attempts, replays and wins with extra moves. Test target layout if the last cells cause trouble, or move budget if pressure is more general.
What happens when moves run out?
out_of_moves / continue_used · available offers, gold, progress and continue method
Measure continuation among attempts eligible for the offer and their later outcomes. Low use alone does not establish that an option is overpriced or unhelpful.
Where does the economy stall?
earn_virtual_currency / spend_virtual_currency / lives_refill · sources, sinks and life refills
Track replay rewards separately and examine how currency balances relate to life and continue pressure.
Distinguish completed, cancelled, pending and failed purchases. Check delivery first, then form a conversion hypothesis.
level_end records the result, attempt count, duration, moves used and remaining, target progress, and gold/ad continue counts. out_of_moves records which continue offers were actually available. This helps avoid treating an unavailable offer as a rejected offer.
I have no player results for retention, revenue or purchase conversion yet. When data arrives, I want to check the events first, then form level-specific hypotheses. Remote Config can change Kilim’s move budget. Painting and tile-guidance tests would need a new gameplay-rule version.
Economy and monetisation
The currency is gold leaf. Level wins, rewarded ads and store packs supply it. Extra moves and life refills spend it. The values below are the game’s default settings, not prices established as optimal through player data.
System
Default
Design consideration
Starting balance and wins
Start with 60 · win reward: 5 + moves remaining
Efficient completion is rewarded. Replayed wins also award currency, so accumulation and easy-level farming need monitoring.
Lives
Maximum 5 · one regenerates every 30 minutes
Lives are part of the attempt-ending flow. Bot measurements exclude waiting and session effects.
Continue with gold
+5 moves · gold continues cost 30, then 60, 90…
Cost rises with gold continues in the same attempt. Ad continues do not increase this counter.
Life refill
100 gold leaf
Examine balance and life depletion together, not only spend counts.
Rewarded ads
Continue: +5 moves, at most once per attempt · free currency: 20, at most 5 times per day
Extra-life and double-win-reward options also exist. Reward delivery depends on ad completion.
Purchases
300 / 1,000 / 2,500 gold-leaf packs
Prices come from the store in local currency. Actual purchase or revenue results are outside this study.
I balance levels without extra moves or purchases. I do not want the economy to hide a problem in the base level. Remote Config can change prices and ad limits. Before a change, I need to name the question and the measures I want to protect.
Technical details
How the code is organised
I wrote the game in C# with Unity 6. The rules are separate from how they appear on screen. The editor and bots use the same rules. When I change one, the game and tools keep using the same code.
Part
What it does
Rules (Core)
Board, clearing, painting, obstacles, tools, level files and player progress. No visual or scene code.
Game
How the board looks, animation, interface, haptics and the flow between screens.
Services
Firebase (analytics and remote settings), AdMob and Unity IAP. The game reaches them through interfaces. If a package is not installed, that code is not compiled.
Developer tools (Dev)
Bots, in-game shortcuts, and test ads and store. They exist only in the Unity editor and development builds, not in the store version.
Editor and tests
The level editor, balancing and QA menus run only in the Unity editor. NUnit unit tests protect the rules. On 9 October all 138 tests passed.
A level is a small file made of letters
Each level is a small JSON file. The target pattern is written in letters: T turquoise, K cobalt, M coral, S saffron, Z emerald, and a dot for an empty cell. Clay, cages and moss sit the same way on a separate obstacle layer. spawnColors are the colours of tiles that fall onto the board (Servi has no saffron), and target is the rate the variable-choice bot should reach. This lets me change a level without writing code, in the editor or as text.
Blast calculates a tap’s result and applies it to the board. It also handles moves, wins, losses and moss growth. Preview makes the same calculation without changing the board. Bots use it to compare moves, so they test the same rules the player plays.
BoardModel.cs · one tap
public BlastResult Preview(int x, int y) =>
State == GameState.Playing ? Resolve(x, y, previewResult) : null;
public BlastResult Blast(int x, int y)
{
if (State != GameState.Playing) returnnull;
var result = Resolve(x, y, moveResult);
if (result == null) returnnull;
MovesLeft--;
MoveNumber++;
Apply(result);
RecountPainted();
if (PaintedCount >= TargetCount) State = GameState.Won;
elseif (MovesLeft <= 0) State = GameState.Lost;
else
{
if (result.MossDestroyed == 0) SpreadMoss(result);
ShuffleUntilPlayable(result);
if (!HasAnyMove()) State = GameState.Lost;
}
return result;
}
On screen: playing the same result in order
The screen code does not recalculate the rule. The board controller passes the tap to the model and hands the result to the class that runs the animation. It reads the cleared tiles, painted cells, obstacle hits, tools, falling tiles and moss from that result and animates them in order.
The board model is separate from its visual presentation. Clearing, painting, falling, obstacles and tools are calculated in that model. Bots use it rather than a separate approximation of the game. Fixed seeds and CSV reports make changes measurable again.
The Level editor section explains the editing and balancing workflow. Sharing the board model helps avoid applying a rule differently in the editor, game and bot measurement.
Small rules that carry the feel of the game
Some design decisions are a few lines of code. When a new tile falls, there is a 30% chance it takes one of the target colours still waiting to be painted in that column. Otherwise it comes from the colour pool at random. The aim is that a player close to finishing a pattern does not get stuck waiting for the right colour. Tools depend on group size too: 7 or more tiles make a brush, 10 or more a bucket, and 13 or more a seal.
BoardModel.Apply.cs · the colour of a new tile
int SpawnColor(int column)
{
    if (Rules.SpawnBias > 0f)
    {
        biasedSpawnPool.Clear();
        for (int y = 0; y < Height; y++)
        {
            int cell = Index(column, y);
            int target = targets[cell];
            if (target >= 0 && painted[cell] != target && Array.IndexOf(spawnColors, target) >= 0) biasedSpawnPool.Add(target);
        }
        if (biasedSpawnPool.Count > 0 && random.NextDouble() < Rules.SpawnBias)
            return biasedSpawnPool[random.Next(biasedSpawnPool.Count)];
    }
    return spawnColors[random.Next(spawnColors.Length)];
}
Applying remote settings safely
Remote Config can change level-specific move budgets, a general move bonus, lives and economy values. Numeric inputs are clamped to allowed ranges. Level moves, for example, stay between 1 and 99. New settings take effect in the map flow rather than changing an active board halfway through.
This is infrastructure for controlled experiments, not evidence of growth. Ads and purchases can also be checked with test providers in the editor.
Interface and visual language
The game’s look comes from Turkish ceramic tiles: a turquoise background, a cobalt frame and raised tiles that shine like glazed ceramic. I rendered the tiles, obstacles and tools in Blender, and designed the interface and background in Figma. The images below come from the game’s own files.
Five colours, five flowers
Each colour has a distinct flower: round forget-me-not petals, a pointed bellflower, a layered rose, a thin-petalled daisy and a side-view lotus. I wanted shape to help identify tiles as well as colour, including when colours are difficult to distinguish or the screen is in sunlight.
TurquoiseForget-me-not
CobaltBellflower
CoralRose
SaffronDaisy
EmeraldLotus
Top: the five tiles in the game. Bottom: the same tiles in greyscale. Without colour, the flowers still tell them apart.
Showing a target without relying on colour
Clearing the right colour paints the target underneath. Later wrong-colour blasts leave it complete. I use the visible strip around a tile to show the target. An unfinished cell has diagonal hatching. Once painted, the hatching disappears and the floor becomes glazed. This gives the player another cue besides colour.
Not a targetPlain plaster floor.Waiting to be paintedCobalt target: light blue floor with cobalt hatching. The tile on top can be any colour.DoneThe floor has turned cobalt and the hatching is gone.
Made by layering the game’s floor, hatching and tile files with the game’s own drawing rules.
Obstacles and tools
I rendered tiles, obstacles and tools with the same camera and lights. I wanted their looks to suggest their rules. A crack marks single-hit clay, while stacked layers mark double clay. The cage leaves the tile colour visible because it can still join groups. Moss looks alive and spreading. Brass and cream tools sit on plain tiles so their icons stand out.
ClayOne hit
Double clayTwo hits
CageHolds the tile in place
MossSpreads
BrushGroup of 7–9
BucketGroup of 10–12
SealGroup of 13+
Fixing render quality
The first renders had harsh, jagged highlights. Stepped 8-bit height maps, very smooth glaze and small lights contributed to the problem. I smoothed the maps at higher precision, lowered the relief, softened the glaze and enlarged the lights. I rendered at twice the resolution and reduced to game size. Clay cracks became carved grooves instead of rods above the surface. I updated 19 images. Their sizes and import settings stayed the same, so texture memory did not increase.
Before
After
Plain cobalt tile: the harsh highlight is softer.
Before
After
Clay crack, close up: the rod on the surface became a real groove.
Interface pieces
I designed the buttons, badges, frames, panels and icons in Figma. They share a navy outline, dark base and slightly offset light face. Buttons also have a highlight. I used 9-slice sprites for panels, frames and buttons so they stretch without changing the corners. The same panel appears in dialogs, the shop and the top bar.
Main button
Ad offer
Map badge
Locked badge
Frame
Panel
Life
Gold leaf
Lock
Settings
Watch ad
Navy #1B2E5E Outlines
Cobalt #2F63C6 Frame, ad button
Green #47C65E Main button
Saffron #FFC93C Badge, lock, gold
Coral #F2545B Lives
Turquoise #2DB7AF Background
Screen layout and languages
The move count sits in a large circle beside the target preview. Restart and map controls sit below the board, outside the play area.
Menus, tips and offer text support 7 languages: Turkish, English, French, Italian, German, Spanish and Portuguese. Long offer text, target-preview legibility on small screens and the usefulness of non-colour cues still need checking on real devices and with players.
Next steps
I need to recruit real players for playtests to check how clearly they understand the target pattern, colour-matching rule and tools.
Crumble Crew is a collapse puzzle with 50 levels in five groups. You choose one of three coloured buttons, remove its target blocks and watch the structure settle. The puzzle comes from the order: the biggest hit now can leave a block standing at the end.
I wanted a short decision followed by a collapse you could watch clearly. Each group introduces one block rule, then combines it with earlier ones. I focused on the decision each level asks for, what the player needs to see to make it, and where to place a breather between harder levels.
My work on the project
Level design: I designed all 50 levels in an editor I built. For each of the five groups of ten, I set the new block, the tutorial levels and the finale.
Testing and improvements: I built a level checker and a bot test with 50 behaviour profiles. I examined the data with SQL and Excel, revised 7 levels and tested them again.
Product decisions: I defined the analytics events and measures, and set limits for Remote Config. The game has no ads or purchases. I plan to use its data to examine progression, learning and performance.
Implementation: I wrote the collapse rules in C# and Unity, modelled the blocks in Blender and designed the interface in Figma.
How I gathered the evidence
I could not access large-scale player testing, so I used bots with different playing behaviours. I report their assumptions alongside the results and compare changes under the same conditions. These are bot measurements. I have not yet checked their effect on real players.
Analytics, crash reports and remote settings · no ads or in-app purchases
Firebase Analytics · Crashlytics · Remote Config
Analysing the bot data
SQL · Excel
Menus and hints in 9 languages
English, Turkish, Spanish, Portuguese, German, French, Italian, Russian, Indonesian
Gameplay
Each button hits blocks of its own colour. Its number shows how many it will hit now. Blocks fall when they lose support. Normal blocks falling two block heights or more can shatter and crush those below. You cannot undo a move, and the next button is hidden.
Learning the order first
The video shows the same level played twice. On the first try the moves run out and a single red block is left standing. On the second, that red block goes first and the last hit brings the whole structure down. The only difference is the order of the moves.
The first tap on a button lights up the blocks it will hit. The second tap knocks them down, so nobody wastes a move by accident.
The next button in line replaces the one used. The player only sees the three buttons on screen.
The level ends when every block is down. If the moves run out, the game says how many blocks are still standing, and “Try again” restarts the level.
A guide to the game screen
A screen from level 4. The numbers mark the elements described here.
12345
1Moves left. Each dot is one move. Two moves are left on this screen.
2Level name and menu. The menu pauses the game: continue, restart the level or go back home.
3Structure. The level itself: coloured blocks resting on the ground or on each other. The level is won when every block is down.
4Targeted blocks. One tap on a button lights up the blocks it will hit. Here, the two legs red 6 will knock down. The second tap knocks them down.
5Buttons. There are always three buttons. The colour says which blocks a button knocks down and the number how many it hits. The next one in line replaces the one used.
Game loop
LookWhat is holding up what?
PickTap a color. Its targets light up.
HitThe second tap knocks them down.
WatchEverything that lost its support collapses.
When moves run out, the game shows how many blocks remain. One tap restarts the level. With no undo and a hidden next button, I wanted a loss to encourage trying a different order.
Outside the level, the loop is a path: every finished level opens the next one, and a new block arrives every ten levels. When every level is done, a “Coming soon” box waits at the end of the path. The game has no ads or in-app purchases. What progress gives you is new structures and new blocks.
Level design
I split the 50 levels into five groups of ten. Each adds a block, teaches its rule, combines it with earlier blocks and closes with a finale. Older blocks stay in use. The last level brings steel, chameleon and two-tone blocks together. I set up the catalog and level selection so I can add another group when I develop a new block idea.
Left to right: normal, steel, chameleon, anchor, two-tone.
Levels
New block
What it does
The player’s likely new question
1–10
Normal
Falls when its support is gone, and shatters if it falls far enough
What is holding up what?
11–20
Steel
Survives the fall and can’t be crushed by what lands on it. Only a hit of its
own color breaks it
What will be left after the collapse?
21–30
Chameleon
Takes the color that was used last
How will my move order change the colors?
31–40
Anchor
Hangs in mid-air and holds up its neighbors
What is this structure hanging from, if not the ground?
41–50
Two-tone
Breaks in two hits, one for each of its colors
In which order should I hit the same block?
Planning each group’s rhythm first
Each group starts with two short teaching levels. I then remove the hints and make the structures larger. The finale combines the decisions taught in that group. Teaching levels have at most three buttons and three moves. Here are four examples from the steel group.
Level
Its job
The decision I expect from the player
11 · Tutorial
Show that steel doesn’t break when it falls
Watch the collapse and see the steel left intact in the rubble
12 · Tutorial
Show that falling blocks can’t crush steel
Break the uncrushed steel with a button of its own colour
13 · Free
Ask about the same rule, this time without a hint
See in advance which steel will still stand after the collapse
20 · Finale
Close the group with the narrowest solution: only 1 of 81 orders wins
Work out the one right order from how the structure is supported
How I use the difficulty measure
I first look at how many tested move sequences win. Fewer winning paths leave less room for error. That describes the solution space. It does not measure how hard the level feels to someone. A single clear route can be easier to read than several misleading ones.
The number doesn’t measure how tempting the wrong orders look or whether the right line can be read from the screen. So I read it together with the bot result and the level’s job in its group. Level 14 (Pyramid) is an example of how I decide when the three don’t agree.
Design rules and the checking tool
I wanted regular levels to make move order matter, reward planning and leave the right path readable. My solver tries every move order and flags designs that may miss those goals. I inspect the flagged level in the game before deciding what to change. Teaching levels are exempt because their first job is to show a rule.
LevelAnalyzer.cs · the design rules, shortened
// Tutorial levels are there to show the rule; the design rules only apply to regular levels.if (r.index < TutorialLevels || r.def.tutorial) return;
if (r.greedy.won) r.warnings.Add("The bot that picks the biggest number wins");
if (r.myopic.won) r.warnings.Add("The bot that only thinks about this turn wins: no long-term plan needed");
if (!r.greedy.won && r.greedy.percent > NearMissPercent && !r.greedy.onlyArmoredLeft)
r.warnings.Add($"The bot that picks the biggest number loses by a hair ({r.greedy.percent}%): the loss may feel unfair");
// First moves: the winning move must not look too weak to notice, and the second decision must still matter.if (bestWinningImmediate < maxImmediate * HiddenMathRatio)
r.warnings.Add($"The winning first move looks very weak in the moment ({bestWinningImmediate} blocks, best immediate {maxImmediate}): hidden maths risk");
if (!standingOk)
r.warnings.Add($"The structure left after the right first moves is outside {MinStanding}-{maxStanding}%: the second decision may stop mattering");
if (winnable == r.firstMoves.Count)
r.warnings.Add("Every first move can win: the first decision doesn't matter");
Tapping the biggest number shouldn’t be enough. If a player who always taps
the button with the biggest number can clear the level, the tool flags it. In a regular
level, that means the order of moves has stopped mattering.
Planning should pay off. If always going for the option that knocks down
the most blocks right now is enough to clear the level, the tool flags it. Then there’s no
need to think ahead.
Simple paths should not lose by a hair. If the biggest-number or biggest-immediate-hit strategy destroys more than 90% of a structure but loses, the tool flags it. A near miss may encourage another try or feel unfair. Bot data does not tell me which. I use the warning to inspect the design.
The right first move should be readable. If the winning first move knocks
down less than half of what the best-looking move does, the tool flags it. The player may
only find it by luck. But the structure’s supports can also make such a move visible, so I
check this warning by playing the level too.
Both decisions should matter. If every first move can win, the first
decision stops mattering. If none of the right first moves leaves 30–70% of the structure
standing, the second decision may stop mattering (the upper limit is 90% in levels with
chameleon blocks). The tool flags both cases.
All 50 levels pass these checks without warnings. The solver knows the full button queue, though. Players see only three buttons. It missed Balcony’s information trap, which the bot test found.
Teaching a new block
Every new block is introduced with two short tutorial levels. Level 11 in the video is
the first lesson on steel. I followed three rules when designing these levels:
Teach one thing per level. Steel has two properties, so I split
them across two levels: in level 11 steel doesn’t break when it falls, and in level
12 the blocks that land on it can’t crush it.
Say it first, then let the player do it. A short hint states the
rule and shows where to tap. The real proof is the collapse itself: everything falls
apart and the steel block is left standing in the rubble.
Leave no room for mistakes. Tutorial levels have at most three
buttons and three moves. The very next level asks the same rule again, this time
without a hint.
Difficulty curve
The bars show each current level’s solution space. Colours distinguish teaching, regular and finale levels. I changed seven designs after bot testing. On 10 October, I checked all 50 again. Every level had a solution. The explored states had no unsupported starting blocks, zero-target buttons or duplicate choices. These are rule checks. Player difficulty has not been measured.
Tutorial level
Regular level
Finale
Very easyevery
order winsEasy1 in
3Medium1 in
9Hard1 in
27Very hard1 in
81
Basics1–10
Steel11–20
Chameleon21–30
Anchor31–40
Two-tone41–50
Show the data as a table
Level
Winning orders
All orders
1
3
7
2
4
27
3
1
9
4
1
9
5
2
27
6
3
27
7
3
81
8
2
81
9
2
81
10
2
81
11
1
2
12
1
2
13
3
27
14
2
27
15
3
81
16
4
27
17
5
81
18
2
81
19
9
81
20
1
81
21
2
2
22
2
2
23
5
27
24
2
27
25
3
79
26
4
27
27
4
81
28
4
81
29
7
77
30
1
81
31
1
1
32
2
2
33
4
25
34
2
27
35
3
81
36
4
27
37
4
81
38
2
81
39
3
27
40
1
81
41
2
2
42
6
6
43
4
27
44
3
27
45
3
81
46
5
27
47
3
81
48
2
81
49
7
81
50
2
81
Groups begin with two easy teaching levels, then grow harder in waves before the finale. I plan the dips too. A breather follows a hard level. At the start of a new group, I reduce pressure to leave space for the new rule.
Level editor
I designed all 50 levels in the editor I built in Unity. It keeps the structure, button queue, moves and design note together. I choose the decision, build the structure, run the checks and open the draft in the game before saving. Level 20, Viaduct, shows this workflow below.
The level editor inside Unity with level 20 open. Level list on the left, canvas in
the middle, live check on the right: only one of this level's 81 move orders wins. The
editor's own interface is in Turkish.
Build: I paint the structure on the grid and line up the buttons and the number of moves.
Check: The live check tries every move order and immediately shows how many win and which design rule doesn’t hold.
Play and fix: I open the level in the game without saving and look at how the collapse looks and whether the structure is easy to read on a phone.
The illustrated editor workflow
I start from a shape. A bridge, a crane, a clock tower… that’s where the
level names come from. What matters as much as the shape is what the player will have to
decide there: which leg to cut first, whether to bring down the roof or the base.
I draw the structure. I pick a block type and colour from the palette at
the top and paint by dragging across the grid. Right click erases. Alt-click turns the block
I clicked into my brush. If the structure outgrows the grid, I extend the grid from the
left, the right or the top. A block with no support gets a red outline. I don’t want
anything falling the moment a level opens.
Block types and colours at the top. The two blue blocks left floating are
outlined in red.
I line up the buttons. Each button has a colour and a number. The first
three are on screen when the level opens and the rest arrive in order, so the order of the
buttons is part of the puzzle too. Hovering a button shows me on the grid which blocks it
would hit on the first move. This is also when I set how many moves the player gets.
Hovering red 6 outlines in white the six blocks it would hit on the first
move. The button order is underneath.
I read the live check. The panel on the right refreshes with every change
and tells me: how many of all the move orders win, what the shortest solution is, whether a bot that always taps the biggest number or only thinks about the current move would win,
and how much of the structure each first move leaves standing. Any condition that fails
shows up right underneath as a warning.
Live check: 1 of 81 orders wins, both bot strategies lose, and every condition
passes.
I keep changing it until the numbers hold. This is the longest part,
because a single block can change the whole level. In level 20 above, only one of the 81
move orders wins. Of the two legs in the middle, the right one has a blue block at its base. When I turn it yellow, that number goes up to 7 and the bot that always taps the biggest
number starts winning too, so the level no longer meets the planning requirement I set for this finale (pictured). When I do the same to the
middle block of the left leg, no order wins at all. I see both the moment I paint the block,
without launching the game.
The same level with one difference: the block at the base of the right
middle leg went from blue to yellow. Winning orders went from 1 to 7, and the panel
lists exactly what broke.
I check for a twin. If the level’s decision structure is too close to
another level, the editor names that level. Then I change one of the two, or at least place
them far apart in the game. Even if they look different, I don’t want the player solving the
same puzzle twice.
I try it in the game. The rule check matches my design targets. They don’t tell me whether it’s fun. “Play in game” opens the level straight in the game,
and I look at whether the collapse looks good and whether the structure reads comfortably on
a phone screen.
Left: the drawing in the editor. Right: the same level in the game.
I put it in order. I move the level up and down the list until it sits in its place on the difficulty curve. The dot next to each level in the list shows whether it passes the check, and every
level is checked once more when a build is made.
The level list. Viaduct’s dot has turned red because a block was left
floating.
The live check confirms solutions and catches repeated options. It knows the whole queue. It cannot tell me how someone will read only the three visible buttons. I use behavioural bots and visual checks to examine that part of the design.
Level 14: problem, decision, result
Pyramid is a three-move level in the steel group. Two of its 27 sequences win: red 9, one of the yellows, then blue 8. Only three buttons are visible at the start. Others appear as replacements after use. In the first bot test, planning profiles cleared it on their first try just 2% of the time. Current-move profiles cleared it 55%. A level intended to reward planning was doing the opposite in this model.
Old order
On
screen932Next382
Taps red 9. Red 3 takes its place. Yellow 3, yellow 2 and red 3 are on screen.
Working it out with what’s on screen, red 3 looks like the best follow-up: with
yellow 3 after it, 84% of the structure comes down, while going yellow first
reaches 61% at most. Taps red 3.
Only now does blue 8 appear. It knocks down 97% of the structure, but the level
is lost.
The planner loses
New order
On
screen932Next832
Taps red 9. Blue 8 takes its place. Yellow 3, yellow 2 and blue 8 are on screen.
Working it out with what’s on screen, yellow and then blue 8 brings down the
whole structure. Taps yellow.
Blue 8 brings down what’s left, and the level is won.
The planner wins
The map is the same in both. Only the places of two upcoming buttons changed. Framed
blocks are steel. The steps follow a bot that plans two or three moves ahead.
The problem: the last piece of the winning line wasn’t on screen
In the old queue, blue 8 appeared only after the second move. A bot planning with the visible buttons chose the best continuation it could see and lost. For a current-move bot, red 3 and yellow 3 looked equal: each destroyed 9% of the structure. Half chose yellow, then used the newly visible blue 8 and won. That equal choice, rather than planning, led to the winning path.
The change: swap the order, leave the map alone
I wanted the visible buttons to make the winning continuation readable. Planning should help, while choosing the largest immediate hit should not be enough. I also wanted to keep the same solution space: two winning sequences out of 27.
I swapped queued red 3 and blue 8 and kept the structure unchanged. Blue 8 now appears after the first move. The bot can see that using it after yellow brings everything down. Using blue 8 immediately still loses: 22% of the structure remains, and the last move cannot clear it.
Before choosing this change, I ran two other candidates through the same test and ruled them out:
Turning the rightmost block of the red beam yellow. The first-try clear
rate for planning bots rose to 62%, but only 1 of 27 orders won, so the level got harder on
paper. Level 14 isn’t a finale, so I ruled it out.
Turning yellow 3 into yellow 1. Again only 1 of 27 orders won, and planning
bots (16%) still won less often than the ones looking only at the current move (about 25%).
It didn’t fix the problem.
The result and what I learned
Planning bots’ first-try completion rose from 2% to 42%. The number of winning paths stayed at two out of 27. Across all profiles, completion rose from 22% to 28%, so the opening still needs work. I chose the queue change because it supports planning without narrowing the solution space. The test and its limits are in Bot A/B comparisons.
Tests and balancing
I used two tests: isolated levels to inspect their decisions, and an in-order run to see where the simulated progression stalls. The results in this section are the historical baseline before the seven changes. They are kept separate from the current catalog check and the before/after comparisons.
Bot profiles and test method
I made 50 bot profiles with different lookahead, error, memory and patience settings. Each uses the game’s rule code and sees only the three available buttons. It does not know the next button. The profiles differ in the following ways:
Lookahead. Thinks one, two or three moves ahead.
Carelessness. How often it picks the wrong one when two options look close.
Big-number pull. How strongly it’s drawn to the button with the biggest
number.
Memory. How well it remembers a losing opening on the next attempt, and
whether it remembers which buttons come next.
Patience. How many losses in a row on the same level before it quits the
game.
Each profile played 20 times. I repeated the test with four separately generated groups of 50 profiles: 4,000 runs in total. I used the groups to examine how much the findings depended on the profile mixture. I chose the behaviour settings myself. They have not been calibrated with player data, so I use the bots to find design problems.
Tests and measures in this section
Level test
Every bot plays every level separately, with up to 30 attempts to clear it. Shows
how hard a level is on its own. The charts and the results in the decision table
come from this test.
In-order test
Bots play the game from the start, level by level, and quit when they lose the same
level too many times in a row. Shows where bots drop off. The SQL and Excel work
uses this test’s data.
Attempts per clear
Attempts per clear: total attempts on a level ÷ number of bots that cleared it.
Attempts by bots that never cleared it or quit are included, so it isn’t the same as
the average of the clearing bots’ own attempt counts.
First-try clear rate
Share of the bots starting a level that clear it on their first attempt.
Drop-off
Share of the bots reaching a level that quit the game there (in the in-order test).
Near miss
An attempt lost with only 1–2 blocks left.
Four groups × 50 profiles × 20 repeats give 4,000 runs per layout in the isolated-level test. In the sequential test, 4,000 bots start the game and fewer reach later levels. These are repeated assumed behaviours, not 4,000 human participants. The spreadsheet contains the first sequential run, without raw runs for the later revisions.
What the first test revealed
The difficulty measure and the bots’ attempts per clear largely move in the same direction (rank correlation 0.89, where 1 is a perfect match). The real value came from the levels that don’t fit the measure:
Medium by solution count, hard for the bots. Fountain (44) has two winning orders out of 27. Levels with that same count take 3–4 attempts per clear, but Fountain takes 9.5. Two losing openings look very similar to the winning one. Solution count does not show that similarity.
An information trap. Balcony (5) needs a button that is not visible yet. Even a bot choosing the best visible move loses on its first try. Only 3% clear it immediately. The solver knows the full queue and missed this problem. Its place early in the game made it a priority to inspect.
Planning works against the bot. In Pyramid (14), current-move bots clear 55% of first attempts. Bots looking two or three moves ahead clear only 2%. I wanted planning to help, so I revisited the queue.
An early wall. Crane (10) is the first group’s finale. In the sequential run, 46% of arriving bots stop here. I tackled this bottleneck before later levels because it ends the first group.
A middle level harder than the finale. Ship (level 28) takes even more
attempts than its group’s finale, which breaks the group’s pacing.
Levels where players get stuck. In Robot (level 47), 10% of the bots can’t
solve it even in 30 attempts. In Skyline, the last level, a third can’t.
Attempts per clear for all 50 initial layouts
Each column is one level. Its height is total attempts divided by bots that cleared the level, including attempts by bots that never cleared it. The chart shows the designs before the changes.
Other levels
Problem level
Attempts per clear
05101520
Basics1–10
Steel11–20
Chameleon21–30
Anchor31–40
Two-tone41–50
Show the data as a table
Level
Attempts per clear
Cleared on first try
1 · First Smash
1.0
100%
2 · Shell
1.6
60%
3 · Right Support
1.4
66%
4 · Bridge
1.4
71%
5 · Balcony
3.7
3%
6 · Twin Bridge
2.0
37%
7 · Layers
3.3
42%
8 · Castle
3.7
12%
9 · Twin Towers
2.8
33%
10 · Crane
8.3
10%
11 · Steel Roof
1.0
100%
12 · Steel Floor
1.0
100%
13 · Stairs
2.2
45%
14 · Pyramid
3.7
22%
15 · Clock Tower
5.0
22%
16 · I-Beam
2.3
36%
17 · Factory
4.3
24%
18 · Aqueduct
7.7
9%
19 · Gear
2.5
31%
20 · Viaduct
8.2
8%
21 · Color Shift
1.0
100%
22 · Shifting Stilts
1.0
100%
23 · Mushroom
1.8
46%
24 · Hourglass
3.3
19%
25 · Windmill
4.2
27%
26 · Crown
3.4
55%
27 · Turtle
3.1
20%
28 · Ship
11.2
6%
29 · Flower
1.8
53%
30 · Cathedral
9.0
11%
31 · Anchor Beam
1.0
100%
32 · Anchor Shelf
1.0
100%
33 · Balloon
3.1
21%
34 · Floating Islands
3.8
20%
35 · Kite
4.6
23%
36 · Sky Bridge
1.5
64%
37 · Airship
5.2
19%
38 · Cable Car
6.3
13%
39 · Satellite
1.8
50%
40 · Floating Castle
8.1
16%
41 · Two Coats
1.0
100%
42 · Tough Roof
1.0
100%
43 · Totem
1.5
71%
44 · Fountain
9.5
14%
45 · Rocket
8.6
7%
46 · Zigzag
1.6
61%
47 · Robot
8.8
20%
48 · Train
3.5
24%
49 · Lighthouse
3.0
32%
50 · Skyline
20.9
12%
SQL and Excel
In the in-order test run before I edited seven levels, 4,000 bot runs played 126,873 attempts. I put the level_start and level_end events the bots generated into three simple tables and asked questions with SQL. The queries run in SQLite.
players: one bot per row: how many moves ahead it thinks (lookahead), how many levels it cleared, whether it finished, and the level where it quit (stopped_at_level).
attempts: one attempt per row: the level, the attempt number, whether it was won (won is 1 or 0) and how many blocks were left.
levels: each level’s number and name.
1. Where are we losing the most bots?
SQL · bot test data
-- Botları en çok hangi level'da kaybediyoruz?SELECT p.stopped_at_level AS level,
l.name,
COUNT(*) AS bots_quit
FROM players p
JOIN levels l ON l.level = p.stopped_at_level
WHERE p.finished = 0GROUPBY p.stopped_at_level, l.name
ORDERBY bots_quit DESCLIMIT5;
level
name
bots_quit
10
Crane
1149
5
Balcony
559
7
Layers
360
18
Aqueduct
248
8
Castle
239
What the query does: It takes the bots that did not finish, groups them by the level where they quit and counts the bots in each group. The JOIN brings each level’s name from the levels table. The five largest counts are listed.
What I found: Most bots quit on Crane, level 10: 1,149 bots, or 45.6% of the 2,520 bots that reached it. Crane is the first group’s finale, so it was the first place I examined. Second on the list, Balcony (level 5), turned out to hide an information trap.
2. Are the losses near misses?
SQL · bot test data
-- Kaybedilen attempt'lerin ne kadarı kıl payı (1–2 blok kaldı)?SELECT a.level,
l.name,
COUNT(*) AS losses,
ROUND(100.0 * SUM(CASEWHEN a.blocks_left <= 2THEN1ELSE0END) / COUNT(*), 1) AS near_miss_pct
FROM attempts a
JOIN levels l ON l.level = a.level
WHERE a.won = 0GROUPBY a.level, l.name
HAVINGCOUNT(*) >= 100ORDERBY near_miss_pct DESCLIMIT5;
level
name
losses
near_miss_pct
35
Kite
606
95.0
37
Airship
797
86.1
16
I-Beam
1166
80.3
14
Pyramid
3525
72.3
40
Floating Castle
971
66.9
What the query does: It looks only at lost attempts: won = 0. For each level it counts the losses. CASE WHEN counts a loss with 1–2 blocks left as 1 and any other loss as 0. The total is divided by the number of losses to give a percentage. HAVING leaves out levels with fewer than 100 losses, because a percentage from little data misleads.
What I found: On Kite, 95% of losses leave one or two blocks. Coming this close may encourage another try or feel unfair. I need to watch someone play to investigate that response.
3. Can a bot that plans ahead win on Pyramid?
SQL · bot test data
-- Pyramid'de (14. level) plan yapan botlar ilk attempt'te kazanıyor mu?SELECT p.lookahead,
COUNT(*) AS bots,
ROUND(100.0 * SUM(a.won) / COUNT(*), 1) AS first_try_win_pct
FROM attempts a
JOIN players p ON p.player_id = a.player_id
WHERE a.level = 14AND a.attempt_no = 1GROUPBY p.lookahead
ORDERBY p.lookahead;
lookahead
bots
first_try_win_pct
1
390
58.7
2
528
2.3
3
437
1.8
What the query does: It takes the first attempts on Pyramid (level 14). How far ahead a bot thinks is stored in the players table, so the JOIN connects the two tables and the result is split by lookahead. Because won is 1 or 0, SUM(won) is the number of wins. It is divided by the number of bots.
What I found: In the progression data, current-move bots win 58.7% of first attempts on Pyramid. Planning bots win only 2%. This gave me another reason to change the queue.
Excel workbook
I also examined the data in Excel. Attempts stores one attempt per row. Levels calculates results with COUNTIFS. For example, counting a level number together with attempt 1 gives the bots that started it. Entering a level number in Segment’s yellow cell recalculates first-try completion by lookahead.
Excel · two formulas from the Levels sheet
C2 · bots that started the level: rows with attempt 1 on that level
=COUNTIFS(Attempts!C:C, A2, Attempts!D:D, 1)
K2 · near miss: lost attempts with 1–2 blocks left, divided by losses
=IFERROR(COUNTIFS(Attempts!C:C, A2, Attempts!E:E, 0, Attempts!G:G, "<=2")/J2, 0)
The Levels sheet in Excel. The drop-off column is colour-coded. Crane and Balcony stand out. Select the image to enlarge it.
Level summary from the Excel analysis
The table below contains the 50-level summary from the first campaign simulation: 4,000 starts and 126,873 attempts, before the seven edits. This is a campaign dataset. It differs from the tests that start each level independently. Scroll within the table to read all levels.
Level
Runs reaching it
Reach from 4,000 starts
Drop-off after reaching it
Attempts per clear
First-try clear
Near misses in losses
1 · First Smash
4,000
100.0%
0.0%
1.00
99.9%
0.0%
2 · Shell
4,000
100.0%
1.9%
1.61
62.0%
0.0%
3 · Right Support
3,924
98.1%
0.2%
1.40
67.0%
31.4%
4 · Bridge
3,915
97.9%
0.2%
1.37
69.0%
0.0%
5 · Balcony
3,907
97.7%
14.3%
3.89
3.5%
43.3%
6 · Twin Bridge
3,348
83.7%
1.5%
2.00
37.7%
0.0%
7 · Layers
3,299
82.5%
10.9%
2.65
44.6%
20.9%
8 · Castle
2,939
73.5%
8.1%
3.38
13.4%
0.0%
9 · Twin Towers
2,700
67.5%
6.7%
2.59
34.7%
0.0%
10 · Crane
2,520
63.0%
45.6%
9.25
8.0%
20.0%
11 · Steel Roof
1,371
34.3%
0.0%
1.00
100.0%
0.0%
12 · Steel Floor
1,371
34.3%
0.0%
1.00
100.0%
0.0%
13 · Stairs
1,371
34.3%
1.2%
2.01
48.6%
18.5%
14 · Pyramid
1,355
33.9%
10.9%
3.92
18.4%
72.3%
15 · Clock Tower
1,207
30.2%
15.7%
4.13
25.4%
38.1%
16 · I-Beam
1,018
25.4%
1.2%
2.16
42.8%
80.3%
17 · Factory
1,006
25.1%
9.2%
3.58
27.5%
10.7%
18 · Aqueduct
913
22.8%
27.2%
6.55
9.1%
45.9%
19 · Gear
665
16.6%
1.2%
2.46
26.9%
51.4%
20 · Viaduct
657
16.4%
21.8%
6.47
7.8%
51.1%
21 · Color Shift
514
12.8%
0.0%
1.00
100.0%
0.0%
22 · Shifting Stilts
514
12.8%
0.0%
1.00
100.0%
0.0%
23 · Mushroom
514
12.8%
0.0%
1.62
51.4%
22.7%
24 · Hourglass
514
12.8%
0.8%
2.55
19.8%
0.0%
25 · Windmill
510
12.8%
4.5%
3.07
37.8%
7.9%
26 · Crown
487
12.2%
2.3%
2.05
73.3%
0.0%
27 · Turtle
476
11.9%
0.6%
2.56
22.9%
8.3%
28 · Ship
473
11.8%
31.1%
8.34
4.7%
13.4%
29 · Flower
326
8.2%
0.3%
1.50
61.7%
0.0%
30 · Cathedral
325
8.1%
20.9%
6.22
14.8%
35.9%
31 · Anchor Beam
257
6.4%
0.0%
1.00
100.0%
0.0%
32 · Anchor Shelf
257
6.4%
0.0%
1.00
100.0%
0.0%
33 · Balloon
257
6.4%
0.0%
2.26
30.0%
61.3%
34 · Floating Islands
257
6.4%
4.7%
3.20
21.0%
10.8%
35 · Kite
245
6.1%
6.5%
3.65
28.6%
95.0%
36 · Sky Bridge
229
5.7%
0.0%
1.30
74.2%
0.0%
37 · Airship
229
5.7%
11.8%
4.95
21.4%
86.1%
38 · Cable Car
202
5.1%
10.4%
4.99
15.3%
34.2%
39 · Satellite
181
4.5%
0.0%
1.63
58.6%
44.7%
40 · Floating Castle
181
4.5%
25.4%
8.19
9.9%
66.9%
41 · Two Coats
135
3.4%
0.0%
1.00
100.0%
0.0%
42 · Tough Roof
135
3.4%
0.0%
1.00
100.0%
0.0%
43 · Totem
135
3.4%
0.0%
1.16
91.1%
0.0%
44 · Fountain
135
3.4%
14.8%
4.71
25.2%
43.3%
45 · Rocket
115
2.9%
7.0%
4.75
3.5%
25.7%
46 · Zigzag
107
2.7%
0.0%
1.20
85.0%
0.0%
47 · Robot
107
2.7%
0.0%
2.22
41.1%
0.0%
48 · Train
107
2.7%
0.9%
2.64
38.3%
19.0%
49 · Lighthouse
106
2.6%
0.9%
2.38
33.0%
15.9%
50 · Skyline
105
2.6%
3.8%
4.63
15.2%
54.2%
Reach uses the 4,000 campaign starts. Drop-off and first-try completion use the runs that reached the level. Attempts per clear is all attempts divided by successful runs, including attempts from runs that never cleared. A near miss is a loss with one or two blocks left, divided by lost attempts. The original worksheet stores bot-run IDs under “player”. None of these rows are human participants. COUNTIFS counts entries and wins, then ratios use those counts.
Changes based on bot tests
I did not choose a change only because it reduced attempts. It also needed to preserve the level’s role, remain solvable and pass the button checks. The results below are rounded summaries of the earlier bot comparisons. No new player measurements are included.
I tried small changes on seven levels: a block colour or two, or a button swap. First I ran the checker. No button should target zero blocks, no two should target the same blocks, and choosing the biggest number alone should not win. Bots then tested the designs that passed. I chose an option that kept the level’s role, saved it and wrote the reason in its design note.
What changed in the 7 levels?
Level
What the data showed
Decision
Result (with bots)
5 · Balcony
Only 3% of bots clear it on the first try. The solution depends on a button that
isn’t on screen yet
Pyramid and Robot still have the same number of winning sequences. Planning bots now do better on Pyramid. Removing Robot’s misleading opening cut attempts per clear by more than half. The bots’ decisions changed without widening either solution space.
After retesting
The share of bots that reach Crane and quit there fell from 45.6% to 29%.
Runs reaching level 11 rose from 34% to 47%, and those reaching the last level from 2.6% to 4.3%.
The bottleneck moved: the level where the most bots quit is now Aqueduct (level 18). 35.6% of the bots that reach it quit there.
In Balcony, the bots clearing it on the first try rose from 3% to 10%, which is still low for the game’s fifth level.
Crane and Skyline changed both button order and a block colour. Their comparison evaluates the whole new layout. It cannot isolate which edit produced the difference. The simulated reach figures also depend on the bots’ patience settings and are not retention rates.
Bot A/B comparisons
Could showing a button sooner help planning without changing the solution space? I tested that on Pyramid. A uses the old queue. B swaps the upcoming red 3 and blue 8. Structure, three-move budget, starting buttons and rules stay the same.
Test choice
Definition
Hypothesis
Showing blue 8 after the first move could help planning bots see the winning continuation.
Main measure
First-try clear rate for profiles with two- or three-move lookahead. One-move profiles and the full profile mix are reported separately.
Design constraints
Keep 2 winning paths out of 27. Retain the need to choose a move order. Do not narrow the solution space just to raise one segment’s score.
Test scope
Historical isolated-level comparison: four groups × 50 profiles × 20 repeats, 4,000 runs per layout. These are repeat simulations of assumed profiles.
Old order
New order
Winning move orders
2 of 27
2 of 27
Cleared on first try: planning bots
2%
42%
Cleared on first try: current-move bots
55%
4%
Cleared on first try: all bots
22%
28%
Attempts per clear
3.7
2.8
I chose B. Planning profiles gain 40 percentage points in first-try completion. Current-move profiles fall from 55% to 4%. Planning helps more in this bot model. Across all profiles the gain is just 6 points, so I still want to inspect the opening.
Bots played this comparison. I did not assign human participants to random groups. The percentages are rounded summaries of the earlier test. On 10 October I checked again that both queues have two solutions out of 27. That rule check does not rerun the behaviour measurements. I draw no conclusion about player conversion, statistical significance or retention from it.
Why I rejected “just add a move”
I also tried adding a move to a hard level. It can reveal zero-target or duplicate buttons at the end of the queue. A larger budget therefore needs checking before I treat it as a valid option. I made the fixes in the levels instead. A Remote Config budget change needs the same check.
Analytics and product decisions
I added analytics for the questions I want to investigate when player data arrives. The table shows what I would measure and review. I have no player results yet. Local bot files stay separate from Firebase player events.
Observe how players interpret the first tap and target preview, then try a shorter hint. A missing completion event alone does not explain the cause.
Is an exit related to performance?
quality_tier, level_quit and Crashlytics · device and version context
Compare the same level across device groups and inspect frame behaviour. Treat an association as a question to investigate.
When should I ask for a rating?
review_prompt · request point at level 10 or the end
Check whether the moment interrupts progression. The event records a request. It does not prove the store displayed a prompt or a review was submitted.
Getting the denominator right
The game records the attempt number on the device. A level-end event carries the result, used and remaining moves, remaining blocks and duration. Restarting and switching levels are separate exit reasons, and leaving before making a move is not counted as a played-level quit. An app closing can leave a start without an end, which needs its own interpretation.
Using the same metric definitions will let me compare bot and player results later. The groups are still different. Day-one and day-seven return rates need dated player cohorts and enough observation time. Bots reaching later levels do not measure that.
Economy and product choices
Crumble Crew has no ads, in-app purchases, virtual currency or lives system. The progression is built around solving and retrying the puzzle, unlocking the next level and meeting a new block every ten levels. I can therefore assess a layout’s baseline difficulty without a paid continuation changing the result.
The visible reward is the collapse and the next stop opening on the path. I chose that progression loop. I have not measured whether it brings players back or how another business model would perform. My analytics plan focuses on progression, learning and performance.
Technical details
One rules model for the game and the checks
The grid model calculates falling and breaking. Physics shows the debris. A block gets support from the ground, a stable block below or a stable neighbour within two cells in the same row. Unsupported connected blocks fall together. A one-cell fall lands safely. Larger falls can shatter normal blocks and crush those below. The calculation repeats until the structure settles. Special blocks add their own rules.
The editor and deterministic checks use this same model. Levels are separate data assets in an ordered catalog. The UI Toolkit editor supports undo, groups a drag stroke into one undo step and waits briefly after painting before checking the latest draft. Before a build, the catalog is checked for missing or unsolvable levels.
Remote settings and their limits
Remote Config can add 0–2 moves globally, change level budgets, label test groups and toggle the rating prompt. Budgets stay at or above the designed value and cannot exceed five. Teaching levels keep their own budgets. Missing settings use defaults, and changes apply at the next level. These limits do not prevent zero-target buttons on their own. Each candidate still needs a level check.
Collapse effects within a phone budget
I modelled a block split into five pieces in Blender. Debris comes from a reusable pool, with at most 100 active pieces on a phone. Further breaks use dust when the pool is full. Pieces do not collide with each other. I use these limits to control cost, without claiming a measured frame rate on every device.
Screen shake follows block mass and fall height. Impacts of six or more blocks add 0.05 seconds of hit stop. The final collapse slows to 35% speed for half a second. Haptics add an impact cue on Android and iOS. I use these effects to make the result of a move readable while preserving the structure as the focus.
Keeping test records out of player analytics
Behavioural bots run locally and do not connect to Firebase. Editor and measurement modes suppress analytics collection. Measurement mode also avoids remote tuning and rating prompts. Crash reports include the current level as context. This keeps a test run from being counted as a player session.
Interface and visuals
I designed the interface in Figma and blocks in Blender. Their appearance also shaped the levels. I built the structures and options around the information a player can read on screen.
Three buttons, 81 possibilities
I drew the interface on a 1170 × 2532 phone screen in Figma. Three buttons stay at the bottom, each about a quarter of the screen wide and within thumb reach. They show only a colour and a large number.
The three-button decision also set the size of the puzzle. On every move the player picks one of three options, and the next button in line takes the place of the one used. That’s why a 2-move level has at most 9 move orders, a 3-move level 27 and a 4-move level 81. The difficulty measure in Level design is built on exactly these numbers.
The number shows current targets and updates when the structure changes. The first tap also highlights those blocks. To protect that information, I added two checks: buttons must have a target, and visible buttons must not target identical blocks. The editor flags both as errors. Neither was found in the current 50 levels.
The pieces on screen
I drew a small set of interface pieces and reused them. Move buttons use lighter block colours with a dark lower edge. Green marks primary actions and white marks secondary ones. Orange dots show remaining moves, becoming faint empty circles after use. A white pill sprite becomes a level label, path or hint bubble when stretched and coloured. Card titles use a yellow ribbon.
Red button
Blue button
Yellow button
Main button
Secondary button
Menu
Pill
Title ribbon
Card
Move left
Move used
Tutorial hand
Red #FF4D3A Block and button
Blue #2B7CFF Block and button
Yellow #FFC41F Block and button
Green #35A358 Ground
Steel #8C949E Steel block frame
Night blue #143A63 Menu background
Framing the structure for the available screen area
The camera fits each structure between the top bar and bottom buttons, allowing for safe areas and wide-screen margins. Bridges and small towers share that usable area. I still need to check small displays and long translations on real devices.
Blocks that show their own rule
I modelled the blocks in Blender. I wanted their appearance to give a clue to each rule. I used a different feature for each special block:
The steel block is wrapped in a metal frame: it doesn’t break when it
falls.
The chameleon block has a three-colour wheel on top: after every move it
turns the colour of the button you just pressed.
The anchor block is held by a steel clamp: it stays put even when there’s
nothing under it.
The dual-colour block is split down the middle: it takes two hits to break,
one for each colour.
There is very little text in the play area. Buttons show colour and numbers. Menus and hints support nine languages, while the puzzle rules stay the same. I aim to introduce each block in two short levels. I still want to observe how much the visual cues help players learn.
The broken version of the block was modelled in Blender too: the block is split into pieces in
advance, and in the game those pieces fly apart when it breaks. How they move, and how they’re
capped so the phone doesn’t struggle, is covered above in Technical details.
In Blender: a single block and the pre-split version that replaces it when it
breaks.
The app icon: 31 attempts
I made 31 app-icon renders in Blender. I started with single cubes showing chipped corners, cracks or broken pieces. Then I tried a stack in the game’s three colours, changing its arrangement and background. I chose a slightly offset top cube to suggest an unstable structure. I also checked the silhouette. Three stacked cubes remain readable without colour. The wordmark uses the same colour family.
Chipped corner
Cracks
Three cubes, pyramid
Diagonal stack
Silhouette check
Final icon
Six of the 31 renders, from left to right in the order I tried them.The wordmark.
A level select built to grow
Level select is a path: every level is a stop, and the next level waits behind a lock.
When every level is finished, a “Soon” box appears at the end of the path and the end
screen says “New levels are coming soon!”
The path builds itself from the catalog’s level count. When I add a group in the editor, level selection updates without a new interface layout.
Next steps
I need to recruit real players for playtests to observe how they plan with the three available buttons and understand support relationships and special-block rules.